ViewPager Using Fragments in Android with Example


ViewPager Using Fragments in Android with Example
Last Updated: 13 Feb, 2022ViewPager is a layout manager that enables users to navigate through pages of data by swiping left and right. It is commonly seen in apps like YouTube and Snapchat where users can switch screens by swiping. Fragments are utilized instead of activities, and ViewPager is also employed to onboard users when they first launch the app.
ViewPager
ViewPager Using Fragments in Android
Guidelines for implementing ViewPager:
Guidelines for implementing ViewPager:- Integrating the ViewPager widget into the XML layout (usually the main_layout).
- Developing an Adapter by extending either the FragmentPagerAdapter or FragmentStatePagerAdapter class.
An adapter fills the pages within the ViewPager. PagerAdapter serves as the base class extended by FragmentPagerAdapter and FragmentStatePagerAdapter. Let's explore the key distinctions between these two classes.
Distinguishing features of FragmentPagerAdapter and FragmentStatePagerAdapter:
Distinguishing features of FragmentPagerAdapter and FragmentStatePagerAdapter:- FragmentStatePagerAdapter: This variant retains only the current fragment displayed on the screen in memory. It is memory-efficient and ideal for applications with dynamic fragments (where the number of fragments is variable).
- FragmentPagerAdapter: Recommended when the quantity of fragments remains constant. For instance, an application featuring 3 tabs that persist unchanged throughout the app's runtime. This tutorial will utilize FragmentPagerAdapter.
FragmentStatePagerAdapter
- Keeps in memory only the current fragment displayed on the screen. This is memory efficient and should be used in applications with dynamic fragments (where the number of fragments is not fixed).
FragmentPagerAdapter
- This adapter should be used when the number of fragments is fixed. An application that has 3 tabs which won't change during the runtime of the application. This tutorial will be using FragmentPagerAdapter.
ViewPagerAdapter Class Structure
- Java
Code Structure:
| import androidx.annotation.NonNull; |
| import androidx.annotation.Nullable; |
| import androidx.fragment.app.Fragment; |
| import androidx.fragment.app.FragmentManager; |
| import androidx.fragment.app.FragmentPagerAdapter; |
| import java.util.ArrayList; |
| import java.util.List; |
- public class ViewPagerAdapter extends FragmentPagerAdapter {
- private final List<Fragment> fragments = new ArrayList<>();
- List<String> fragmentTitle = new ArrayList<>();
- Method Description:
ViewPagerAdapter class is used to manage the fragments displayed within a ViewPager. It extends FragmentPagerAdapter, a class provided by the Android Support Library for managing fragments within a ViewPager.
Within the ViewPagerAdapter class, fragments and their titles are stored in separate lists. The add() method is used to add fragments along with their titles to the adapter.
The getItem() method is overridden to return the fragment at a specific position within the adapter. The getCount() method returns the total number of fragments in the adapter.
The getPageTitle() method is overridden to return the title of the fragment at a specified position, which is used as the tab title when the ViewPager is displayed with tabs.
By using ViewPagerAdapter, developers can efficiently manage and display multiple fragments within a ViewPager, providing a seamless user experience when navigating between different screens or sections of an application.
Method Description:
- getCount(): This method is used to retrieve the number of fragments to be displayed. It is necessary to override this method.
- getItem(int pos): Returns the fragment located at the specified position index. This method must be overridden.
- ViewPagerAdapter(@NonNull FragmentManager FM): This constructor for the ViewPager Adapter should accept a FragmentManager instance. The FragmentManager plays a crucial role in managing fragments in Android, facilitating transactions between fragments. Transactions involve adding, replacing, or removing fragments.
- getPageTitle(int pos): (Optional) Similar to the getItem() method, this function provides the title of the page at the given index position.
- add(Fragment fragment, String title): This method is responsible for populating the lists of fragments and fragment titles. These lists store the fragments and their respective titles.
Example
A sample GIF is given below to provide an overview of the project that will be implemented using Java:
Step by Step Implementation
Step 1: Create a New Project
To initiate a new project in Android Studio, follow the steps outlined in How to Create/Start a New Project in Android Studio. Ensure that Java is selected as the programming language.

Step 2: Working with the activity_main.xml file
Begin by working with the activity_main.xml file. The file includes the following components:
- AppBarLayout: Hosts the TabLayout responsible for displaying page titles.
- ViewPager layout: Houses the different fragments.
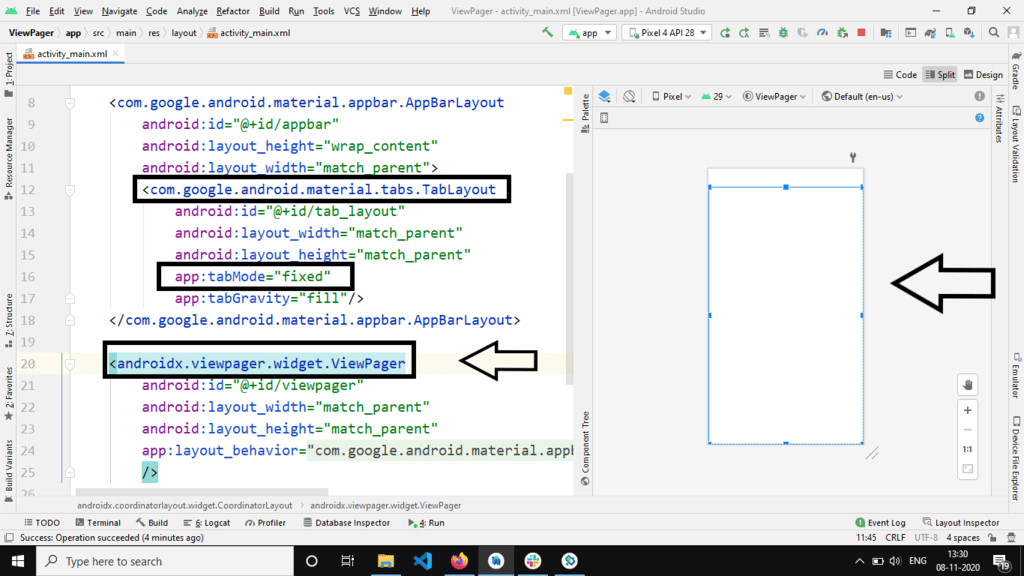
Refer to the image below for important parameters to set:
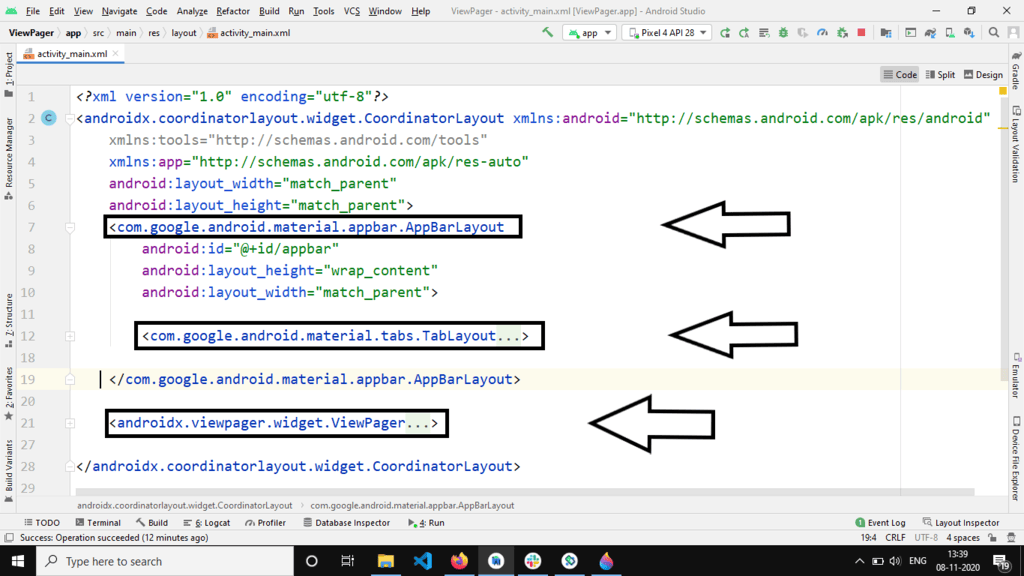
In the TabLayout, ensure to add the parameter tabmode="fixed" in the activity_main.xml file for a fixed number of tabs in the application.
Below is the XML code snippet to be added to the activity_main.xml file:
| <?xml version="1.0" encoding="utf-8"?> |
| <androidx.coordinatorlayout.widget.CoordinatorLayout xmlns:android="http://schemas.android.com/apk/res/android" xmlns:app="http://schemas.android.com/apk/res-auto" android:layout_width="match_parent" android:layout_height="match_parent"> |
| <com.google.android.material.appbar.AppBarLayout android:id="@id/appbar" android:layout_width="match_parent" android:layout_height="wrap_content"> |
| <com.google.android.material.tabs.TabLayout android:id="@id/tab_layout" android:layout_width="match_parent" android:layout_height="match_parent" app:tabGravity="fill" app:tabMode="fixed" /> |
| <androidx.viewpager.widget.ViewPager android:id="@id/viewpager" android:layout_width="match_parent" android:layout_height="match_parent" app:layout_behavior="@string/appbar_scrolling_view_behavior" /> |
| </androidx.coordinatorlayout.widget.CoordinatorLayout> |
Step 3: Create Fragments
Lastly, proceed with creating fragments to further develop the application.
Designing Fragmented Pages
- Three Pages (Fragments) are used for designing.
- Project structure should include three blank fragments.
Code Snippets for Page1, Page2, and Page3 Files
Below are the code snippets for Page1.java, Page2.java, and Page3.java files respectively:
- Page1.java
- Page2.java
- Page3.java
Java Code for Page1
import android.os.Bundle; | import android.view.LayoutInflater; | import android.view.View; |
import android.view.ViewGroup; | Page1 extends Fragment { | public Page1() { |
// Required empty public constructor. | onCreate(Bundle savedInstanceState) { | super.onCreate(savedInstanceState); |
onCreateView(LayoutInflater inflater, ViewGroup container, Bundle savedInstanceState) { | return inflater.inflate(R.layout.fragment_page1, container, false); |
Java Code for Page2
import android.os.Bundle; | import android.view.LayoutInflater; | import android.view.View; |
import android.view.ViewGroup; | Page2 extends Fragment { | public Page2() { |
// Required empty public constructor. | onCreate(Bundle savedInstanceState) { | super.onCreate(savedInstanceState); |
onCreateView(LayoutInflater inflater, ViewGroup container, Bundle savedInstanceState) { | return inflater.inflate(R.layout.fragment_page2, container, false); |
Page3 Class in Android
The Page3 class in Android is a fragment that plays a crucial role in the Android app development lifecycle. Fragments are essential components for building flexible and modular user interfaces.
Method Description
- Page1(): Default Constructor.
- onCreateView(LayoutInflater inflater, ViewGroup container, Bundle savedInstanceState): This method is responsible for inflating (parsing) the respective XML file and returning the view added to the ViewPager adapter.
- onCreate(Bundle savedInstanceState): This method is analogous to the OnCreate() method in activities.
Designing the Page XML Files
When designing the XML files for pages in Android, consistency is key. All fragment XML layouts typically share identical designs. A central TextView often displays the page's name. The root container is usually a FrameLayout, with a background color commonly set to #0F9D58.
import android.os.Bundle; import android.view.LayoutInflater; import android.view.View; import android.view.ViewGroup; import androidx.annotation.NonNull; import androidx.annotation.Nullable; import androidx.fragment.app.Fragment; public class Page3 extends Fragment { public Page3() { // required empty public constructor. } @Override public void onCreate(@Nullable Bundle savedInstanceState) { super.onCreate(savedInstanceState); } @Nullable @Override public View onCreateView(@NonNull LayoutInflater inflater, @Nullable ViewGroup container, @Nullable Bundle savedInstanceState) { return inflater.inflate(R.layout.fragment_page3, container, false); } } |
FrameLayout
- Below is the code for the fragment_page1.xml file: Code:
- Below is the code for the fragment_page2.xml file: Code:
- Below is the code for the fragment_page3.xml file:
Fragment Page 3
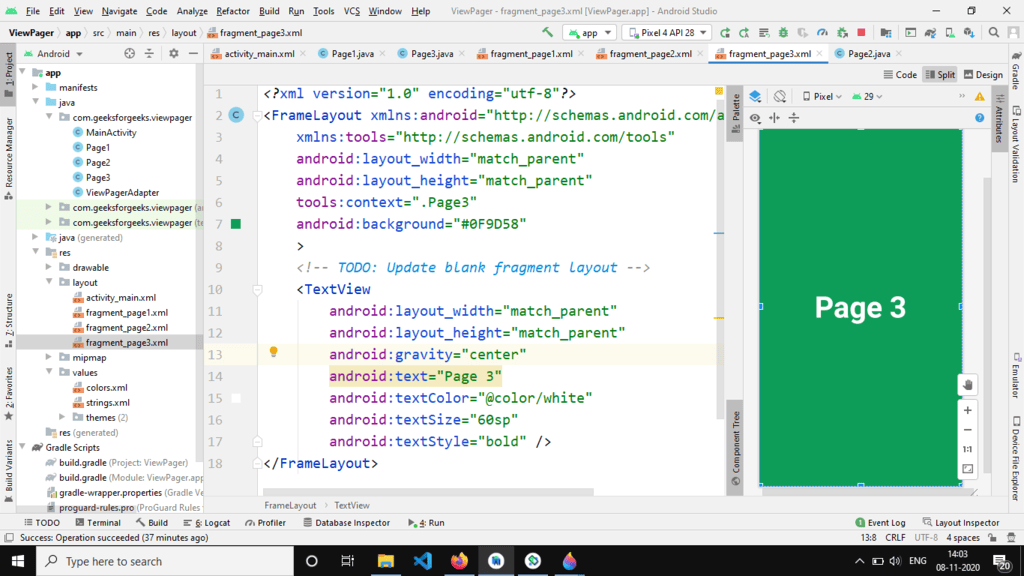
Code:
"Page 3" Step 4: Creating the ViewPager Adapter
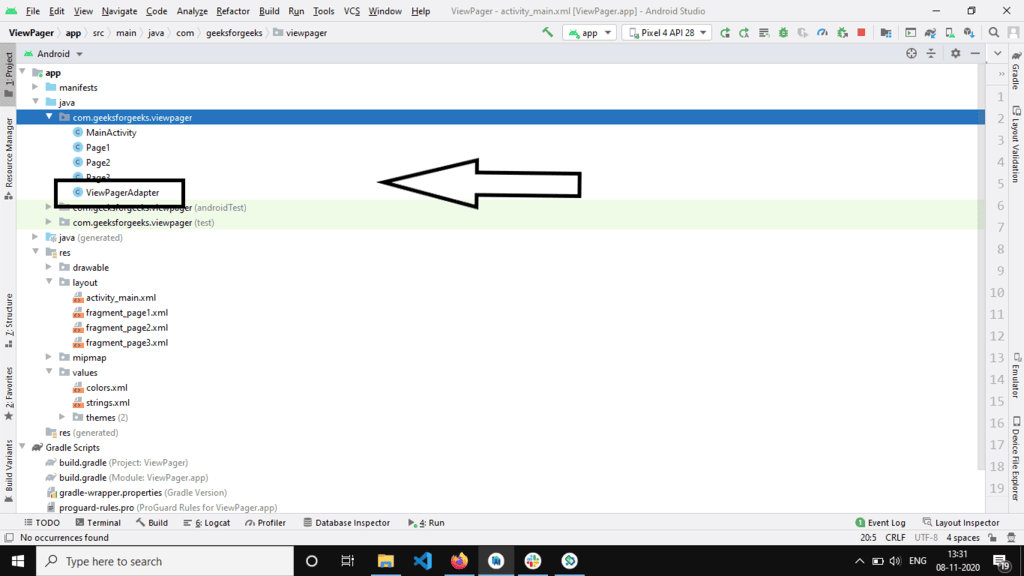
- Add a Java class named ViewPagerAdapter to the project structure. The project structure would look like this.
- Below is the code for the ViewPagerAdapter.java file:
ViewPagerAdapter.java
In the ViewPagerAdapter.java file, we define a class named ViewPagerAdapter, which extends FragmentPagerAdapter. This class is responsible for managing the fragments displayed in a ViewPager.
- The ViewPagerAdapter class has methods to add fragments and their titles.
- It overrides methods like getItem and getCount to provide the necessary fragments to the ViewPager.
- The getPageTitle method is overridden to return the titles of the fragments.
Working with the MainActivity.java file
In the MainActivity.java file, we typically handle the setup and behavior of the main activity of an Android application. This includes activities like initializing components, handling user interactions, and coordinating with other parts of the app.
MainActivity Setup Steps:
- Initialize the ViewPager, TabLayout, and the Adapter.
- Add the Pages (fragments) along with the titles.
- Link the TabLayout to the ViewPager using the setupWithViewPager method.
setupWithViewPager Method:
Syntax: TabLayout.setupWithViewPager(ViewPager pager).
Description: This method links the TabLayout with the ViewPager. Each pager's title appears on the TabLayout, allowing users to navigate through fragments by clicking on the tabs.
Parameter:
- ViewPager: Used to display the fragments.
Code Snippet (MainActivity.java):
import android.os.Bundle; | import androidx.appcompat.app.AppCompatActivity; |
import androidx.viewpager.widget.ViewPager; | import com.google.android.material.tabs.TabLayout; |
Below is a simplified explanation of the code:
- Set up the necessary imports and extend the
AppCompatActivityclass. - Initialize the
ViewPagerAdapter,ViewPager, andTabLayout. - In the
onCreatemethod, set the content view, find the ViewPager by ID, and set up the adapter. - Add fragments (Page1, Page2, Page3) to the adapter and set it to the ViewPager.
- Link the TabLayout to the ViewPager using
setupWithViewPager.
By following these steps, the MainActivity is properly set up to display fragments with titles on the TabLayout, allowing seamless navigation for the user.
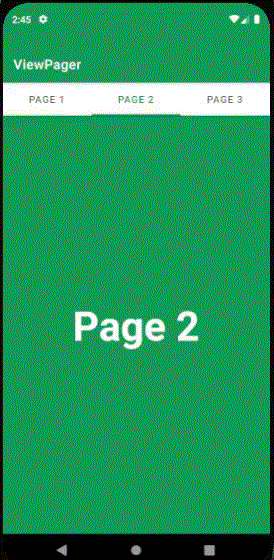
Output:
- Video Player
- 00:00
- 00:09
- Use Up/Down Arrow keys to increase or decrease volume.
Find the code in the following GitHub repo: GitHub Repository
Ready to start an exciting journey into Android Development with Kotlin? Begin a fantastic learning experience with our Mastering Android Development with Kotlin From Beginner to Pro - Self Paced!
Please Login to comment...
- Login
- Like
