NCERT Based Activity: The Amazing World of Solutes, Solvents, and Solutions


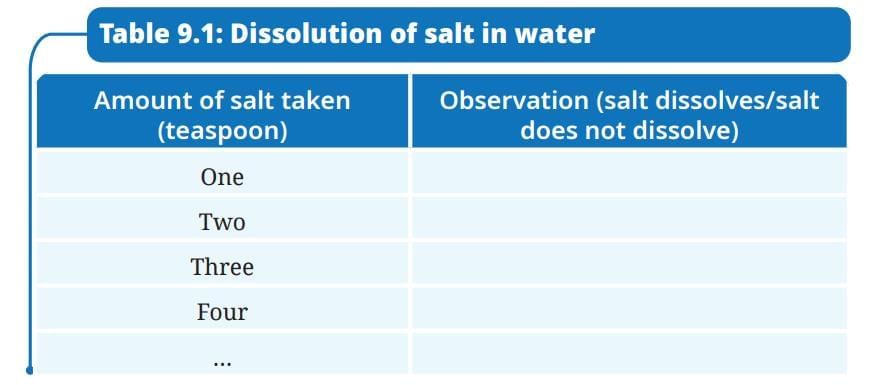
Activity 9.1: Let us investigate
- Take a clean glass tumbler and fill it half with water.
- Add one spoon of salt into it and stir well till it dissolves completely.
- Gradually add a spoonful of salt into the glass tumbler and stir. Observe how many spoons of salt you can add before it stops dissolving completely.
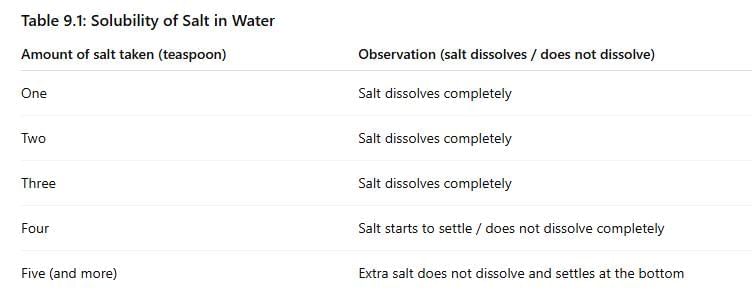
- Record your observations in Table 9.1.
Ans:
Some discussion points and answers:
How many spoons of salt were you able to dissolve before some of it remained undissolved?
Ans: The number of spoons usually ranges from about two to four for a half-filled tumbler of water at room temperature. This number depends on how much water is in the tumbler and on the temperature of the water. Warmer water can dissolve more salt, while colder water dissolves less.What does this indicate about the capacity of water to dissolve salt?
Ans: Water can dissolve only a limited amount of a solid like salt. When that limit is reached, the solution is said to be saturated. Any extra salt added after saturation will remain undissolved and settle at the bottom.What will happen if we keep on adding more salt in a given amount of water?
Ans: Once the saturation point is reached, further salt will not dissolve and will appear as solid grains at the bottom of the tumbler. If temperature is increased, some of this extra salt may dissolve again because solubility increases with temperature for many solids.
Activity 9.2: Let us experiment (Demonstration activity)
- Take about 50 mL of water in a glass beaker and measure its temperature using a laboratory thermometer, say 20 °C.
- Add a spoonful of baking soda (sodium hydrogen carbonate) to the water and stir until it dissolves. Continue adding small amounts of baking soda while stirring, till some solid baking soda is left undissolved at the bottom of the beaker.
- Now, heat the contents to 50 °C while stirring. (Fig. 9.7).
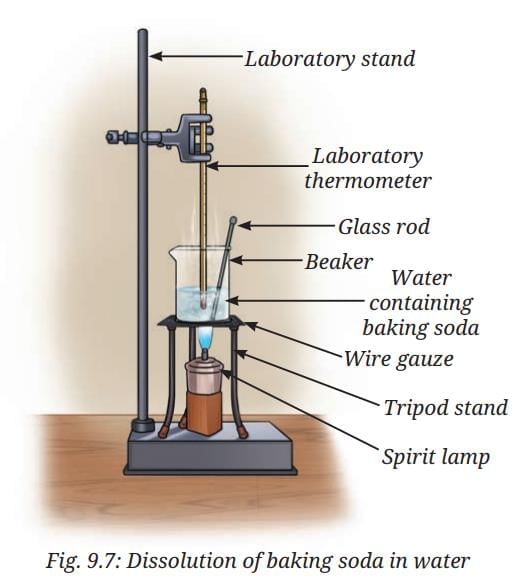
- What happens to the undissolved baking soda?
- Continue adding more baking soda while stirring at this temperature until some solid baking soda is left undissolved.
- Again, heat the contents further to 70 °C while continuing to stir. What do you observe?
- What do you infer from this experiment?
Ans:
What happens to the undissolved baking soda?
Ans: The baking soda that remained undissolved at room temperature dissolves when the solution is heated to 50 °C. Heating increases the ability of water to take in more solid.What do you observe?
Ans: When the temperature is raised further to 70 °C, even more of the baking soda dissolves and you can add more until the solution becomes saturated again at that higher temperature.What do you infer from this experiment?
Ans: The experiment shows that the solubility of many solids in water increases with temperature. In other words, warmer water can dissolve more of a solid like baking soda than cooler water can.
Activity 9.3: Let us measure
- Switch ON the digital weighing balance.
- Observe the initial reading on the digital weighing balance display.
- It should show a zero reading. If not, then we must bring it to zero by pressing the tare or reset button (Fig. 9.12a).
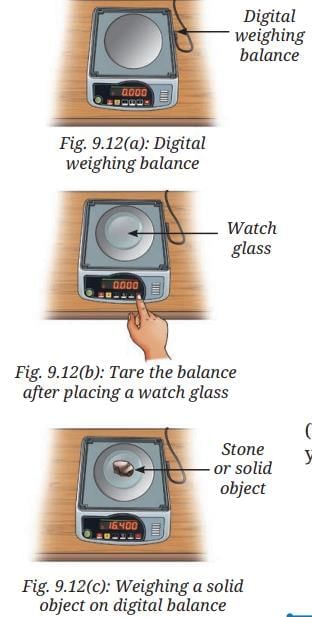
- Place a dry and clean watch glass or butter paper on the pan.
- Note the reading on the digital weighing balance.
- Reset the digital weighing balance reading to zero by pressing the tare or reset button as shown in Fig. 9.12b.
- Now, carefully place the solid object, such as stone, on the watch glass (Fig. 9.12c).
- Note the reading displayed on the balance, which gives the mass of the stone, say 16.400 g.
Ans: The mass of the stone is 16.400 g. This value was obtained by first placing a clean watch glass on the balance, pressing the tare (reset) button so the display read zero, and then placing the stone on the watch glass. Taring removes the mass of the watch glass so the displayed reading shows only the mass of the stone.
Activity 9.4: Let us observe and calculate
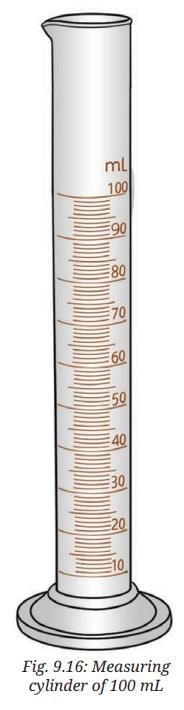
Take a measuring cylinder and observe it carefully. Note down the following:
- What is the maximum volume it can measure?
- What is the smallest volume it can measure? Look at the measuring cylinder again.
- How much is the volume difference indicated between the two bigger marks (for example, between 10 mL and 20 mL)?
- How many smaller divisions are there between the two bigger marks?
- How much volume does one small division indicate?
Ans:
What is the maximum volume it can measure?
Ans: For a 100 mL measuring cylinder, the maximum volume it can measure is 100 mL.What is the smallest volume it can measure?
Ans: The smallest volume that can be read reliably on this cylinder is 1 mL. This is the volume represented by one small division on the scale.How much is the volume difference indicated between the two bigger marks?
Ans: The difference between two consecutive larger marks (for example, 10 mL and 20 mL) is 10 mL.How many smaller divisions are there between the two bigger marks?
Ans: There are 10 smaller divisions between two larger marks.How much volume does one small division indicate?
Ans: One small division represents 1 mL because 10 mL divided by 10 small divisions = 1 mL per small division.
Activity 9.5: Let us measure 50 mL of water
- Place a clean, dry measuring cylinder on a flat surface.
- Pour water slowly into the measuring cylinder up to the required mark, as shown in Fig. 9.17.
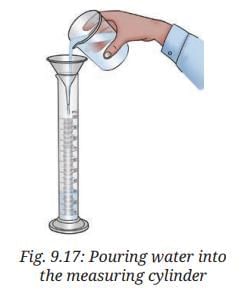
- If required, adjust the level of water in the measuring cylinder by adding or removing a small amount of water using a dropper.
- On careful observation, you will notice that the water inside the measuring cylinder forms a curved surface called the meniscus. (Fig. 9.18).
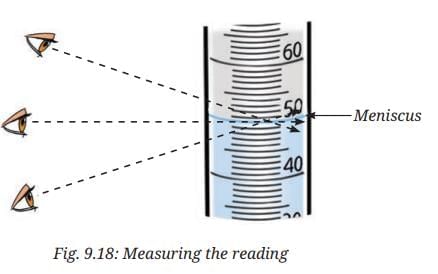
- Read the mark on the measuring cylinder that coincides with the bottom of the meniscus for water or other colourless liquids.
- Make sure that the eyes are at level with the bottom of the meniscus while noting the readings as shown in Fig. 9.18.
- Once it reaches the required level-that is, 50 mL-transfer this water to the required container.
Q: Why are measuring cylinders always designed narrow and tall instead of wider and short like a beaker?
Ans: Measuring cylinders are made narrow and tall so that the liquid level rises higher and the markings are farther apart. This makes it easier to read the exact volume accurately. If the cylinder were wide and short like a beaker, the markings would be too close together and small changes in volume would be hard to read. Also, always read the volume at the bottom of the meniscus with your eye level even with the mark to avoid parallax error.
Activity 9.6: Let us calculate
- Collect various objects with a cuboid shape, such as a notebook, a shoe box, or a dice.
- Measure the length (l), width (w), and height (h) of the objects using a scale. Suppose the length of the notebook is 25 cm, the width is 18 cm, and the height is 2 cm.
- Calculate the volume by using the following formula: Volume = l × w × h.
Answer: Volume = 25 cm × 18 cm × 2 cm = 900 cm³. - Record in your notebook
Ans: Use the formula Volume = l × w × h. For the notebook: Volume = 25 cm × 18 cm × 2 cm = 900 cm³. Ensure each measurement is in centimetres so the volume unit is cubic centimetres (cm³).
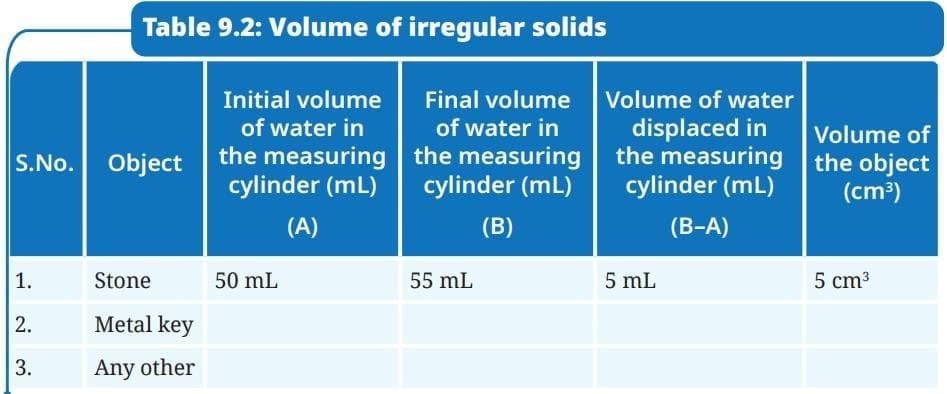
Activity 9.7: Let us measure
- Collect various objects from your surroundings, such as a stone, metal keys, and so on.
- Fill a measuring cylinder with water up to any desired volume, say 50 mL,(Fig. 9.19a) and record the initial volume taken in Table 9.2.
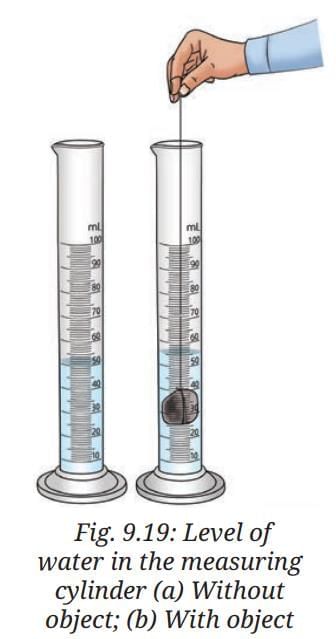
- Tie the object, say a stone, with a thread and slowly lower it into the measuring cylinder.
- What do you notice?
- Record the final volume after the level rises, say 55 mL, as shown in Fig. 9.19b.
- Subtract the initial volume from the final volume after the object is put into the measuring cylinder. This is the volume of the object.
- Record your observations in Table 9.2.
Ans:

What do you notice?
Ans: When the stone is lowered into the water, the water level rises from 50 mL to 55 mL. This rise happens because the stone displaces a volume of water equal to its own volume.Volume of the object:
Ans: The volume of the stone equals the increase in water level: 55 mL - 50 mL = 5 mL. Since 1 mL = 1 cm³, the volume of the stone is 5 cm³.
FAQs on NCERT Based Activity: The Amazing World of Solutes, Solvents, and Solutions
| 1. What are solutes, solvents, and solutions? |  |
| 2. How can we measure the volume of water accurately in experiments? | |
| 3. What is the importance of calculating concentration in solutions? | |
| 4. How can we observe the properties of solutions? | |
| 5. What experiments can demonstrate the concept of solubility? | |