Practical Geometry Class 6 Notes Maths
14. Practical Geometry
Basic Constructions:
Ruler, Compass, Divider, Set squares, Protractor.
The tools in our geometry box are:
• Ruler
• Compass
• Divider
• Set squares
• Protractor
The description of each tool and its uses are given below:
Ruler:
A ruler is a flat and straight-edged strip, whose one side is graduated into centimetres and the other into inches. A ruler is commonly called a scale. It is the most essential tool in geometry. It is used in all constructions.
The basic uses of a ruler are:
• Measuring lengths of line segments.
• Drawing line segments.
Page 58
Compass:
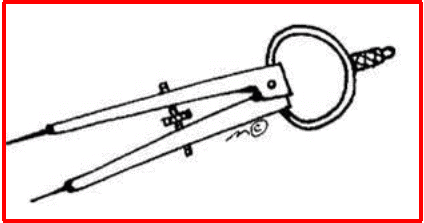
A compass has two ends. One end holds a pointer, while the other end holds a pencil. It is also called a pair of compasses.
The basic uses of a compass are:
• Marking off equal lengths.
• Drawing arcs.
• Drawing circles.
Divider:
A divider is a tool similar in shape to a compass. It has a pair of pointer ends.
Page 59
The basic uses of a divider are:
• Comparing lengths of line segments.
• Helping avoid positioning errors.
• Taking accurate measurements.
Set squares:
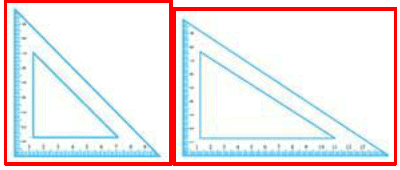
The two triangular tools in the geometry box are called set squares. One of the set square is an isosceles triangle with two angles measuring 45° each. The other set square is a scalene triangle with two angles measuring 30 °and 60° each. The two perpendicular sides of either set square are graduated into centimetres.
The basic uses of set squares are:
• Drawing perpendicular lines.
• Drawing parallel lines.
Protractor:
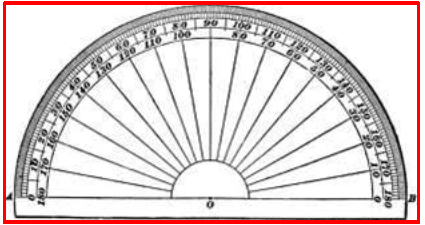
A semi-circular tool with degrees marked is called a protractor. The centre of the semicircle is called the midpoint of the protractor. This point helps as a reference point for the protractor. The horizontal line is called the base line or the straight edge of the protractor.
Page 60
The basic uses of a protractor are:
• Measuring angles.
• Drawing angles.
The important points to be remembered while using the tools for construction are:
• Draw smooth and thin lines.
• Mark points lightly.
• Maintain tools or instruments with sharp pointers and fine edges.
• Keep two pencils in the box. One is for drawing lines and marking points. The other is for using in the compass.
Construction of Lines:
Steps to construct a line segment of length 5 cm
Steps to construct a line segment of length 5 cm:
| Draw line 1. |  |
| Mark a point on line l and name it P. |  |
| Open the compass to measure the length of the line segment by placing the pointer on the 0 mark of the ruler and the pencil point on the 5 cm mark. | 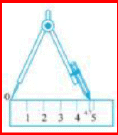 |
| Place tlie pointer of the compass on point P. | 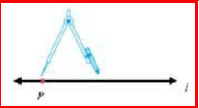 |
| Swing an arc oil tlie line to cut it at Q. |  |
 is the required line segment of length 5 cm. is the required line segment of length 5 cm. |  |
Two lines are said to be perpendicular when they intersect each other at an angle of 90o.
The perpendicular bisector is a perpendicular line that bisects another line into two equal parts.
Constructing of Angles
An exact copy of a line segment can be constructed using a ruler and a compass.
An exact copy of a line segment can be constructed using a ruler and a compass.
To construct a copy of an angle:
• Draw a line AB.
• Mark any point O on AB.
Page 62
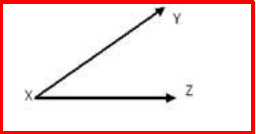
• Place the compass pointer at vertex X of the given figure and draw an arc with a convenient radius, cutting rays XY and XZ at points E and F, respectively.
• Without changing the compass settings, draw an arc on line AB from point O. It cuts line AB at P.
• Set the compass to length EF.
• Without changing the compass settings, draw an arc from P cutting the previous arc at point Q.
• Join points O and Q.
• Hence, ∠POQ is the required copy of ∠YXZ
To construct the bisector of an angle:
Let the given angle be LMN.
Place the compass pointer at vertex M of the given angle.
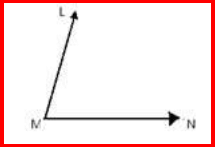
Draw an arc cutting rays ML and MN at U and V, respectively.
Draw an arc with V as the centre and a radius more than half the length of UV in the interior of ∠LMN.
Page 63
Draw another arc with U as the centre and the same radius intersecting the previous arc.
Name the point of intersection of the arcs as X.
Join points M and X.
Thus, the ray MX is the required bisector of ∠LMN
In a similar way, we can construct:
• A 60° angle without using the protractor.
• A 120° angle without using the protractor.
• A 90° angle without using the protractor.
FAQs on Practical Geometry Class 6 Notes Maths
| 1. What is practical geometry? |  |
| 2. What are the basic tools used in practical geometry? |  |
| 3. How can I construct a right angle using a compass and ruler? |  |
| 4. How can I construct a perpendicular bisector of a line segment? |  |
| 5. How can I construct an equilateral triangle using a compass and ruler? |  |


