Class 8 Exam  >  Class 8 Notes  >  Social Media  >  Getting Started with Facebook

Getting Started with Facebook | Social Media - Class 8 PDF Download

Introduction

If you're thinking about joining Facebook, this lesson will show you everything you need to get started. We'll explain some common Facebook terms and how to create a Facebook account. We'll also explore the Facebook homepage, Timeline, and Facebook for mobile devices.

Common Facebook Terms

Friends? Likes? Status updates? If you're new to Facebook, there are a lot of terms and phrases that may seem a little confusing at first. Reviewing some of the most commonly used terms will give you a better understanding of how Facebook works and what to expect as you get started.

Getting Started with Facebook | Social Media - Class 8

Creating a Facebook Account

Before you can use Facebook, you must create an account. Creating a Facebook account is free. All you need to get started is an email address and a few minutes of your time.

To Create a Facebook Account

Navigate to www.facebook.com in your web browser.

Under the words Sign Up, enter your personal information and desired password, then click Sign Up.
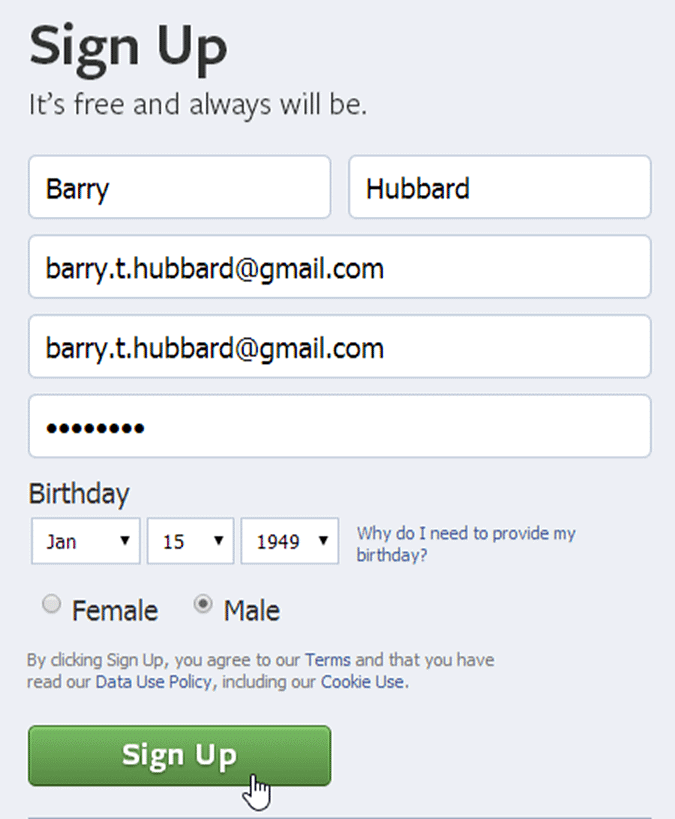
Getting Started with Facebook | Social Media - Class 8

You can then follow the directions on the screen to find friends, upload a profile picture, learn about privacy settings, and more.

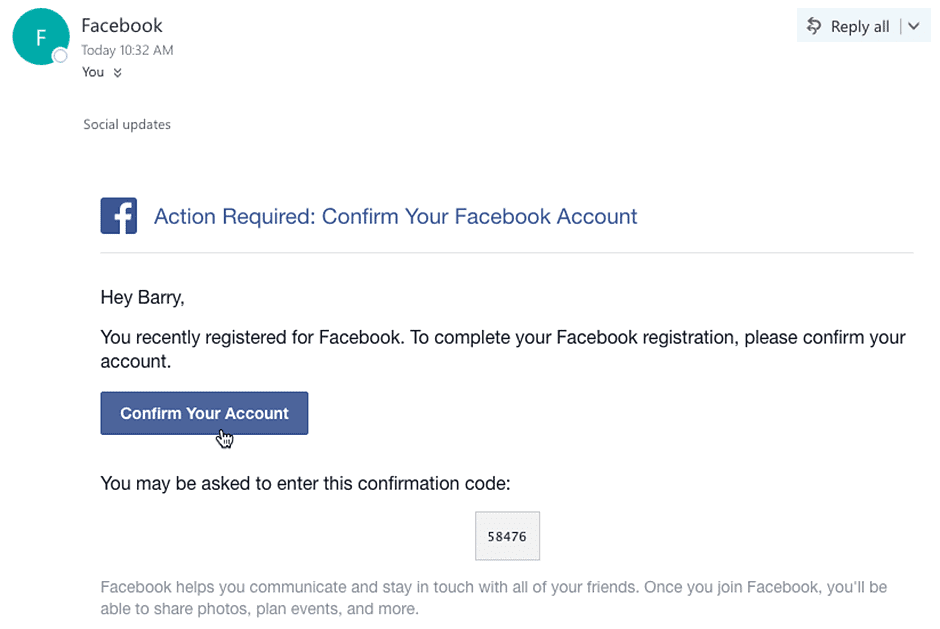
Before you can access all of Facebook's features, you'll need to confirm your email address. To do this, sign in to your email account, open the confirmation message from Facebook, and click Confirm Your Account.
Getting Started with Facebook | Social Media - Class 8

Exploring Facebook

Once you create an account, you'll want to spend a little time becoming familiar with the different parts of Facebook, including the homepage and Timeline.

The Homepage

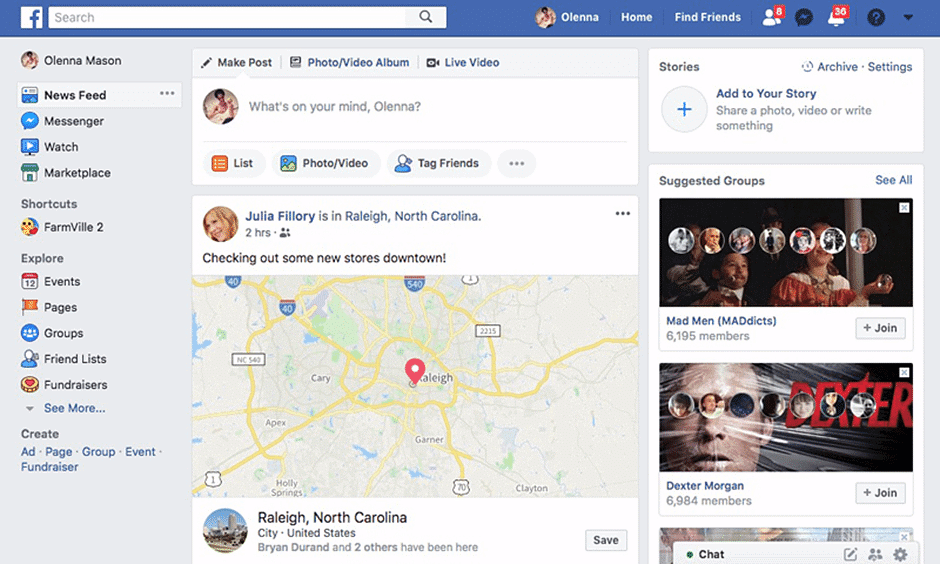
The homepage appears whenever you sign in to Facebook. The homepage displays your News Feed, which shows the things your friends have shared on Facebook. The homepage also allows you to navigate to other parts of Facebook, such as your Timeline.
Getting Started with Facebook | Social Media - Class 8

The Timeline

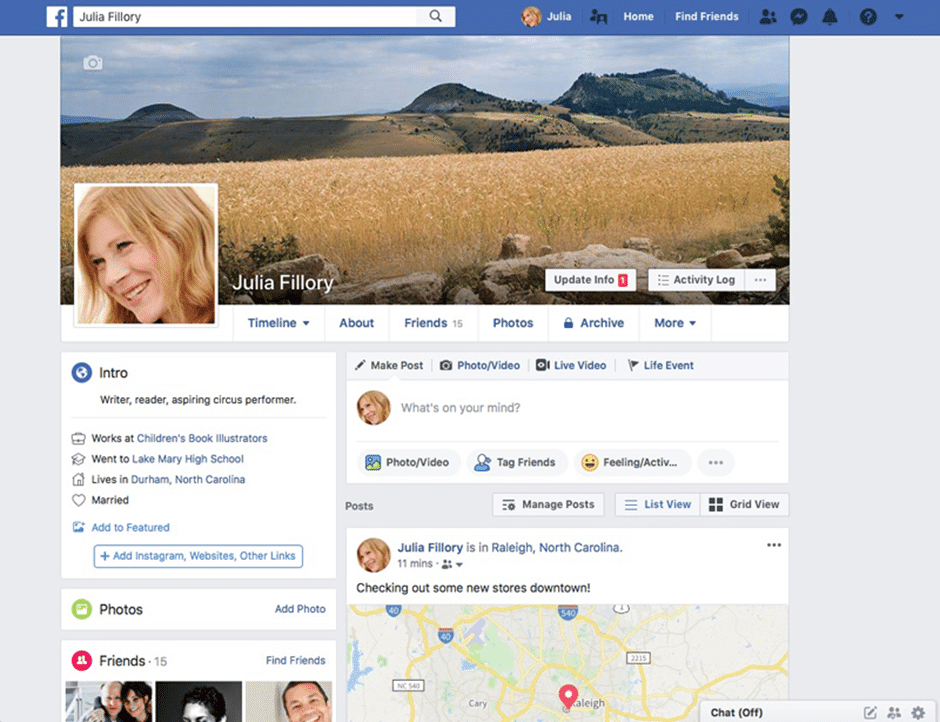
The Timeline (also called your profile page) is where you'll share information about yourself. Whenever you post an update, it appears on your Timeline. Your friends can also share posts on your Timeline.
Getting Started with Facebook | Social Media - Class 8

Facebook for Mobile Devices

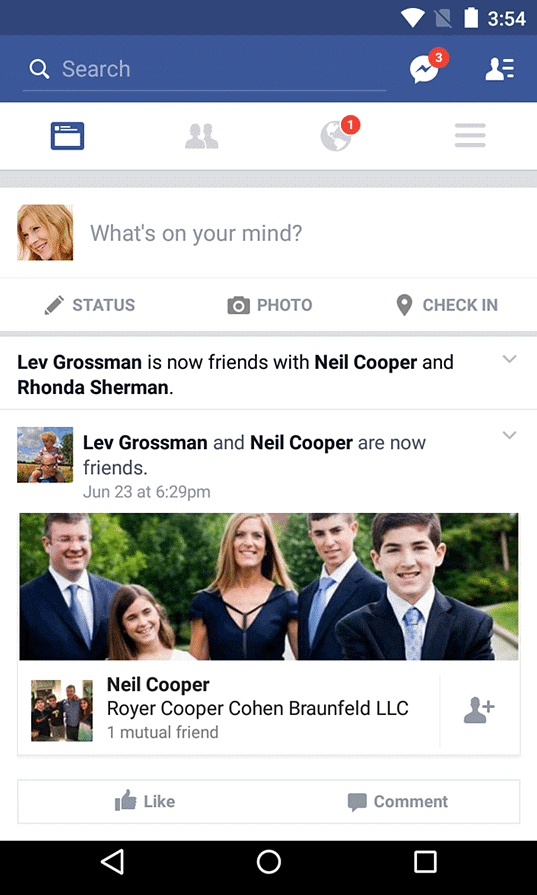
Facebook makes it easy to connect on the go. In fact, most Facebook users primarily access the site from a mobile device. Facebook offers an official mobile app on a variety of smartphones and tablets, including iOS and Android.
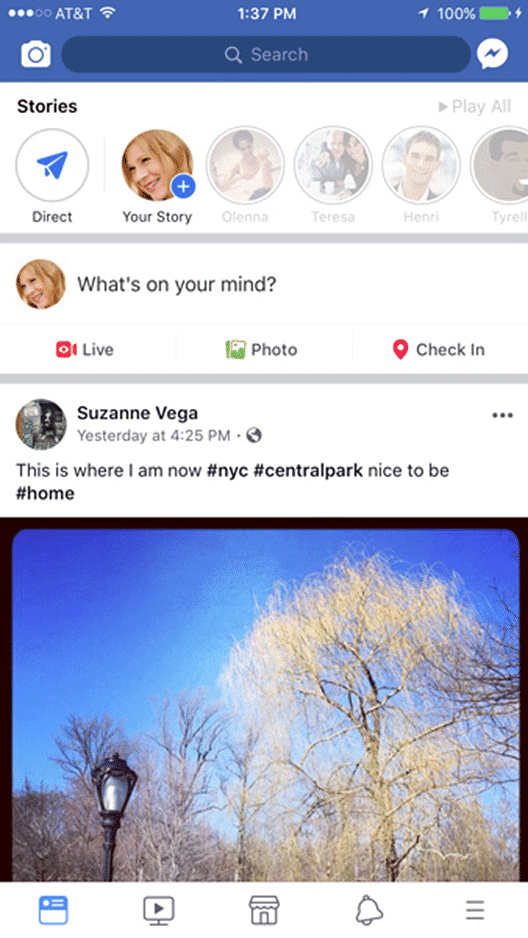
You can use the mobile app to do just about everything you can do in the desktop version of Facebook: post status updates and pictures, read stories and updates, and chat with friends. We'd like to give you a quick overview of the two most popular versions of the Facebook app: Facebook for Android and Facebook for iPhone. While the interface for these apps is somewhat different, you'll notice that each app gives you access to the same basic features.

  • If you don't have a smartphone, you may be able to access a limited version of Facebook on your phone through the Facebook for Every Phone program or Facebook texts.

Facebook for Android

  • The buttons in the interactive below to learn more about using Facebook for Android.
    Getting Started with Facebook | Social Media - Class 8

Facebook for iPhone

  • The buttons in the interactive below to learn more about using Facebook for iPhone.
Getting Started with Facebook | Social Media - Class 8

The document Getting Started with Facebook | Social Media - Class 8 is a part of the Class 8 Course Social Media.
All you need of Class 8 at this link: Class 8
28 videos|74 docs

Top Courses for Class 8

FAQs on Getting Started with Facebook - Social Media - Class 8

1. How do I create a Facebook account?
To create a Facebook account, follow these steps: 1. Go to the Facebook website or download the Facebook app. 2. Click on the "Create New Account" button. 3. Fill out the required information, including your name, email or phone number, password, date of birth, and gender. 4. Review the terms and policies, then click "Sign Up." 5. Complete the security check by entering the verification code sent to your email or phone number. 6. Add a profile picture and customize your account settings. 7. Start connecting with friends and family by searching for their names or importing contacts.
2. How can I change my Facebook password?
To change your Facebook password, follow these steps: 1. Log into your Facebook account. 2. Click on the small arrow in the top right corner of the page and select "Settings & Privacy." 3. From the drop-down menu, click on "Settings." 4. In the left column, click on "Security and Login." 5. Under the "Login" section, locate the "Change password" option and click on it. 6. Enter your current password, then type in your new password. 7. Click "Save Changes" to apply the new password to your account.
3. How do I add friends on Facebook?
To add friends on Facebook, follow these steps: 1. Log into your Facebook account. 2. In the top right corner of the page, click on the search bar. 3. Type the name or email address of the person you want to add as a friend. 4. From the search results, click on the profile of the person you want to add. 5. On their profile, click on the "Add Friend" button. 6. You can also send a message along with the friend request, if desired. 7. Once the person accepts your friend request, you will be connected on Facebook.
4. How can I delete my Facebook account?
To delete your Facebook account, follow these steps: 1. Log into your Facebook account. 2. Click on the small arrow in the top right corner of the page and select "Settings & Privacy." 3. From the drop-down menu, click on "Settings." 4. In the left column, click on "Your Facebook Information." 5. Click on "Deactivation and Deletion." 6. Select the "Permanently Delete Account" option. 7. Follow the on-screen instructions and enter your password to confirm the deletion. 8. Keep in mind that once your account is deleted, you won't be able to retrieve any of the content or information associated with it.
5. How do I adjust my privacy settings on Facebook?
To adjust your privacy settings on Facebook, follow these steps: 1. Log into your Facebook account. 2. Click on the small arrow in the top right corner of the page and select "Settings & Privacy." 3. From the drop-down menu, click on "Settings." 4. In the left column, click on "Privacy." 5. Here, you can customize various privacy settings such as who can see your future posts, who can send you friend requests, and who can look you up using your email or phone number. 6. You can also manage your activity log, timeline and tagging settings, and blocking settings from the left column. 7. Take your time to review and adjust the settings according to your preferences, ensuring your privacy on Facebook.
28 videos|74 docs
Download as PDF
Explore Courses for Class 8 exam

Top Courses for Class 8

Signup for Free!
Signup to see your scores go up within 7 days! Learn & Practice with 1000+ FREE Notes, Videos & Tests.
10M+ students study on EduRev
Related Searches

practice quizzes

,

study material

,

mock tests for examination

,

pdf

,

Getting Started with Facebook | Social Media - Class 8

,

Important questions

,

ppt

,

MCQs

,

Objective type Questions

,

past year papers

,

Previous Year Questions with Solutions

,

shortcuts and tricks

,

Semester Notes

,

Free

,

Getting Started with Facebook | Social Media - Class 8

,

Viva Questions

,

Exam

,

Getting Started with Facebook | Social Media - Class 8

,

Extra Questions

,

Summary

,

video lectures

,

Sample Paper

;