Implement the Mail Merge | Information Technology for Class 10 PDF Download
What is a mail merge?
Mail merge is a combination of two words. Mail and Merge, where mail means a letter or content written on paper and merge means to join. So in simple words, writing a letter and joined the letter with multiple addresses is known as mail merge. So let understand it practically.
Suppose your birthday is coming and you and your family members want to invite your friends and relatives for the celebration. Now, what you will de generally to invite them? Either you will inform by call or SMS or prepare an invitation card or any other means of communication.
Sometimes call or SMS is not that much effective compared to the invitation card. So invitation cards required. Now suppose you have 50 individuals, you need 50 invitation cards and 50 addresses you have to write on them. That is a little bit difficult and time-consuming.
To avoid this you can use mail merge. How? you will learn this in this post. In the next section of Comprehensive notes on implement Mail Merge in Documents class 10, we will provide you a detailed guide about how to use mail merge.
How to mail merge in MS Word 2013?
Step 1: Create a new file and type your contents of letters.
Step 2: Click on the Mailings ➝ Start Mail Merge option from the Start Mail Merge group.
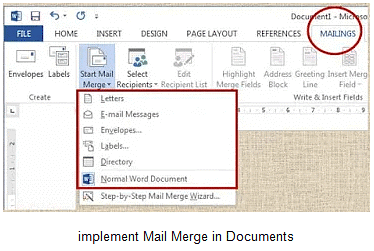
Step 3: Click on Letters option. Your screen will blink for a moment.
Step 4: Now click on Mailings ➝ Select recipients option from the Start Mail Merge group.
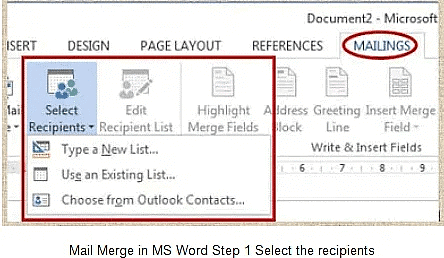
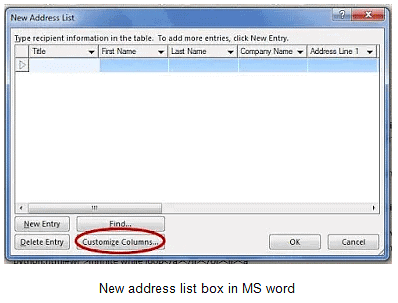
Step 5: Select Type a New List for creating an address list. A new address list dialog box will appear with few fields. If you want to remove unwanted address fields from your address list click on customize columns button shown in the following screenshot.
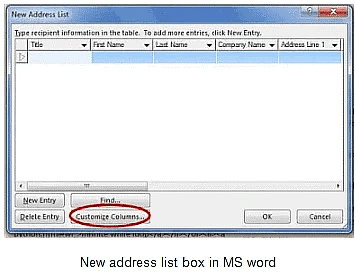
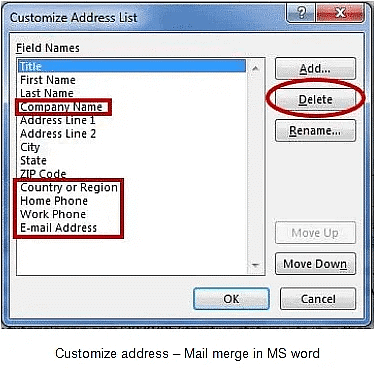
Step 6: When you click on customize columns button like in the previous step, a new dialog box will appear with Add, Delete and Rename button. Select the filed from field names and click on the Delete button as shown following screenshot.
I have deleted unwanted fields like Company Name, Country or region, Home Phone, Work Phone, E-mail address etc. When you delete a field it will ask for confirmation to delete the selected field. Click on Yes button to delete. When you finished deletion click on OK button.
Step 7: Now click type the values for remaining fields. Type the complete list of recipients and click on ok button.
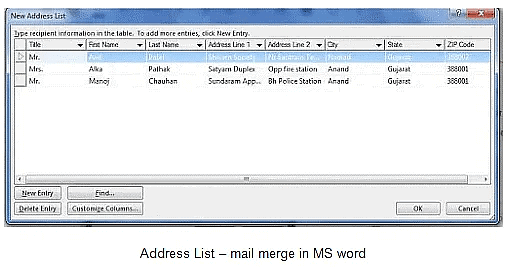
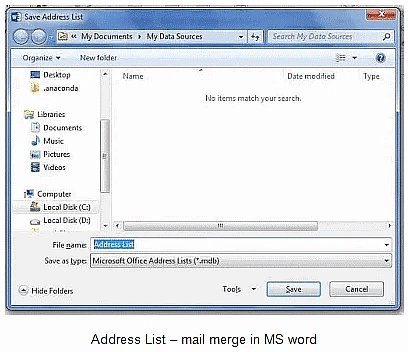
Step 8: Now save your address list.
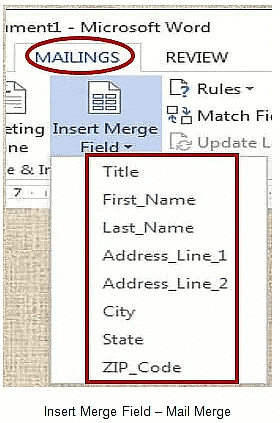
Step 9: Now you will get insert merge field active. Click on Mailings ➝ Insert Merge Field. Observe the following screenshot. You will notice the columns or field title as highlighted in the following screenshot.
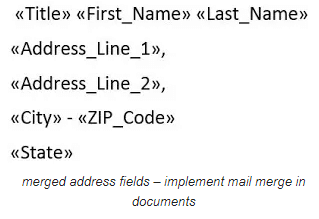
Step 10: Now place your cursor at the exact location where you need the address field. and click on the field. Repeat similar steps for all the fields. You will get merged address field like <<addressfield>>. Look at the following screenshot.
Step 11: Now click on the preview results button. You can use the next previous button to navigate through the records.
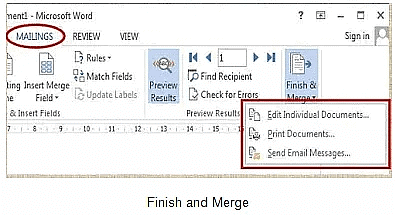
Step 12: It will display preview as I am getting a preview for my first field like this:
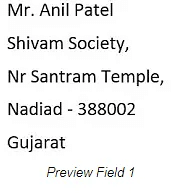
Step 13: Now click on Mailings ➝ Finish & Merge.
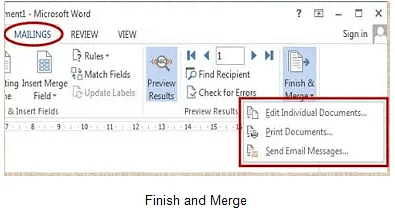
Step 14: Now you can save all letters separately or print them directly or send by email messages.
1. Edit individual documents: When you click on this option a dialog box will appear to merge the recipients and the document like All, current or specific records from_to. Observe the following screenshot. Select your desired option and click on ok button. You will get a new document with a number of pages as number addresses you have in your address list.
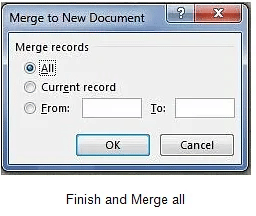
2. Print Documents: Similarly, you can use the print document option.
3. Send Email Messages: To send email messages you need email id in your address list fields. To send this mail merged document by email you need outlook configured system.
How to mail merge in OO Writer 4.1.7?
Step 1: Type your contents of letter or email in a new Writer document.
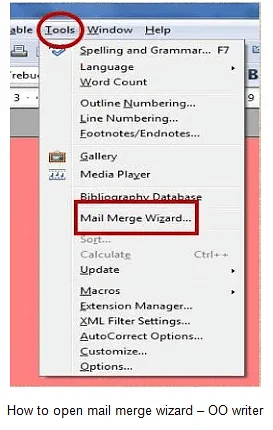
Step 2: Click on Tool ⟶ Mail Merge Wizard.
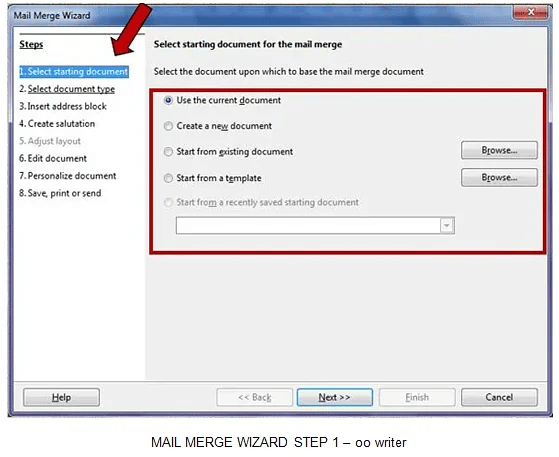
Step 3: Mail wizard open as displayed in the following screenshot. This step is all about to select in which document you want to initiate the process of mail merge. Select “Use the current document” as you have already typed your contents in the document. Click on Next button.
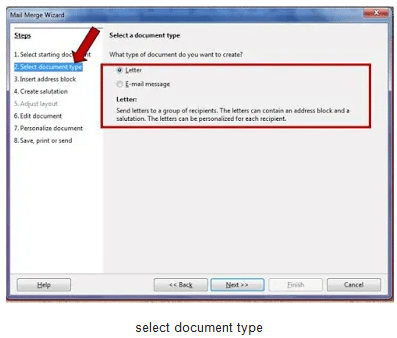
Step 4: This step allows to select the document type out of letter or email. Select a letter and click on next button.
Step 5: This step is more important and you should be careful also. As here you are going to create your address list and address block. This process has 4 steps:
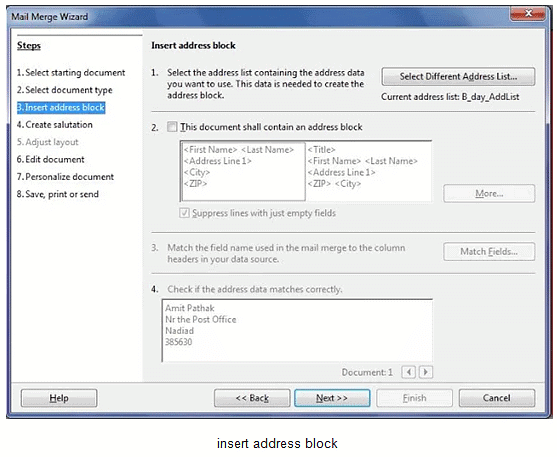
- Select or create an address list
- Select the address block
- Match the fields
- Preview of exact record match
Step 6: Click on the select different address list containing the address data option. You will get something like this:
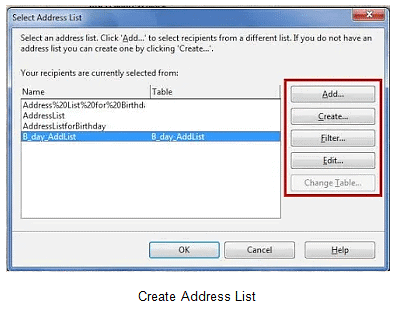
Step 7: Click on Create button. A new address list dialog box appears. As you will see we are not going to use all of these fields in our address block.
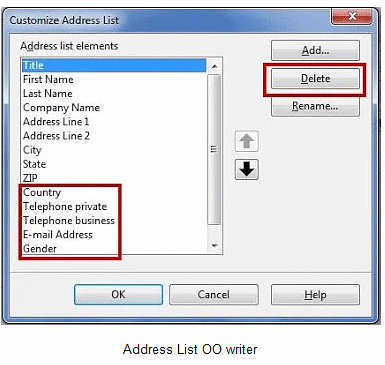
Step 8: Click on the customize button to delete unwanted fields from address blocks. Select the unwanted fields one by one and delete them. You can move any field using arrow buttons. Click on OK button when you finished.
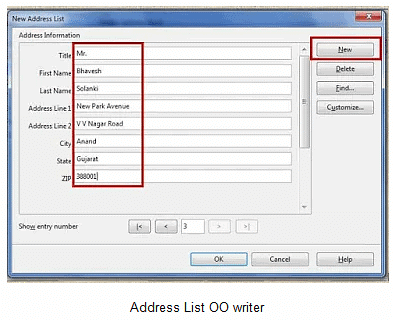
Step 9: Now type address list values for the different fields. Type details for recipients address. Click on New button to insert a new address. Click on OK when you finished all entries.
Step 10: Now it will ask to save your file. Save it. When you save your address list do not use space between the address list name. And the screen will come back to address list. Ensure that your currently saved list should be selected. Click on OK button.
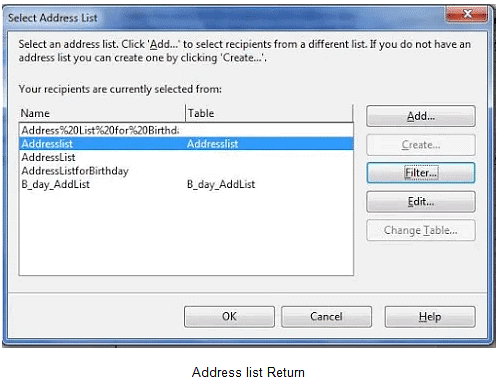
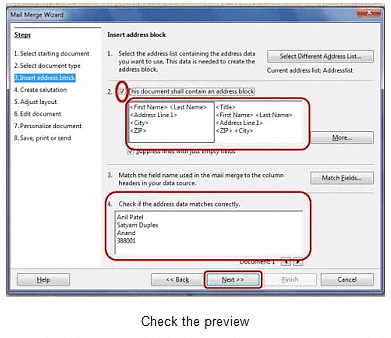
Step 11: Now you will return back to your insert address block step. Click on the checkbox in front of number 2. Check the preview as per your need. If the next button is not coming then click on more button and edit the required fields.
Step 12: Now you will get the create salutation screen. This is an optional part. Click on next button.
Now, a few steps are there to adjust your address block in the document. Adjust as per your need and click on next. Then if any modification required then you can edit the document otherwise click on next button. Then you will get the option to personalize document. This is also an optional step. Click on next if your document looks good.
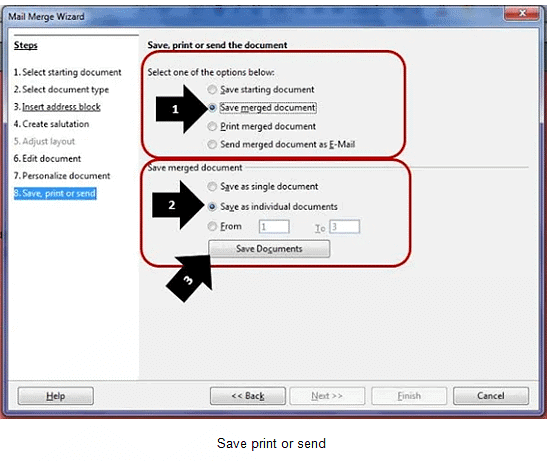
Step 13: Then, at last, you will get the final step to save, print or send the merged document. You will get a screen like this:
|
4 videos|28 docs|8 tests
|
FAQs on Implement the Mail Merge - Information Technology for Class 10
| 1. What is a mail merge? |  |
| 2. How to mail merge in OO Writer 4.1.7? |  |
| 3. What are the benefits of using mail merge? |  |
| 4. Can I use mail merge to personalize email campaigns? |  |
| 5. Is mail merge limited to text-based documents only? |  |


