Create forms & Reports using the wizard

Forms in Base
Basically, forms are used to collect data from the user. It provides an interface to enter the data from the user side. In the database, forms help to store data into the database directly from the interface. By using forms user can view, enter, and change the data directly in the database. So now learn how to forms using wizard in OO base for the learning outcome forms and reports using wizard 10.
Creating a form using the wizard
To create a form using wizard follow the given steps:
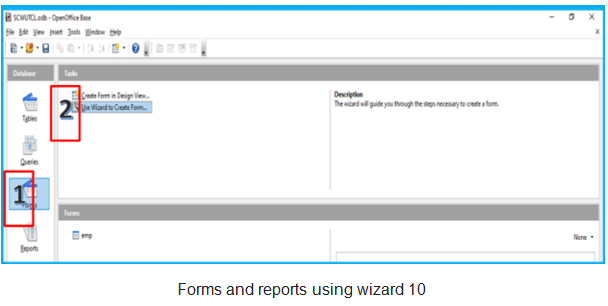
- Click on Forms option available at the database objects pane/window.
- Now click on the option "Use wizard to create form..." in the tasks window. The form wizard will appear.
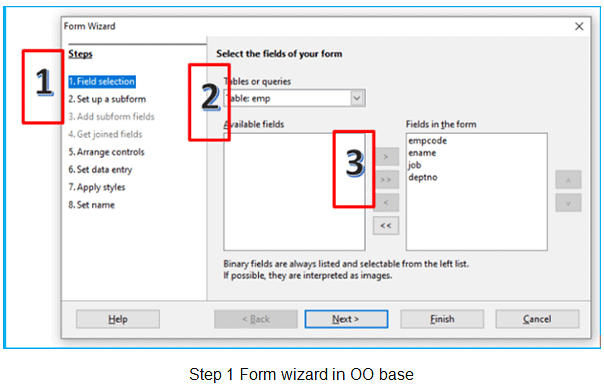
- This form wizard has 8 steps:
- Field selection - Select the field you want to display on the form
- Set up subform - This option allows to show the contents from the table with a separate form. There are two options available for this step:
(i) Subform based on the existing relation
(ii) Subform based on manual selection of fields - Add subform fields - This option only comes when you click on Add Subform option to select fields for the subform.
- Get joined fields - This option also related to subform and appears only when you select Add Subform option.
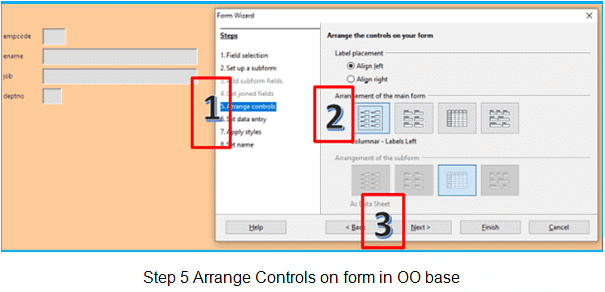
- Arrange Controls - This option allows to arrange available form controls. It provides three options like:
(i) Label placement - Align Left or Align right,
(ii) Arrangement of the main form as: Columnar - Labels at Left, Columnar - Labels on Top, As Datasheet, In blocks - Label Above
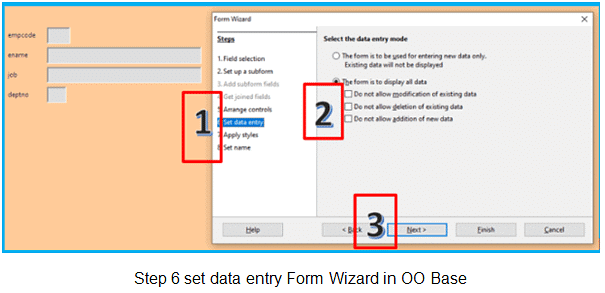
(iii) Arrangement of subform - Columnar - Labels at Left, Columnar - Labels on Top, As Datasheet, In blocks - Label Above - Set Data Entry - This option provides two options:
(i) The form is to be used for entering new data only. Existing data will not be displayed.
(ii) The form is to display all data- do not allow modification
- do not allow deletion
- do not allow the addition
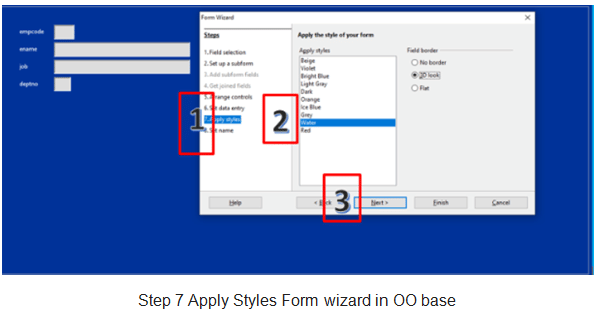
- Apply Styles - This step allows to apply formatting to the form. You can select a colour and border styles for the form.
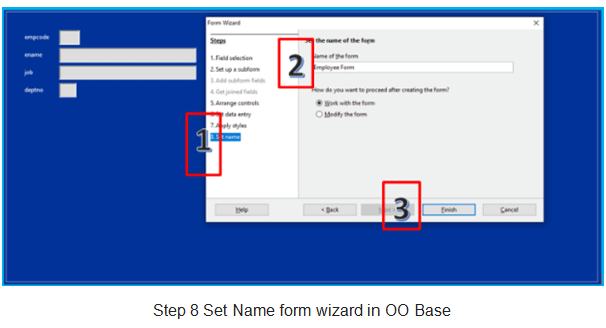
- Set Name - This option allows setting the name for the form. You can give a new name, by default it will show the table name in the box. After then you can select one option like work with the form or modify the form.
Steps explained with the screenshot for forms using wizard.
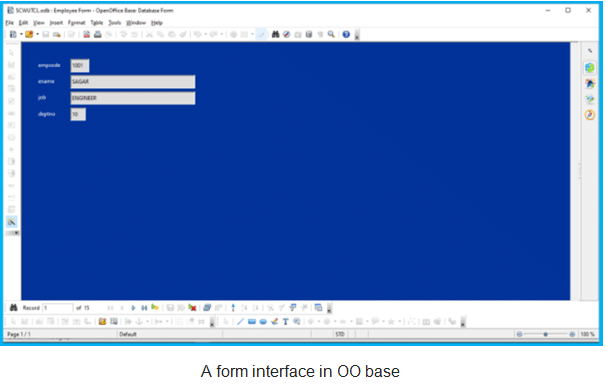
Observe the following screenshot I have Created a form:
Step 1
Step 2 - Step 1 of Form wizard field selection. Here I have selected fields
I have not used any subform in this lab activity so directly I jumped to Step 5 - Arrange Controls.
Step 5 - Arrange Controls: Left Align, Columnar - Labels left
Step 6 - Set Data Entry
Step 7 - Apply Style
Set Name
Final output of Form
When you create forms using the wizard you will get some additional toolbars.
The form window appears with few toolbars:
- Form Control - Available vertically at the left side
- Form navigation - Available at the bottom
- Form Design - Available below the form navigation
- Drawing - Adjacent to form design
Options to enter or remove data from forms
When you complete all the steps of form wizard, you will get a form navigation toolbar at bottom of the form window. In this form navigation, you will get Add New record icon. Click on it and you are allowed to type a new record. Save the record. Observe the following screenshots:
Step 1
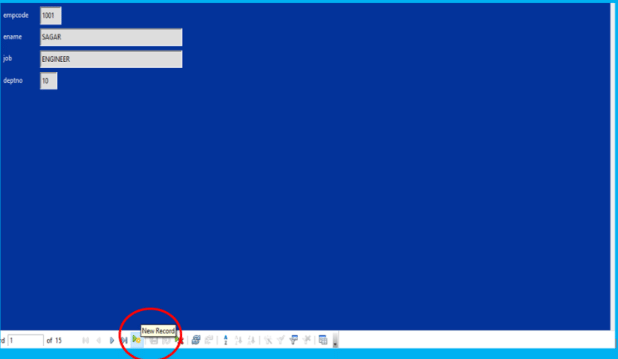
Add new record in table through form in oo base
Step 2
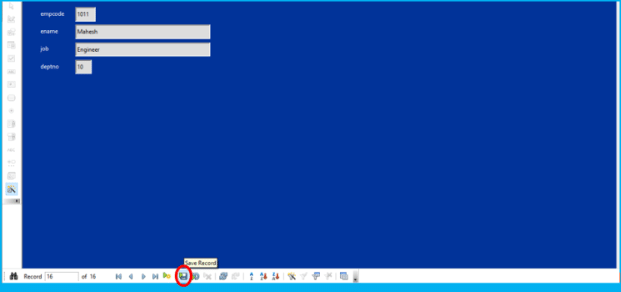
Save newly added record
Modifying Form
Modifying form is a simple process. Click on the record box whatever you want to modify and then save the record. To navigate through different records use form navigation control and modify it.
Now lets talk about changing the label and background for the topic forms using wizard
Changing Label and background
The form created through the wizard is not allowing to modify the labels directly, because the displayed label and text box showing the field value are grouped together by default. Ungroup them first and then you can change it. Follow these steps:
- Right-click on the displayed field value in the form.
- Choose Group > Ungroup.
- Now click on the double click on the label.
- Field label properties will open.
- Find the label text and type your desired text. Now close the properties window.
- Adjust the label accordingly.
- Save the form.
Searching records using the form
To search a record using form, follow these steps:
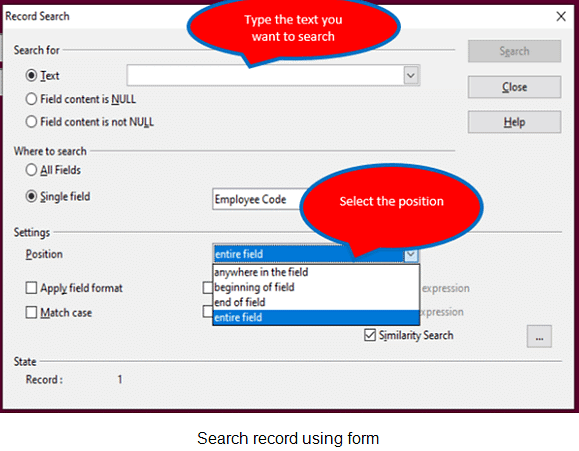
- Click on Find Record button from the navigation toolbar. A new dialog box appears with the title "Record Search".
- Type text you want to search in the search for option and in the box available at the front of Text.
- Select the fields whether all the fields or single field from the box. Apply the desired settings and click on search button.
- Now the record that you have searched, will be displayed on the screen.
What is a report?
A report is the final outcome of any computerized system. Suppose you are giving online order from any online shopping website after completion of the payment and delivery you will get an invoice of the order. This invoice is one of the example of report.
- You summarize the data from the selected table in a printed form.
- You can customize the report as and when required.
- You can add header and footer of your choice.
- You can apply formatting as per your need.
- You can add controls as per the requirements.
- You can select queries and tables to create a report.
Creating a report using the wizard
OO base provides a way to create report using wizard. As you know a wizard is step by step process of creating objects in OO base.
Follow the below given steps to create report using the wizard.
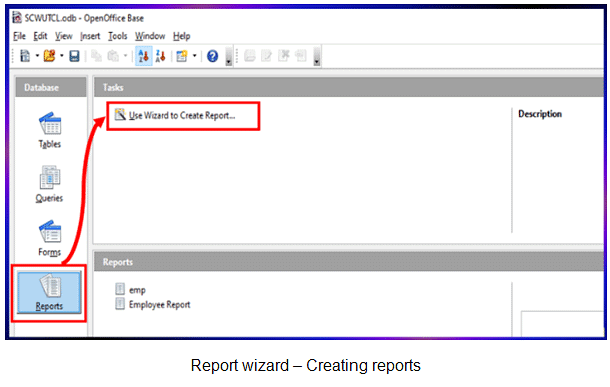
- Select the Reports button from the object selection window.
- Click on Use wizard to create reports from the tasks window. A new report window will appear with Report Wizard.
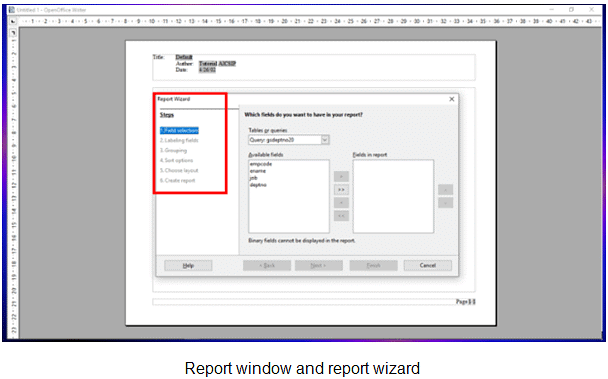
- This Report Wizard has six major steps:
- Field Selection: In this step, select the table and fields you want to display on the report.
- Labelling Fields: This step provides customization for a selected field label. You can change the field name as per need. Otherwise, it will display the field names as provided in the table.
- Grouping: If you need any group records, you can group them according to the grouping field and functions. Select the field to group records.
- Sort Options: It will generate the report in sorting order as selected by the user.
- Choose Layout: There are certain built-in layouts. These layouts are pre-formatted layouts for your report. It provides options like Layout of data, Layout headers and footers and orientation - Portrait or Landscape.
- Create Report: This is the last step of the Report Wizard. Type the name for your report, otherwise, it will save as it with the selected table name. Then select Static or Dynamic report as per your need.
Understand the complete process with screenshots:
Step 1 & 2:
Step 3 report window and report wizard.
Report wizard Step 1 - Select the table and Fields
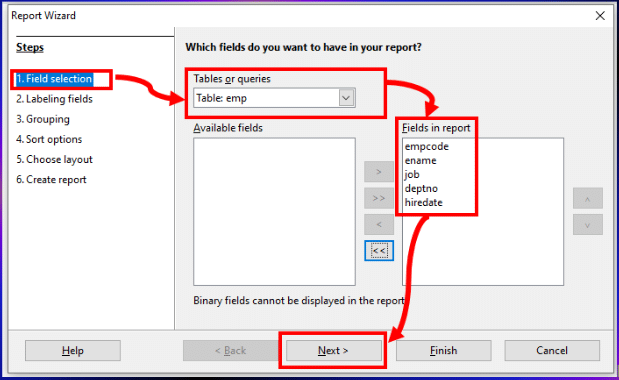
Select table and fields in report wizard in oo base
Select the table from Tables or queries combo box. Now come to available fields and add them to the fields in report.
Here I have selected emp table and all fields.
Click on Next button.
Step 2 Labelling Fields
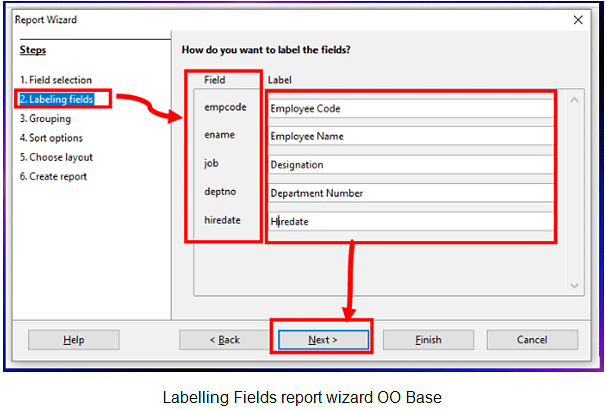
Type the desired names in front of each field under the Label. Click on Next when you finish desired fields labelling.
Step 3 and 4 are optional if you want to group and sort use them otherwise you can ignore them.
Step 5 Choose the Layout

choose layout create report using wizard
You can choose any of the layout of data, layout of headers and footers, and orientation as per your choice.
Step 6 Create Report
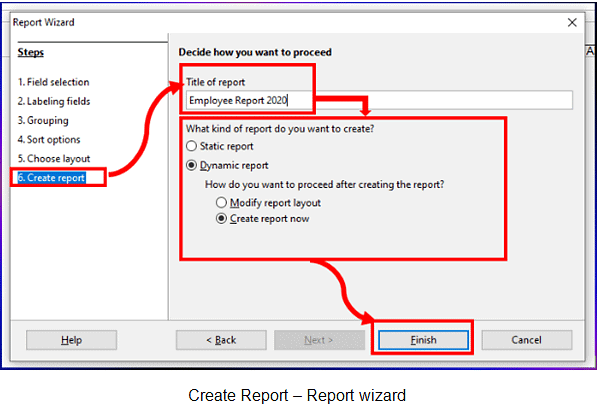
In this step give a suitable title for your report, by default this box contains the table name which you have selected, type the name for the report and choose report options as per your requirements.
FAQs on Create forms & Reports using the wizard
| 1. How do I create a form using the wizard in database applications? |  |
| 2. What's the difference between creating forms manually versus using a wizard? | |
| 3. Can I customize a form after the wizard creates it? | |
| 4. How do I generate reports automatically using the report wizard? | |
| 5. What are the main layout options available in form and report wizards? | |

