Download and Install Java Development Kit (JDK) on Windows, Mac, and Linux - Software Development PDF Download

Download and Install Java Development Kit (JDK) on Windows, Mac, and Linux
Last Updated: 21 May, 2023Setting up a Suitable Development Environment is crucial before commencing the creation of Android Applications. This setup streamlines the utilization of necessary tools for creating applications and ensures the smooth execution of operations and processes. Installing JDK is essential for generating Android Application Source Files through Java or Kotlin programming languages. The system executes the code with a compilation of libraries and compilers. It's important not to confuse JDK, JRE, and JVM with each other. Below, you'll find a detailed guide outlining the step-by-step process of installing and configuring JDK on the three most prevalent computer operating systems to kickstart the Android application development process.
Importance of Setting up a Development Environment
- A suitable development environment is vital for creating Android applications effectively.
- It ensures smooth operation and execution of processes.
Downloading JDK for Android Development
- JDK installation is necessary to create Android Application Source Files.
- Utilizes Java or Kotlin programming languages.
- The system compiles the code with libraries and compilers.
Distinguishing Between JDK, JRE, and JVM
- JDK, JRE, and JVM serve distinct purposes in the software development process.
- Understanding their differences is crucial for effective application development.
Step-by-Step Guide for Installing JDK on Various Operating Systems
- Windows Operating System
- Download the JDK installation file from the official website.
- Run the executable file and follow the installation wizard instructions.
- Set up environment variables after installation to configure the JDK.
- Mac Operating System
- Access the Oracle website to download the JDK package for Mac.
- Double-click the downloaded file to initiate the installation process.
- Configure the JDK settings post-installation for seamless functionality.
- Linux Operating System
- Install JDK using the package manager specific to your Linux distribution.
- Verify the installation and set up the necessary environment variables.
- Run a test to ensure JDK is correctly installed and configured.
Java JDK Download
- The JDK can be installed on the following Platforms:
- Microsoft Windows
- Linux
- macOS
Install JDK on Microsoft Windows
Step 1: Download and Install Java Development Kit (JDK)
Firstly, you need to download the Oracle Java Development Kit (JDK) from the Official Oracle Website. Visit the Official Website to begin.
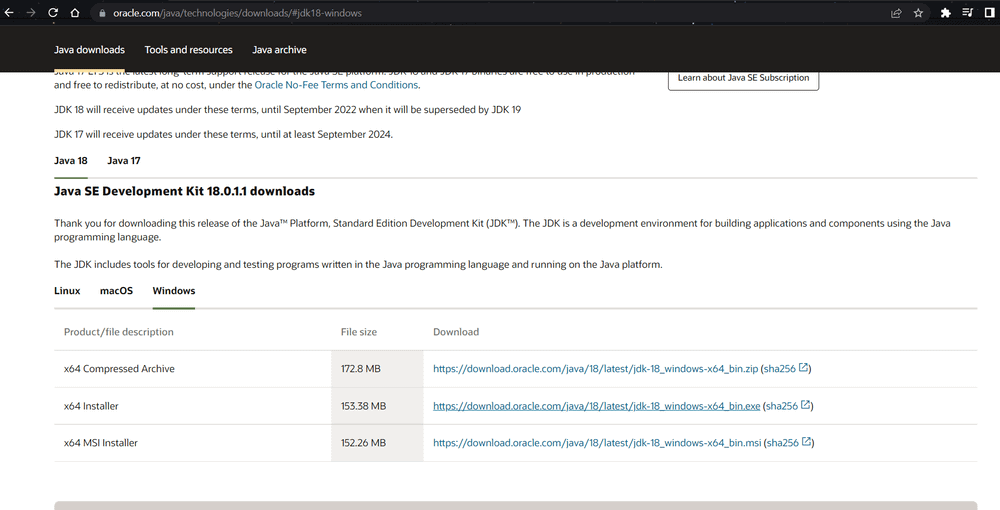
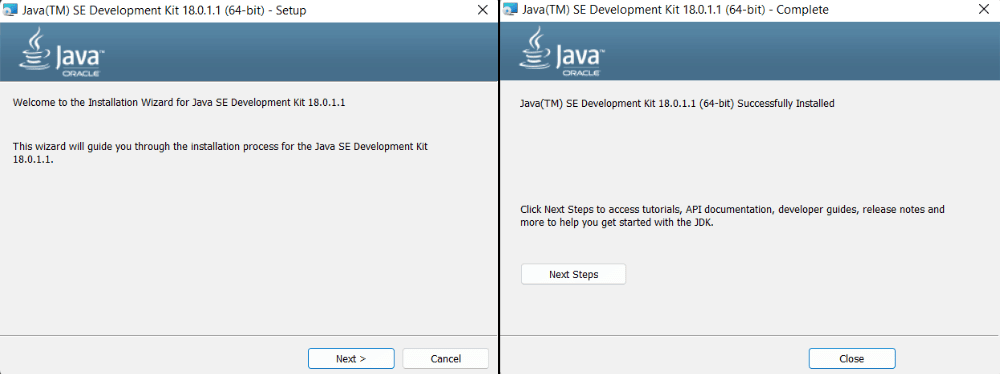
Identify your system specifications to choose the appropriate file. Download the latest x64 Installer of Java SE Development Kit 18 for Windows. After the download, follow the installation steps.
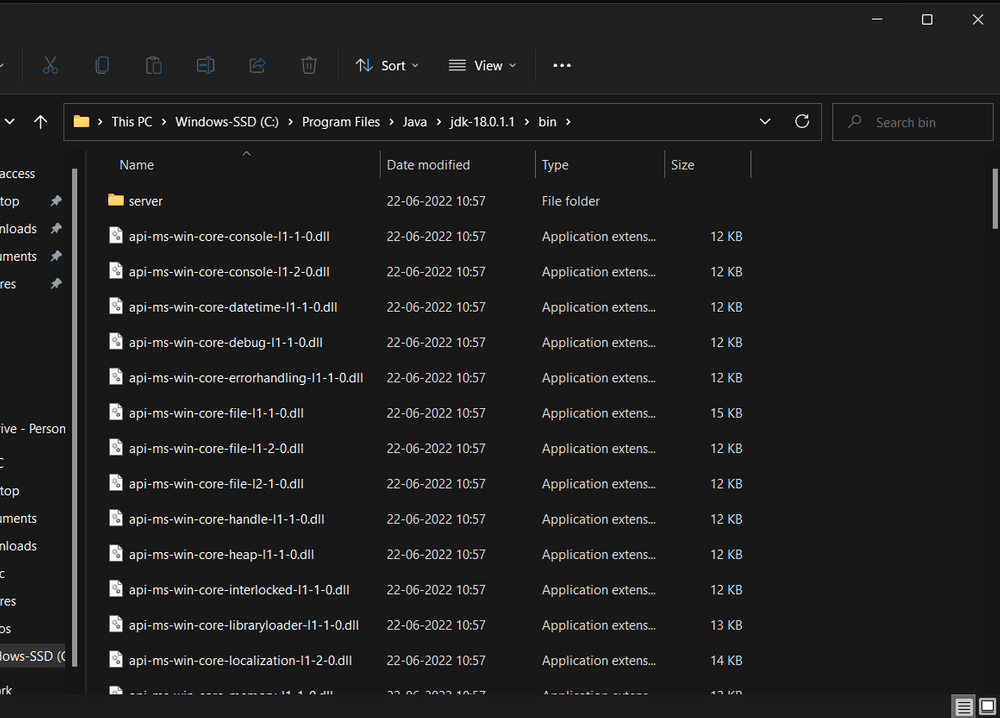
Step 2: Configure Environment Variables
Once installation is complete, configure environment variables to specify the directory where JDK files are stored. Navigate to C:\\Program Files\\Java\\jdk-{YOUR_JDK_VERSION}\\bin (replace {-} with your JDK version).
To set Environment Variables, search for "Environment Variables" in the Task Bar and select "Edit the system environment variables."
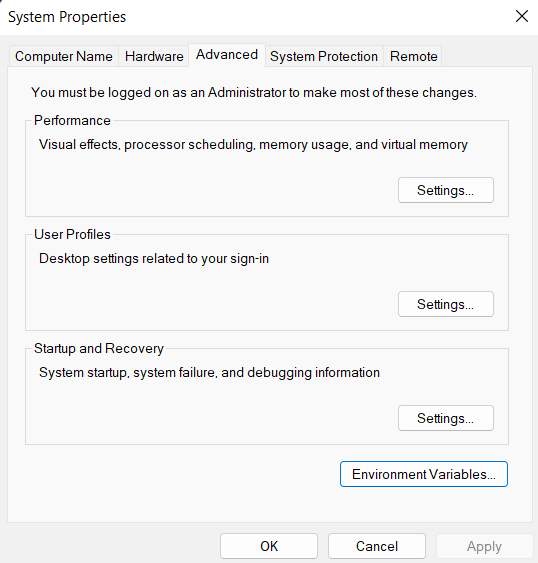
Under the Advanced section, click on "Environment Variables." In System variables, choose the "Path" variable, click "Edit," then "New." Paste the Path Address (e.g., C:\\Program Files\\Java\\jdk-{YOUR_JDK_VERSION}\\bin) and click "OK."
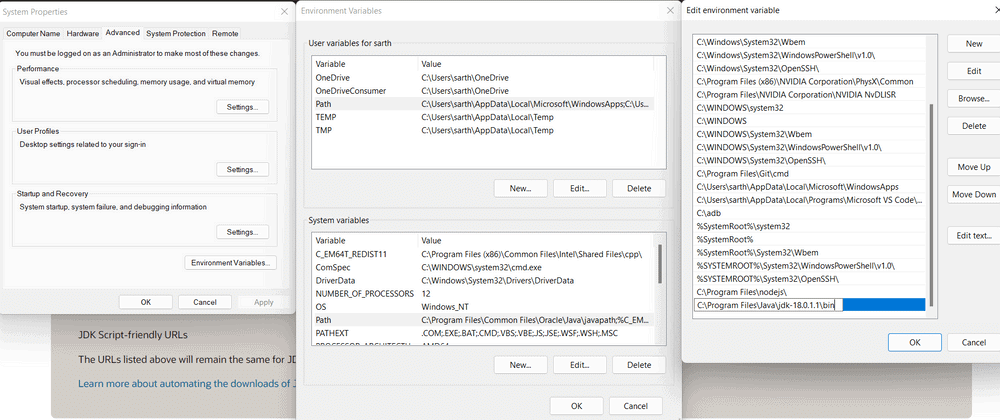
In the Environment Variables dialogue, under System variables, click "New." Set Variable name as JAVA_HOME and Variable value as the JDK address (e.g., C:\\Program Files\\Java\\jdk-{YOUR_JDK_VERSION}). Click OK three times.
Install JDK on Linux
- Step 1: Download and Install Oracle Java Development Kit (JDK)
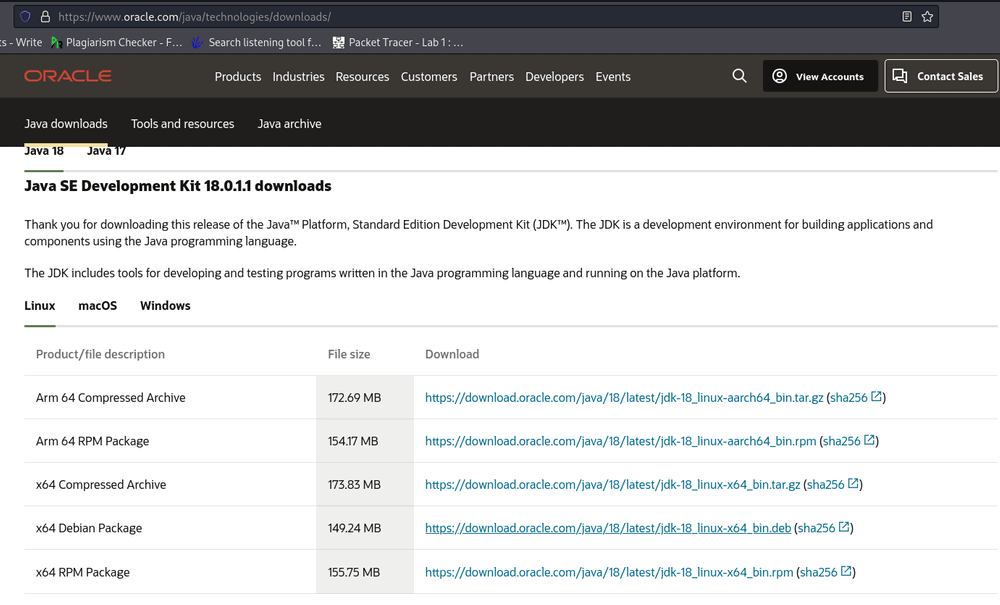
You should identify your system specifications to choose the correct Java Development Kit version. For instance, for Linux, the recommendation is to download the latest x64 Debian Package of Java SE Development Kit 18.
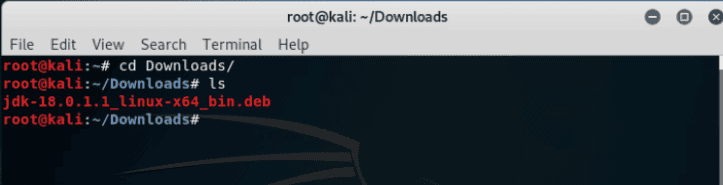
To start the installation process, open your terminal and navigate to the downloads directory using the command.
To list files and packages in the directory, use the following command.
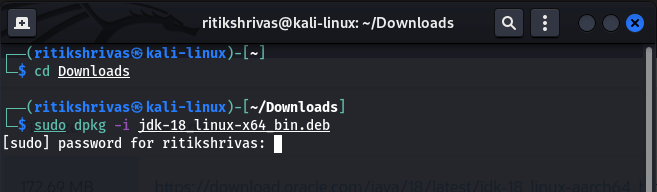
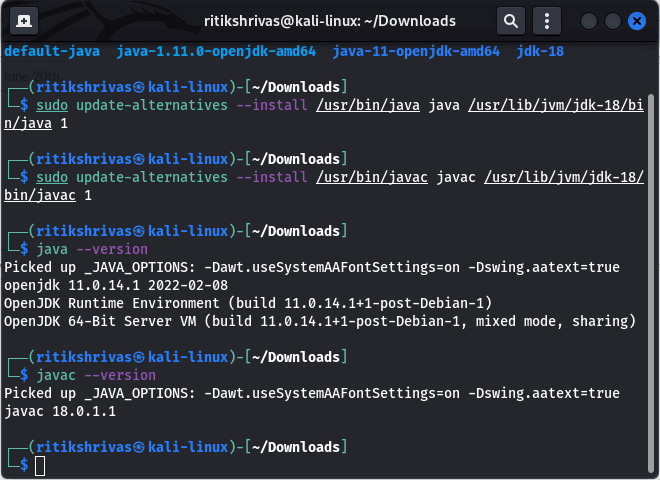
Next, use the Debian Package Manager to configure the downloaded file for installation. Provide your password for elevated permissions.
- Step 2: Check the Java Version
To verify the Java version, open your terminal and input the specified commands.
Install JDK on MacOS
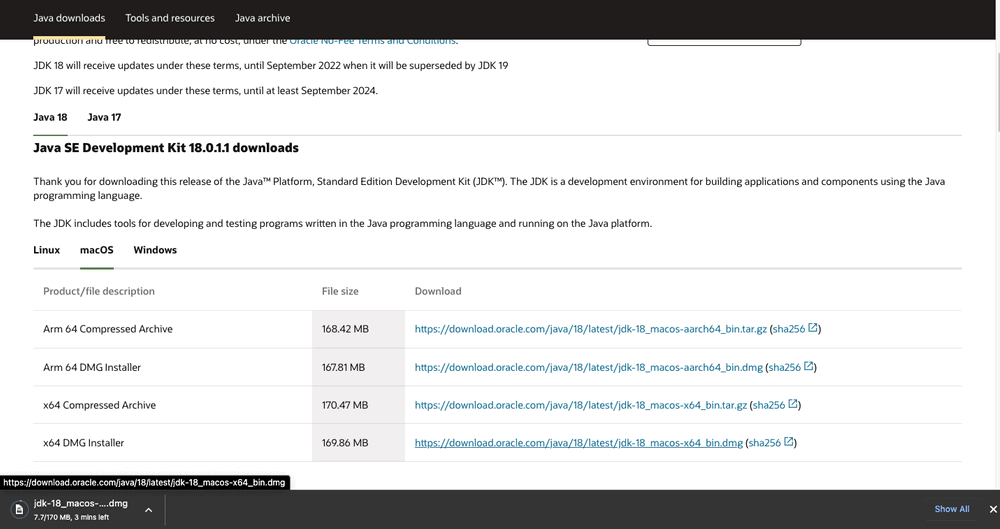
You should identify your system specifications to select the appropriate product. The website will offer the latest version for your specific system. For Mac, you will download the latest x64 DMG Installer of Java SE Development Kit 18. After downloading, proceed with the installation steps.
x64 DMG Installer of Java SE Development Kit 18.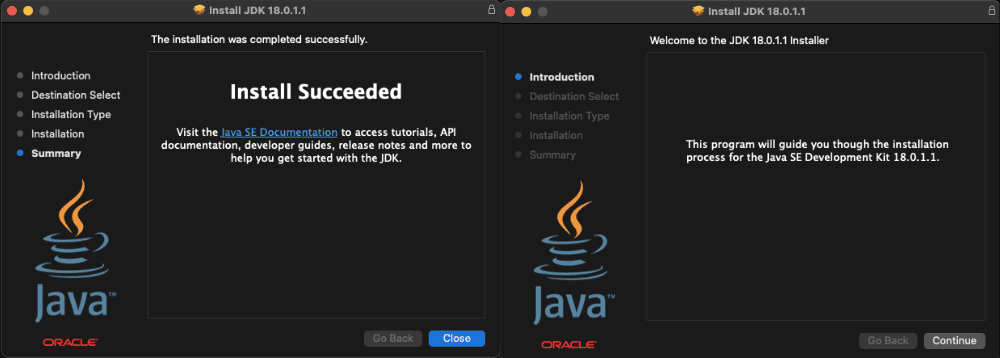
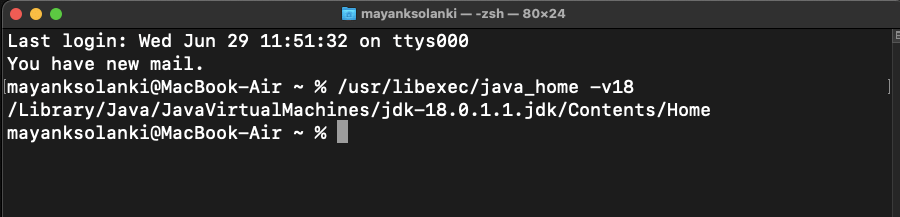
Step 2: Configure Environment Variables
To configure, open the terminal and execute the following commands. Use the command to find the location of JAVA_HOME:
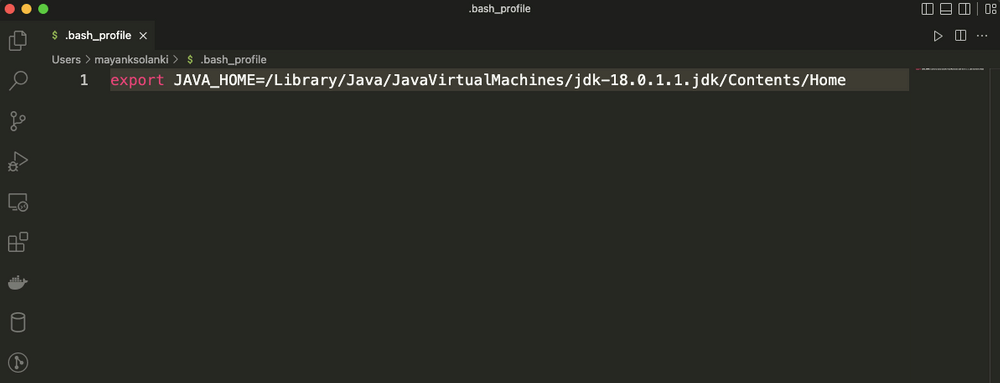
We need to set this output as our JAVA_HOME Environment Variable. You can utilize any command or code editor for editing the file. Here, we are employing VS Code.

At the end, export the path obtained earlier, i.e.
Finally, echo the JAVA_HOME variable.
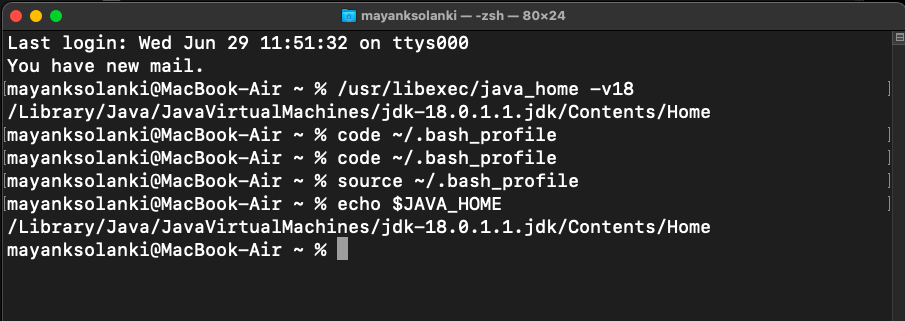
In the terminal, input the following commands:
terminal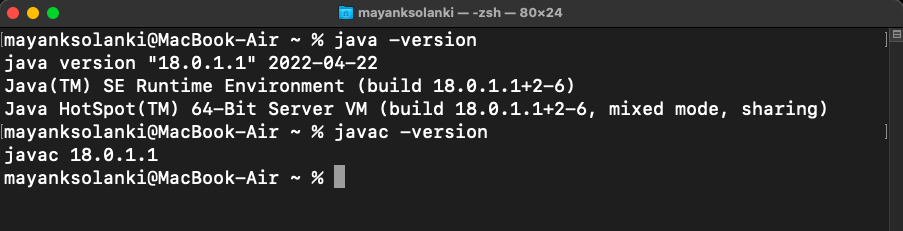
Step 3: Configure JAVA_HOME Environment Variable
Upon completing the installation, it's essential to configure environment variables to inform the system about the JDK files directory. To locate the JDK Files, execute the command to find the file location.
Copy the file location obtained.
To set the environment variable, edit the environment file using the provided command.
Add JAVA_HOME="/usr/lib/jvm/jdk-{YOUR_JDK_VERSION}".
JAVA_HOME="/usr/lib/jvm/jdk-"Save and close the file.

Refresh the environment file using the command provided.
Echo the JAVA_HOME Path.
Feeling overwhelmed in the world of Backend Development? It's time for a transformation! Enroll in our Java Backend Development - Live Course and start your journey to master backend development efficiently and within schedule. Here's what you'll get:
What We Offer:- Comprehensive Course
- Expert Guidance for Efficient Learning
- Hands-on Experience with Real-world Projects
- Proven Track Record with 100,000 Successful Geeks
Key Features of Our Course:
- Comprehensive Course
- Expert Guidance for Efficient Learning
- Hands-on Experience with Real-world Projects
- Proven Track Record with 100,000 Successful Geeks
Please Login to comment...
LoginLike
study material
,MCQs
,video lectures
,Objective type Questions
,mock tests for examination
,Semester Notes
,Mac
,Sample Paper
,and Linux - Software Development
,Important questions
,past year papers
,practice quizzes
,Mac
,shortcuts and tricks
,Download and Install Java Development Kit (JDK) on Windows
,Extra Questions
,and Linux - Software Development
,Viva Questions
,Download and Install Java Development Kit (JDK) on Windows
,Exam
,and Linux - Software Development
,ppt
,Free
,Previous Year Questions with Solutions
,Summary
,Mac
,Download and Install Java Development Kit (JDK) on Windows
;


Download and Install Java Development Kit (JDK) on Windows, Mac, and Linux Free PDF Download
Importance of Download and Install Java Development Kit (JDK) on Windows, Mac, and Linux
Download and Install Java Development Kit (JDK) on Windows, Mac, and Linux Notes
Download and Install Java Development Kit (JDK) on Windows, Mac, and Linux Software Development Questions
Study Download and Install Java Development Kit (JDK) on Windows, Mac, and Linux on the App
|
© EduRev
|
Education Revolution
|


|


