How to Create/Start a New Project in Android Studio? - Software Development PDF Download

Android | How to Create/Start a New Project in Android Studio?
Last Updated: 10 Apr, 2024After successfully installing the Android Studio and opening it for the first time, we need to start with a new project to begin our journey in Android.
In this article, we will learn about how to create a new project in Android Studio.
Steps to Create/Start a New Android Project in Android Studio
Below are the steps to start and set up a new Android project in Android Studio.
Step 1: Select the Activity
- Select Activity to Mobile. Activity in Android refers to a single screen with a user interface.
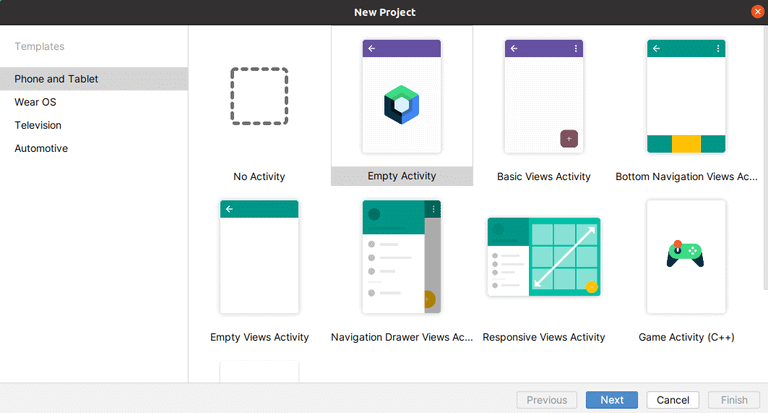
- Note: For beginners, "Empty Activity" is a good recommendation.
Step 2: Create New Android Project
- Name your application in the 'Application name' Text box. By default, the application name appears as "MyApplication" and select the location of the Application you are going to create.
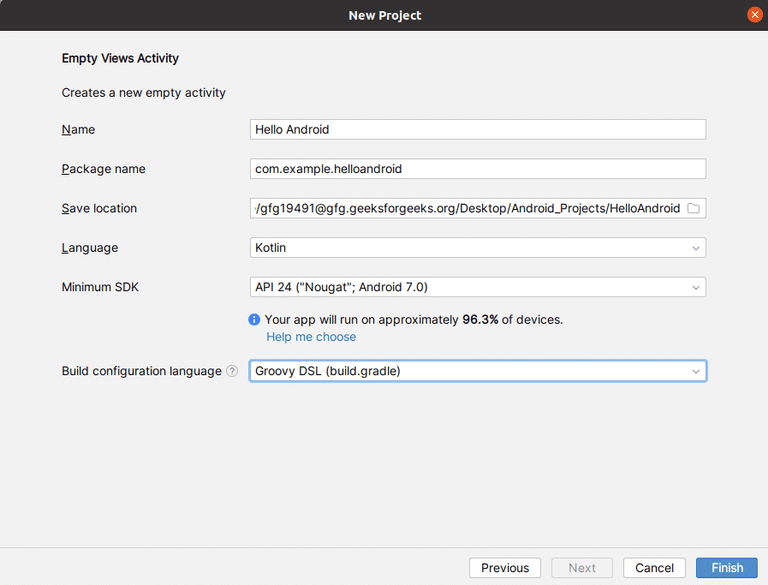
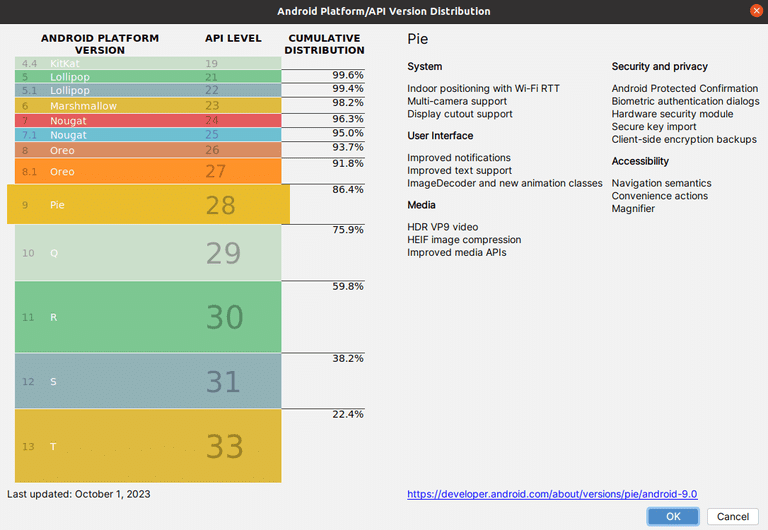
- Then select the Minimum SDK to choose the operating system which must be the least version to run your app. Here, "Nougat" is set as the Minimum SDK, and devices with versions lower than this OS will not be able to run your apps. Click on "Next".
In this step, we filled out the data as mentioned above.
- Name: The Name signifies the title of the application.
- Package Name: Automatically generated, the Package Name is crucial for importing programs within the application.
- Save Location: This denotes the specific storage area for the application.
- Language: Refers to the programming language utilized in developing the application.
- Minimum SDK: Represents the minimum Android version required to support the application.
- Build Configuration Language: Utilized for choosing the tool responsible for creating the .apk file, the final output of the application.
Paraphrased Explanation:
Name:
The 'Name' serves as the distinctive title identifying the application. For instance, in a photo editing app, the 'Name' could be "PhotoMaster".
Package Name:
The 'Package Name', an automatically assigned identifier, is essential for incorporating various programs into the application. For example, in a game app named "AdventureQuest", the 'Package Name' could be something like "com.adventurequest".
Save Location:
The 'Save Location' refers to the directory where the application is stored on the device. For instance, in a note-taking app, the 'Save Location' could be the 'Documents' folder on the user's device.
Language:
The 'Language' signifies the programming language used to develop the application. For example, in a web development app, the 'Language' could be HTML, CSS, and JavaScript.
Minimum SDK:
The 'Minimum SDK' indicates the lowest version of the Android operating system required to run the application. For instance, if an app needs Android 7.0 or higher to function, that would be its 'Minimum SDK'.
Build Configuration Language:
The 'Build Configuration Language' is employed to select the tool responsible for compiling the application into an .apk file. For example, in a game development app, the 'Build Configuration Language' could be set to Unity to create the final game output.
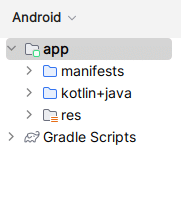
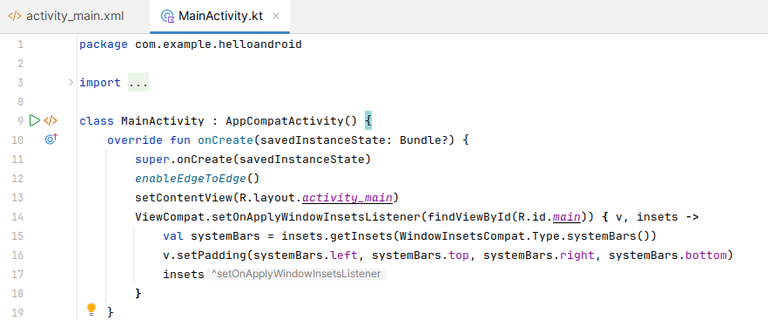
Step 3 (Final One): Then, a default App is Created with all default files.
And now you can begin writing the application code.
- Directory Structure of the Created Application:
- MainActivity.kt is the main Kotlin Program.
Click Here to Learn more about Android to Create Android Application Projects
Ready to start an exciting journey into the world of Android Development with Kotlin? It's time to make a change and dive into a fantastic learning experience with our Mastering Android Development with Kotlin From Beginner to Pro - Self Paced!
Please Login to comment...
LoginLike
How to Create/Start a New Project in Android Studio? - Software Development
,video lectures
,Previous Year Questions with Solutions
,mock tests for examination
,study material
,shortcuts and tricks
,ppt
,Important questions
,How to Create/Start a New Project in Android Studio? - Software Development
,Sample Paper
,Exam
,How to Create/Start a New Project in Android Studio? - Software Development
,practice quizzes
,MCQs
,past year papers
,Semester Notes
,Viva Questions
,Objective type Questions
,Free
,Extra Questions
,Summary
;


How to Create/Start a New Project in Android Studio? Free PDF Download
Importance of How to Create/Start a New Project in Android Studio?
How to Create/Start a New Project in Android Studio? Notes
How to Create/Start a New Project in Android Studio? Software Development Questions
Study How to Create/Start a New Project in Android Studio? on the App
|
© EduRev
|
Education Revolution
|


|


