Advance features of Word Processor (Part - II) Chapter Notes | Computer Studies Class 5 ICSE PDF Download

Introduction
In this chapter, we will learn more about the advanced tools in a word processor like MS Word 2016. These tools help us make our documents look better and more interesting. We will explore how to find and replace words, draw shapes, add WordArt, insert pictures, apply borders and shading, and even create a cover page. By the end of this chapter, we will know how to use these features to enhance our documents and make them attractive.
Finding and Replacing Text
In MS Word, we can search for a word or phrase and replace it with another word or phrase. The Find and Replace tools are in the Editing group of the Home tab.
Finding Text
Follow these steps to find text in Word document:
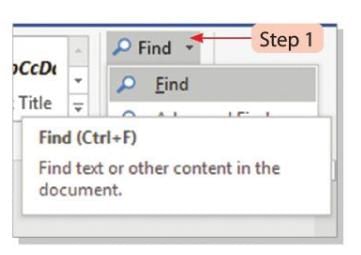
- Step 1: Click on the Find button in the Editing group of the Home tab.
- Step 2: A Navigation pane will appear on the left side of the document window.
- Step 3: Type the word you want to search in the Search document box. The Navigation pane will show the results with highlighted words.
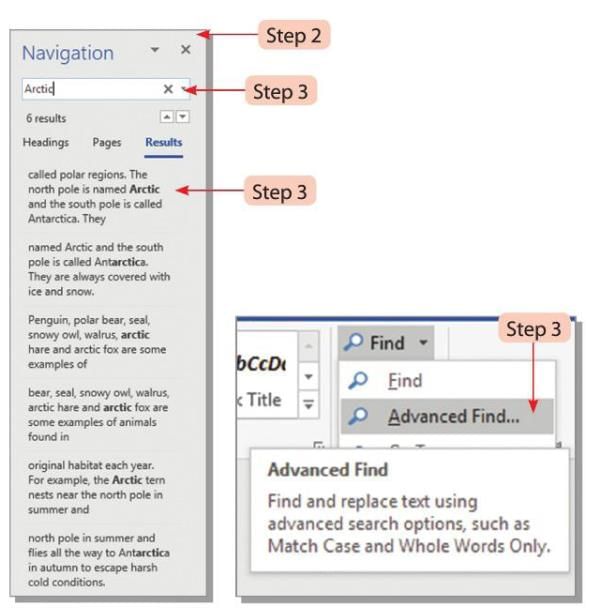
- Step 4: You can also click on the Advanced Find option from the drop-down menu of the Search document box. This opens the Find and Replace dialog box.
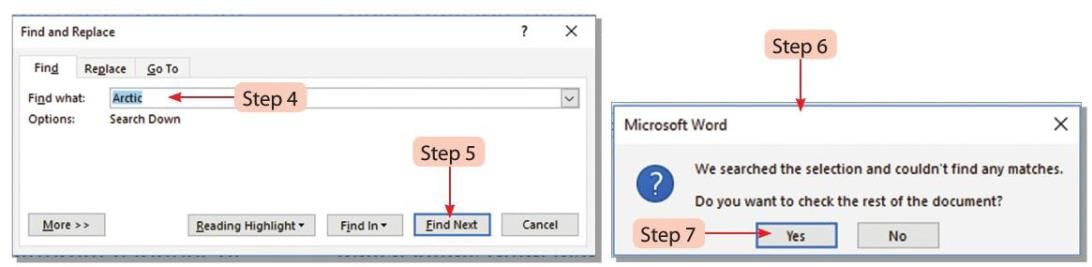
- Step 5: Type the word you want to search in the Find what box in the dialog box.
- Step 6: Click the Find Next button to move to the next occurrence of the word, which will be highlighted.
- Step 7: When the search is complete, a message will appear. Click Yes or No as needed.
Did You Know?
You can make your search more specific by clicking on the More button.
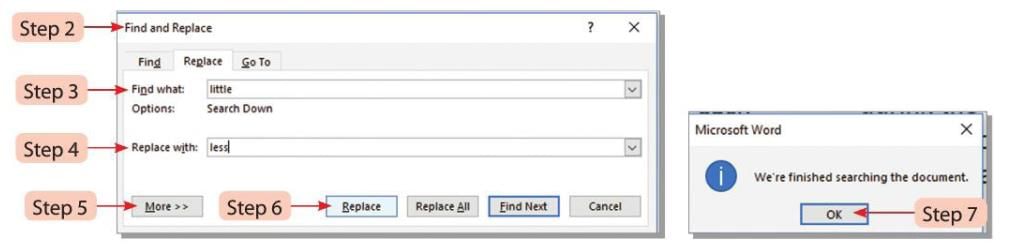
Replacing Text
Follow these steps to replace text with alternate text:
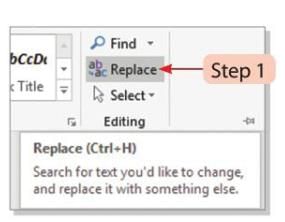
- Step 1: Click the Replace button in the Editing group of the Home tab.
- Step 2: The Find and Replace dialog box will open.
- Step 3: Type the word you want to search in the Find what box.
- Step 4: Type the new word to replace it with in the Replace with box.
- Step 5: Click the More button to see additional options if needed.
- Step 6: Click Replace to change only the current word, Replace All to change all occurrences, or Find Next to skip to the next occurrence.
- Step 7: A message will appear when the text is replaced. Click the OK button.
Did You Know?
The Replace All button changes all the searched text with the new text in the entire document.
Working with Shapes
We can draw different shapes like lines, basic shapes, block arrows, flowcharts, callouts, stars, and banners in Word 2016 to make the document look better.
Follow these steps to insert a shape in Word document:
- Step 1: Click the Shapes button in the Illustrations group of the Insert tab.
- Step 2: A drop-down menu will appear with different shapes.
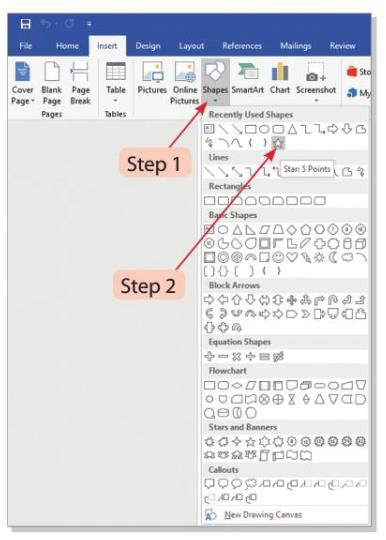
- Step 3: Select the shape you want and drag the pointer to draw it in the working area.
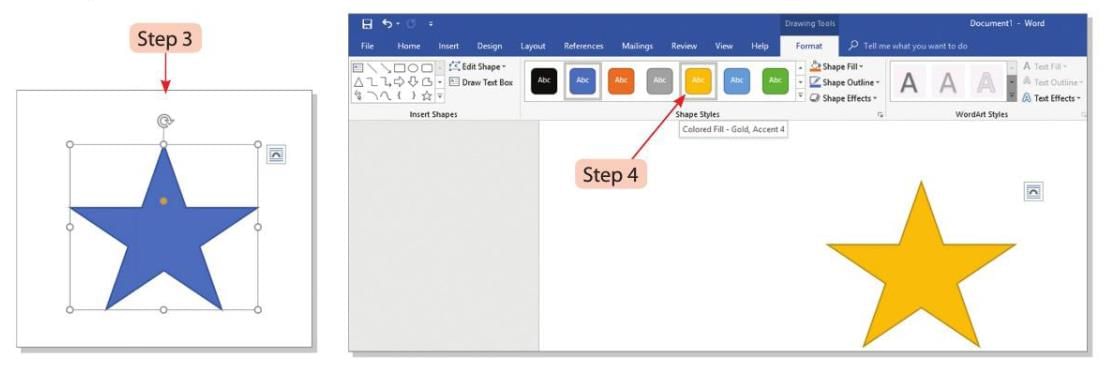
- Step 4: To add a style to the shape, select it and choose an option from the Shape Styles group of the Format tab.
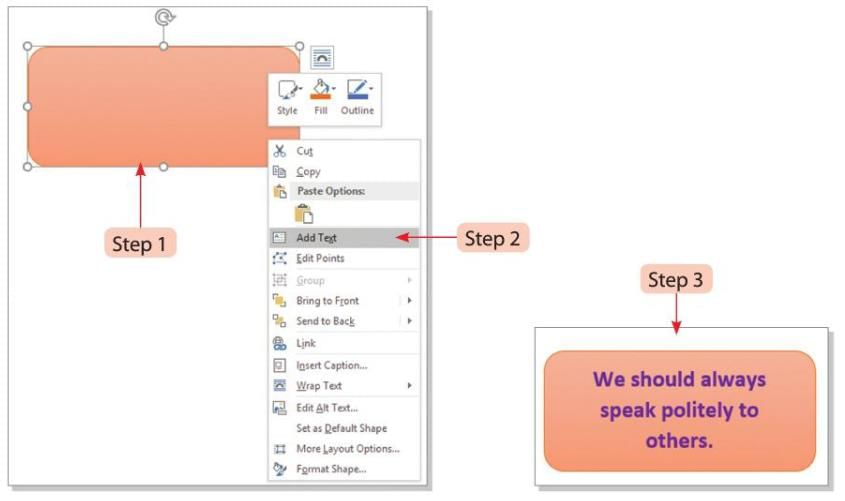
Placing Text in Shapes
Follow these steps to add text in a shape:
- Step 1: Select the shape and right-click on it.
- Step 2: Choose the Add Text option from the shortcut menu.
- Step 3: An insertion point will appear inside the shape where you can type the text.
Working with Drawing Tools
We can use drawing tools in Word to create shapes and format them. These tools help us make scenery or drawings in our document.
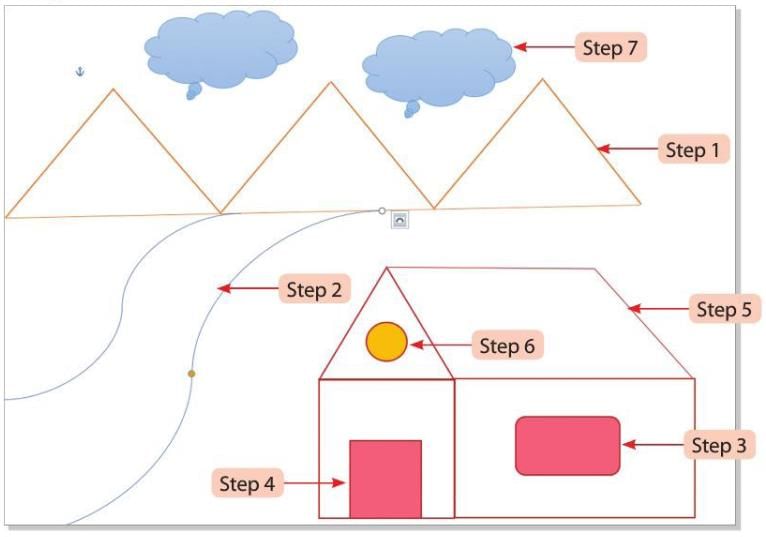
Follow these steps to use the Drawing toolbar and create a scenery:
- Step 1: Select the Line tool and draw the outlines of mountains.
- Step 2: Use the Connector: Curved tool to draw the outlines of a river.
- Step 3: Drag the Rectangle: Rounded Corners tool to draw a window inside a hut.
- Step 4: Drag the Rectangle tool to draw a door inside the hut.
- Step 5: Change the outline color of all parts of the hut to brown using the Shape Outline tool and selecting the color.
- Step 6: Use the Oval tool to draw a circle in the hut (for the sun or another object).
- Step 7: Use the Thought Bubble: Cloud tool to draw clouds in the scene.
Inserting WordArt
WordArt is a tool in MS Word that lets us add special effects like bending, twisting, shading, and rotating to text in our documents.
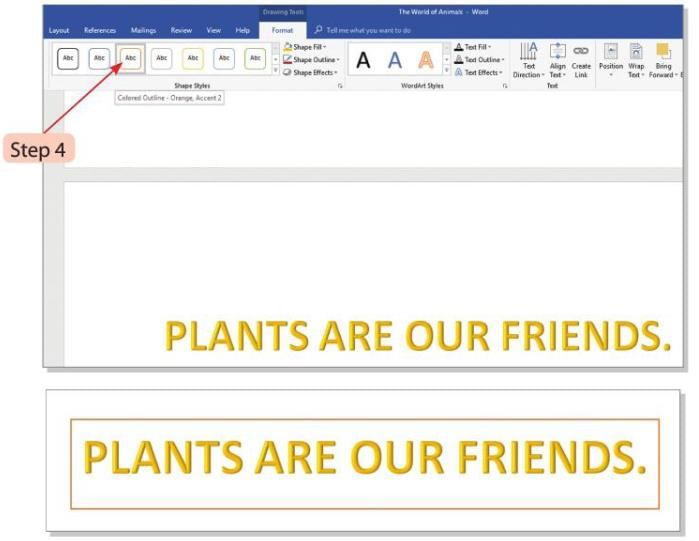
Follow these steps to insert WordArt:
- Step 1: Select the text you want to apply WordArt to.
- Step 2: Click the WordArt button in the Text group of the Insert tab. A WordArt box will open.
- Step 3: Select a WordArt style and click on it.

- Step 4: To change the style, select the WordArt and choose an option from the Shape Styles group of the Format tab.
Tip:
Bold typefaces like Arial, Arial Black, or Helvetica are good choices for WordArt.
Inserting Pictures
Pictures make a document more interesting. We can add pictures from the computer or the internet directly into a Word document.
Adding Picture from Computer
Follow these steps to add picture from a computer:
- Step 1: Place the cursor where you want to add the picture in the document.
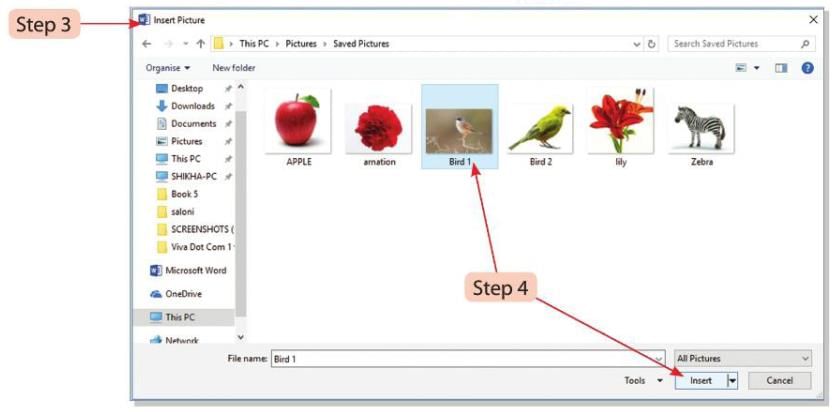
- Step 2: Click the Pictures button in the Illustrations group of the Insert tab.
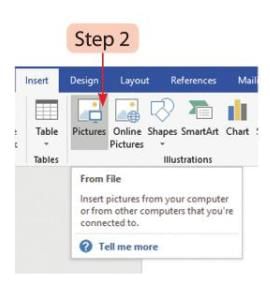
- Step 3: The Insert Picture dialog box will appear.
- Step 4: Select the picture you want and click the Insert button.
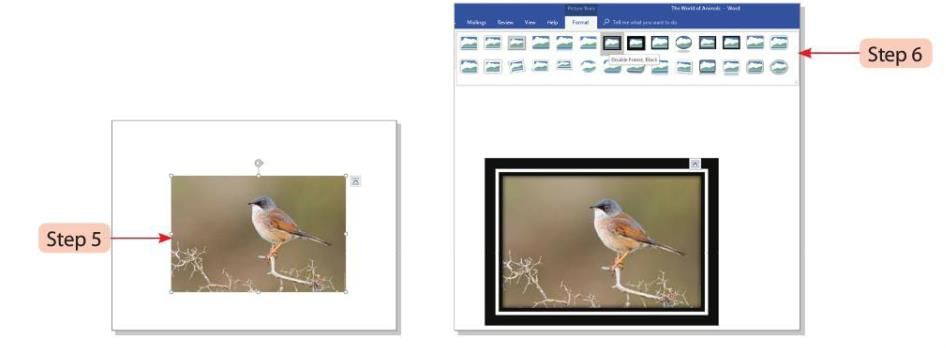
- Step 5: The document will show the selected picture.
- Step 6: Format the picture by selecting an option from the Picture Styles group of the Format tab.
Adding Online Pictures
Follow these steps to insert picture from the Internet:
- Step 1: Place the cursor where you want to insert the picture in the document.
- Step 2: Click on Online Pictures in the Illustrations group of the Insert tab.

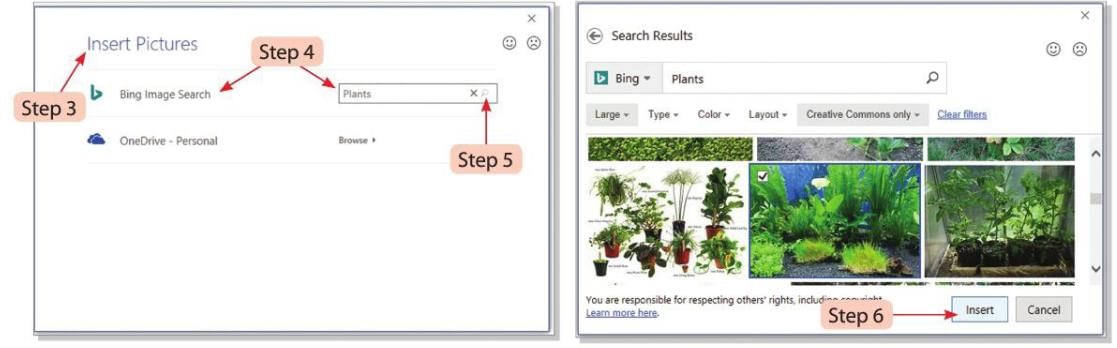
- Step 3: The Insert Pictures dialog box will open.
- Step 4: Type the item you want to search for in the Bing Image Search text box.
- Step 5: Click the Search button. You can also click the Search button directly to browse through categories of pictures.
- Step 6: Select the picture you like and click the Insert button.
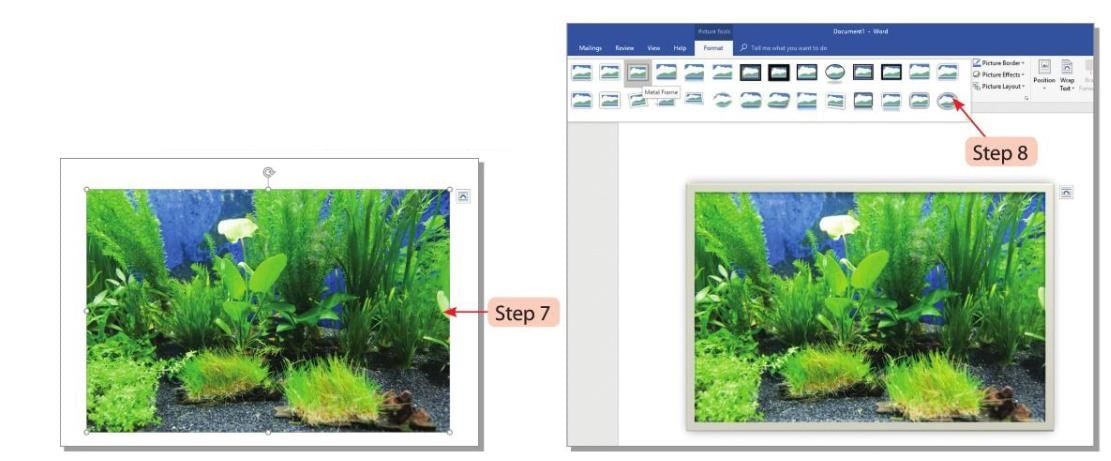
- Step 7: The document will display the selected picture.
- Step 8: Format the picture by selecting an option from the Picture Styles group of the Format tab.
Adding Watermark
A watermark is a faded symbol, design, text, or image in the background of a document. We can add a picture as a watermark.
Follow these steps to add watermark to a document:
- Step 1: Click the Watermark drop-down menu in the Page Background group of the Design tab.
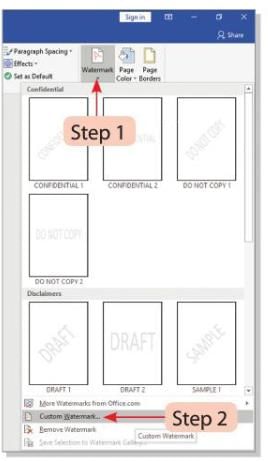
- Step 2: Select the Custom Watermark option.
- Step 3: The Printed Watermark dialog box will open.
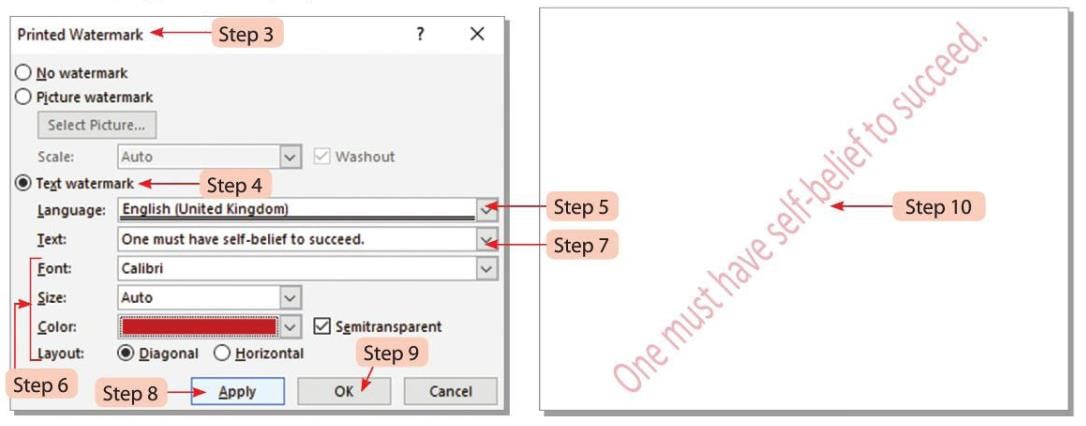
- Step 4: Click the Text watermark radio button.
- Step 5: Select the language from the Language drop-down menu.
- Step 6: Select the font style, size, color, and layout for the text.
- Step 7: Type the text you want to use as the watermark in the Text box.
- Step 8: Click the Apply button to see the watermark on the page.
- Step 9: Click the OK button.
- Step 10: The page will show the watermark.
Inserting Picture as Watermark
Follow these steps to insert a picture as watermark:
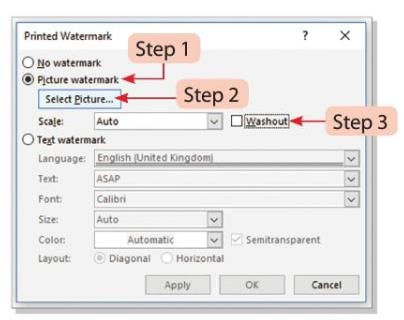
- Step 1: In the Printed Watermark dialog box, select the Picture watermark option.
- Step 2: Click the Select Picture button.
- Step 3: Make sure the Washout checkbox is deselected.
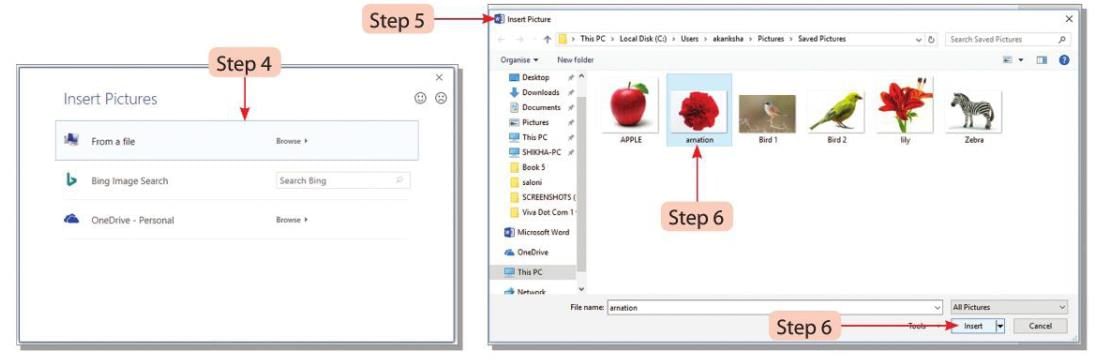
- Step 4: Choose the From a file option and click the Browse button.
- Step 5: The Insert Pictures dialog box will appear.
- Step 6: Select the picture to use as a watermark and click the Insert button.
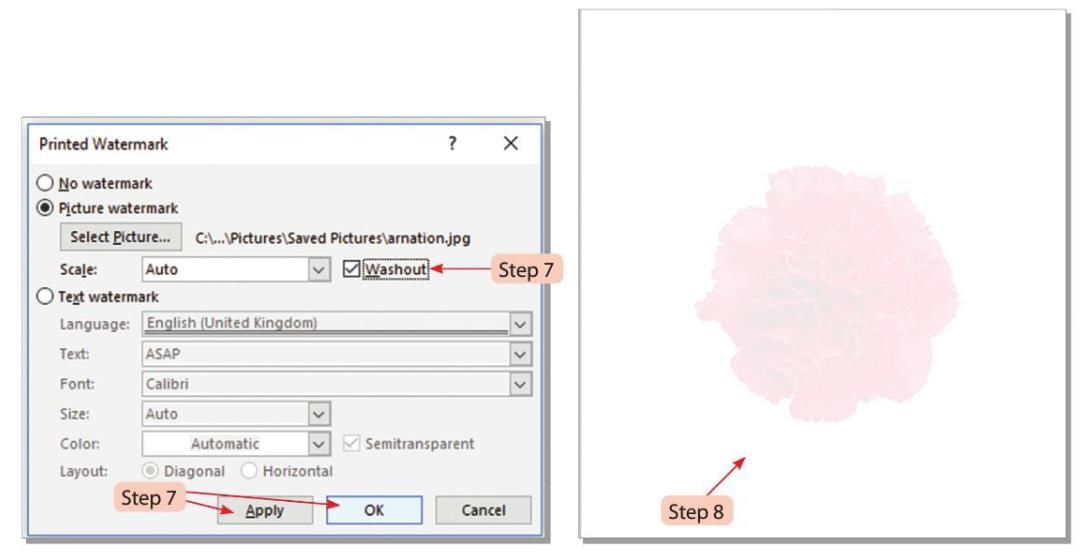
- Step 7: Lighten the picture by selecting the Washout checkbox. This will prevent the picture from interfering with the main text.
- Step 8: Click Apply and then the OK button. The page will show the selected picture watermark.
Applying Borders and Shading
We can add borders and shading effects to text in a document to make it look more attractive.
Follow these steps to apply borders and shading:
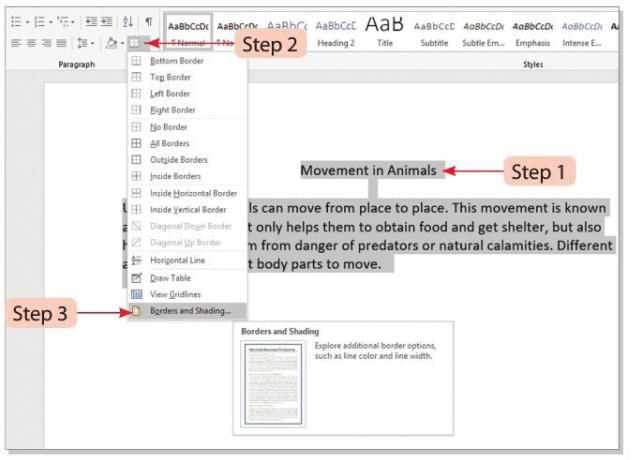
- Step 1: Select the text you want to add borders and shading to.
- Step 2: Click the drop-down arrow of the Borders button in the Paragraph group of the Home tab.
- Step 3: Select the Borders and Shading option from the list.
- Step 4: The Borders and Shading dialog box will open.
- Step 5: In the Setting section, choose the border style (like Box).
- Step 6: In the Style list box, select the line style for the border.
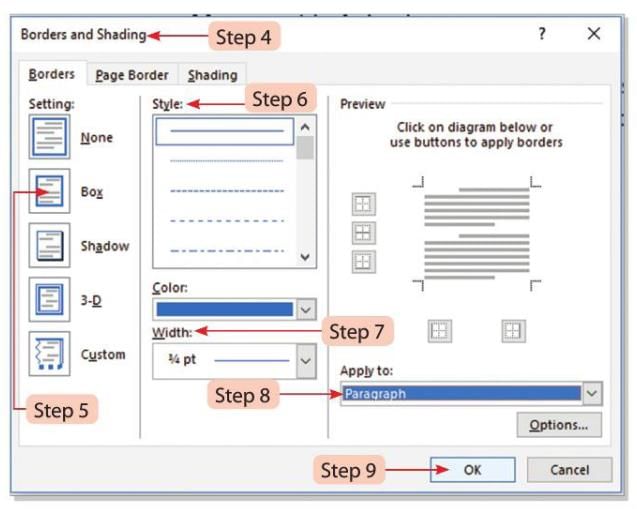
- Step 7: In the Width section, select the line width for the border.
- Step 8: In the Apply to section, click the drop-down list and select Paragraph.
- Step 9: Click the OK button.
- Step 10: To add shading, click the Shading tab in the Borders and Shading dialog box.
- Step 11: In the Fill box, select the desired shading color by clicking the drop-down arrow.
- Step 12: In the Patterns section, select a pattern style for the shading by clicking the Style drop-down arrow.
- Step 13: In the Apply to box, click the drop-down arrow and select Paragraph.
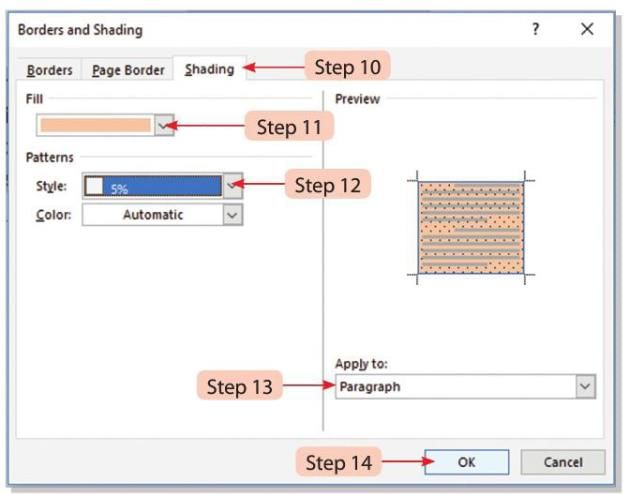
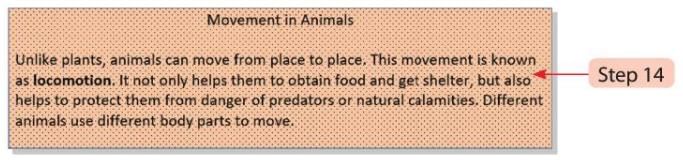
- Step 14: Click the OK button to see the changes.
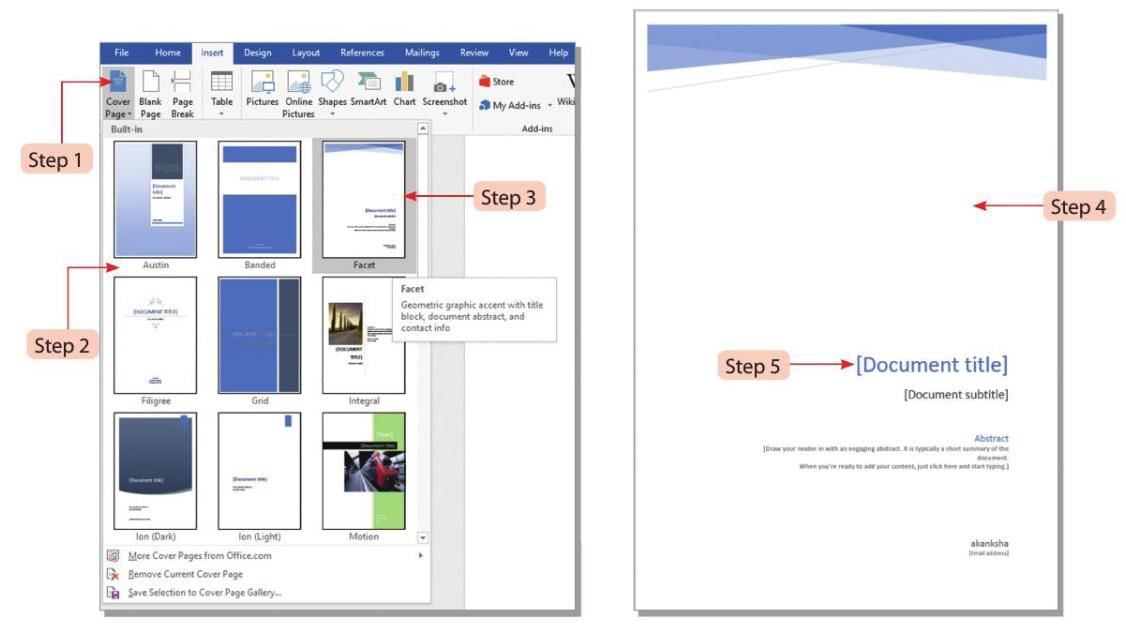
Inserting Cover Page
We can add a cover page to a Word document using a gallery of pre-designed cover pages.
- Step 1: Click the Cover Page option in the Pages group of the Insert tab.
- Step 2: A gallery of cover page layouts will appear.
- Step 3: Select the desired layout for the cover page.
- Step 4: The document will display the selected cover page layout.
- Step 5: You can type your own text, like the document title and subtitle, by clicking on the cover page area and replacing the sample text.
Points To Remember
- In Find and Replace, you can replace a word with another word using the Replace command.
- We can draw shapes like Lines, Basic Shapes, Block Arrows, Flowcharts, Callouts, Stars, and Banners in Word 2016.
- There are different options to format shapes in the Drawing toolbar.
- WordArt allows us to add special effects like bending, twisting, shading, and rotating text in documents.
- We can add pictures from the computer or internet directly into a Word document.
- We can apply Borders and Shading effects on text to make the document more attractive.
Glossary
- WordArt: A text-styling tool.
- Watermark: A faded impression of a symbol, design, text, or image in the background of a page.
|
21 docs|7 tests
|
FAQs on Advance features of Word Processor (Part - II) Chapter Notes - Computer Studies Class 5 ICSE
| 1. What are the steps to insert WordArt in a Word document? |  |
| 2. How can I add a watermark to my Word document? | |
| 3. What is the process of inserting a picture watermark? | |
| 4. How do I apply borders and shading to a Word document? | |
| 5. What is the procedure for inserting a cover page in a Word document? | |


Extra Questions
,Summary
,past year papers
,Free
,Advance features of Word Processor (Part - II) Chapter Notes | Computer Studies Class 5 ICSE
,ppt
,Advance features of Word Processor (Part - II) Chapter Notes | Computer Studies Class 5 ICSE
,Viva Questions
,Previous Year Questions with Solutions
,study material
,Important questions
,Advance features of Word Processor (Part - II) Chapter Notes | Computer Studies Class 5 ICSE
,Objective type Questions
,practice quizzes
,mock tests for examination
,video lectures
,Sample Paper
,shortcuts and tricks
,MCQs
,Exam
,Semester Notes
;


Chapter Notes: Advance features of Word Processor (Part - II) Free PDF Download
Importance of Chapter Notes: Advance features of Word Processor (Part - II)
Chapter Notes: Advance features of Word Processor (Part - II)
Chapter Notes: Advance features of Word Processor (Part - II) Class 5 Questions
Study Chapter Notes: Advance features of Word Processor (Part - II) on the App
|
© EduRev
|
Education Revolution
|


|


