Class 1 Exam > Class 1 Notes > Hands on Art & Craft > Activity: Create "Up" House by Fingerpainting
Activity: Create "Up" House by Fingerpainting | Hands on Art & Craft - Class 1 PDF Download
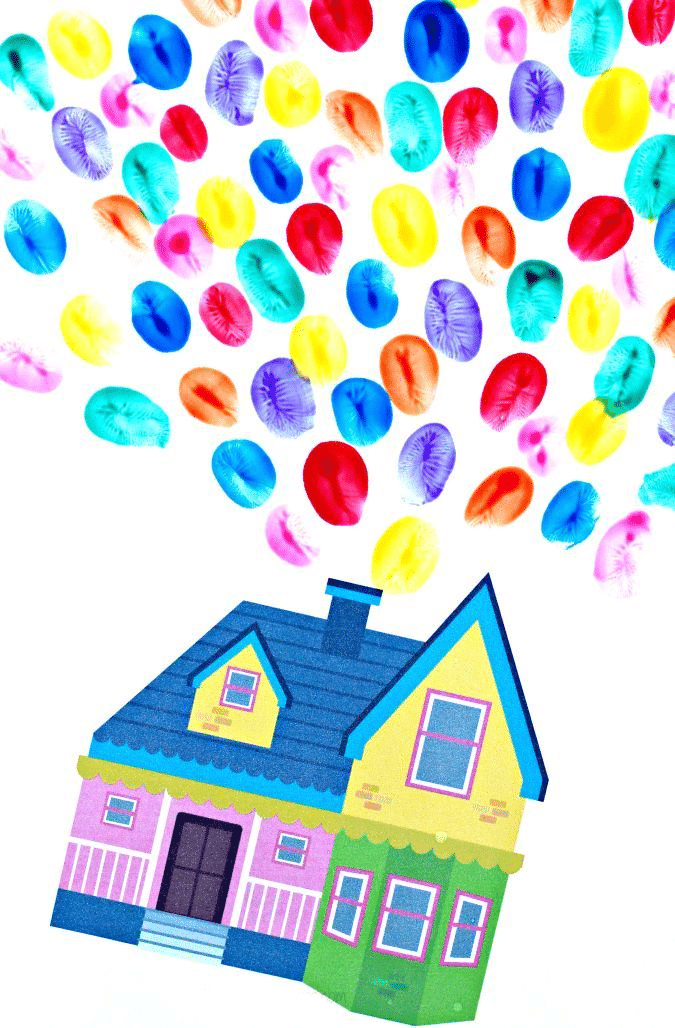
Fingerpainting can be a fun and creative way to make a picture of the house from the Disney movie "Up." Here's a step-by-step guide to help you get started:
Gather Your Supplies:
- Fingerpaints in various colors (you'll need a lot of blue for the sky, green for the grass, and a mix of colors for the house)
- Large sheets of paper or a canvas
- Water and paper towels for cleaning your fingers between colors
- Reference images of the house from the movie "Up" for inspiration
Prepare Your Workspace:
- Lay down a newspaper or a plastic tablecloth to protect your work surface.
- Make sure you have plenty of space to spread out your supplies.
Sketch an Outline (Optional):
- If you feel more comfortable, you can lightly sketch the outline of the house on your paper using a pencil. This can help guide your fingerpainting.
Start with the Background:
- Begin by fingerpainting the background. Use your fingers to spread blue paint across the top of the paper for the sky, and green paint across the bottom for the grass.
- Blend the colors together slightly where they meet to create a smooth transition.
Paint the House:
- Once the background is dry (if you're using thick paint, this might take a while), start fingerpainting the house itself.
- Use your fingers to dab and spread paint to create the shape of the house, paying attention to details like the windows, doors, and roof.
- Refer to your reference images to get the details as accurate as possible.

Add Details:
- Once the basic shape of the house is painted, you can add details like balloons, clouds, and trees around the house to make the scene more lively and reminiscent of the movie.
Let It Dry:
- Allow your fingerpainting to dry completely before handling or displaying it. This might take several hours depending on the thickness of your paint.
Optional Finishing Touches:
- If you'd like, you can add additional details with markers or colored pencils once the paint is dry to enhance the painting further.
Display Your Artwork:
- Once your fingerpainting is dry and complete, you can proudly display it in your home or share it with friends and family!
Remember, fingerpainting is all about having fun and being creative, so don't worry too much about making everything perfect. Enjoy the process and let your imagination guide you!
The document Activity: Create "Up" House by Fingerpainting | Hands on Art & Craft - Class 1 is a part of the Class 1 Course Hands on Art & Craft.
All you need of Class 1 at this link: Class 1
|
46 videos|161 docs
|
FAQs on Activity: Create "Up" House by Fingerpainting - Hands on Art & Craft - Class 1
| 1. How can I create the "Up" House by fingerpainting? |  |
Ans. To create the "Up" House by fingerpainting, you can start by sketching the outline of the house on a canvas or paper. Then, use your fingers to apply different colors to create the details of the house, such as the colorful balloons and intricate designs. Be creative and have fun with the process!
| 2. What materials do I need to fingerpaint the "Up" House? |  |
Ans. You will need fingerpaints in various colors, a canvas or paper to paint on, and some water and paper towels for cleaning your fingers in between colors. You may also want to use a pencil for sketching the outline of the house before you start fingerpainting.
| 3. How long does it take to create the "Up" House by fingerpainting? |  |
Ans. The time it takes to create the "Up" House by fingerpainting can vary depending on your skill level and the level of detail you want to include. On average, it may take a few hours to complete the painting, but it could be longer if you are adding intricate designs or textures.
| 4. Can I customize the "Up" House design while fingerpainting? |  |
Ans. Yes, you can definitely customize the "Up" House design while fingerpainting. Feel free to add your own creative touches, change the colors, or even add personal elements to make the painting unique to you. Fingerpainting allows for a lot of flexibility and creativity.
| 5. Is fingerpainting a suitable technique for beginners to create the "Up" House? |  |
Ans. Fingerpainting can be a great technique for beginners to create the "Up" House, as it is a fun and hands-on way to experiment with colors and textures. The forgiving nature of fingerpainting allows for mistakes to be easily corrected, making it ideal for those new to painting. Just let your creativity flow and enjoy the process!
Related Searches


