Lines and Angles Chapter Notes | Chapter Notes For Class 6 PDF Download
Introduction
Geometry begins with the simplest concepts: points, lines, rays, line segments, and angles. These fundamental ideas are the building blocks of plane geometry. Understanding them is essential as they lay the groundwork for exploring more complex topics, such as constructing and analyzing various shapes.Point
Think about making a tiny dot on your paper with a sharp pencil. The sharper the tip, the smaller the dot will be. This dot gives you an idea of what a point is in geometry. A point marks an exact spot, but it doesn't have any size—no length, width, or height—it's just a position.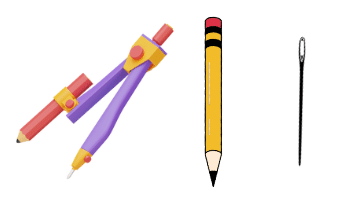
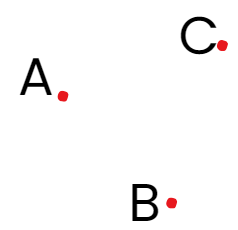
In geometry, we label points with capital letters like A, B, or C. These are referred to as "Point A," "Point B," and "Point C." While the dots you see are visible, in geometry, they represent precise locations that are imagined to be extremely small, almost invisible.
Line Segment
Imagine folding a piece of paper and then unfolding it. You will see a crease where the fold was made. This crease is like a line segment. A line segment has two endpoints, which can be marked as A and B. To understand this better, mark two points, A and B, on a piece of paper. Try connecting A to B using different routes.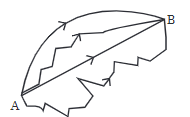
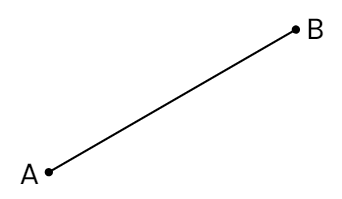
Now, think about which route is the shortest. The shortest path between A and B is what we call a line segment. This line segment includes both points A and B and is written as  . The points A and B are known as the endpoints of the line segment. The points at each end of the segment are called the endpoints.
Line
A line is like a line segment but extends infinitely in both directions. Imagine taking the line segment from A to B and extending it endlessly in both directions beyond A and B. This extended version is what we call a line.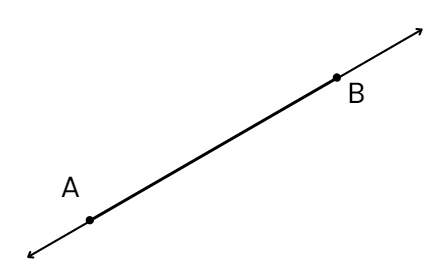 A line has no endpoints and goes on forever in both directions. That’s why you can never draw a complete picture of a line—it’s infinite!
 A line goes on forever in both directions, like an endless road. A line segment, however, is like a piece of that road—it has a clear starting and ending point.
Ray
A ray is like a line that starts at one specific point and keeps going forever in one direction. The point where it starts is called the starting point or initial point of the ray. 
For instance, the light from a flashlight or a beam from a lighthouse is similar to a ray—it starts at the source and keeps going. We represent a ray by its starting point and another point on the ray, like Ray  , where A is the starting point.
Angle
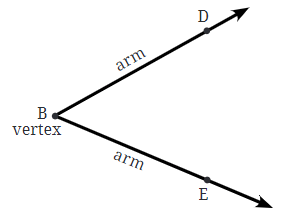
An angle is formed when two rays share a common starting point. For example, imagine if you have rays  that start from the same point B, they form an angle. The common point B is called the vertex of the angle, and the rays
  are called the arms of the angle.
Naming an Angle
- To name an angle, you can simply use the vertex, calling it "Angle B."
- However, to be more specific, you use a point from each arm along with the vertex.
- For instance, the angle formed by rays
 can be named Angle DBE or Angle EBD.
 - The symbol for an angle is "∠", so you can write it as ∠DBE or ∠EBD. It's important to remember that when naming the angle, the vertex (point B) is always written in the middle.
Real-Life Examples of Angles
Angles are everywhere in daily life:
- Compass/Divider: When you turn the arms of a compass, an angle is formed at the vertex where the arms join.
- Scissors: When you open the blades, they create an angle, with the point where they meet as the vertex.

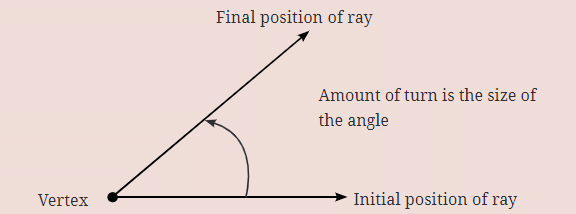
By observing these objects, you can see how angles are formed by the rotation or turning of one part in relation to another.
Comparing Angles
When you look at animals opening their mouths, you can actually see angles being formed by their jaws. Some mouths open wider than others, meaning they have larger angles.
Comparing angles by superimposition
- To compare two angles accurately, you can place one angle on top of the other, which is called superimposition. For this to work, make sure the vertices of both angles overlap exactly.
- After superimposing, it becomes easy to see which angle is smaller and which is larger. For example, if you place ∠PQR on top of ∠ABC and the arms don’t match up, it will be clear which angle is bigger.

Equal Angles
Now consider angles like ∠AOB and ∠XOY. How can you tell if they’re the same size?
- When comparing two angles, if the corners (vertices) match up perfectly and the arms (rays) overlap exactly, like OA overlapping with OX and OB overlapping with OY, it means the angles are equal in size.
- The reason these angles are considered equal is that if you think of each angle as being formed by rotating a ray, the amount of rotation needed to move one ray to the other is the same for both angles.
- From the superimposition point of view, if two angles are placed on top of each other, and their vertices and rays align perfectly, then the angles are equal in size.
Comparing Angles Without Superimposition
What if you don’t want to superimpose the angles directly? For example, imagine two cranes arguing about who can open their mouth wider.
You can:
- Use a transparent circle: Place it on one angle so that the center of the circle is at the vertex of the angle.
- Mark points on the circle where the arms of the angle pass through.
- Move the circle to the second angle: Align the vertex with the center of the circle and check where the arms pass through the circle.
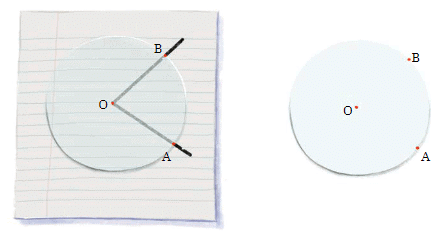
This method can help you determine which angle is larger without needing to physically overlap the angles. It’s a handy way to compare angles, especially when superimposition isn’t possible.
Making Rotating Arms
You can create rotating arms using simple materials like paper straws and a paper clip.
Follow these steps:
Step 1: Take two paper straws and a paper clip.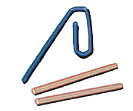 Step 2: Insert the straws into the two ends of the paper clip.
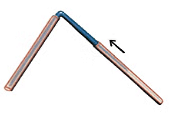 Step 3: Your rotating arm is ready!
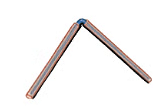 Now, make several rotating arms with different angles between the straws. Once you've made them, compare the angles by placing them on top of each other (superimposition) and arrange them from smallest to largest.
Passing through a slit
Let's do a fun activity with your rotating arms. First, gather several rotating arms with different angles, but don’t rotate them during the activity. Take a piece of cardboard and make a slit in the shape of one of your rotating arms by tracing and cutting out that shape. Now, shuffle and mix up all your rotating arms. Your task is to find out which of the rotating arms can pass through the slit. To do this, place each rotating arm over the slit and see if it fits.
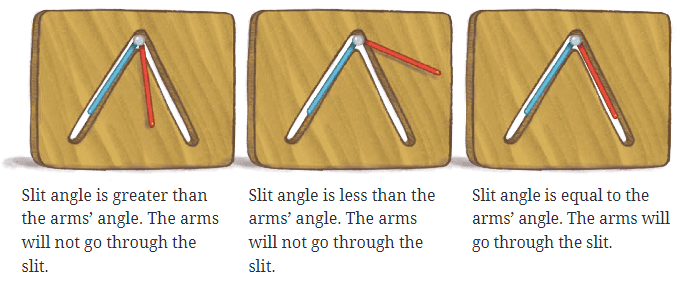 Only the rotating arm with an angle that matches the angle of the slit will pass through it. Remember, whether the arm fits through the slit depends on the angle, not the length of the arms (as long as they are shorter than the slit).
Special Types of Angles
Let’s explore some special types of angles with a different example.Straight Angle and Right Angle
Now, think about this straight angle, ∠AOB, where A and B are points on the door and wall, and O is the hinge. If you place a piece of string from the hinge (O) to the edge of the door (C), this string will divide the straight angle into two smaller angles, ∠AOC and ∠COB.
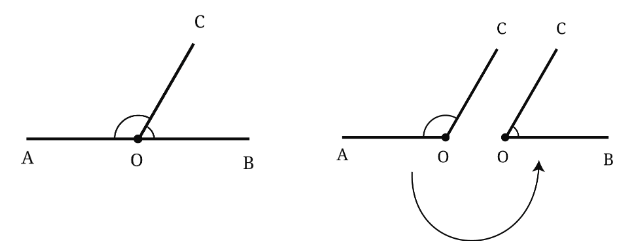
The question is: Can you place the string so that these two angles are equal?
Here’s how you can find out:
- Folding Paper: Imagine you have a piece of paper that you fold in half. The fold represents a line that divides a straight angle into two equal parts.
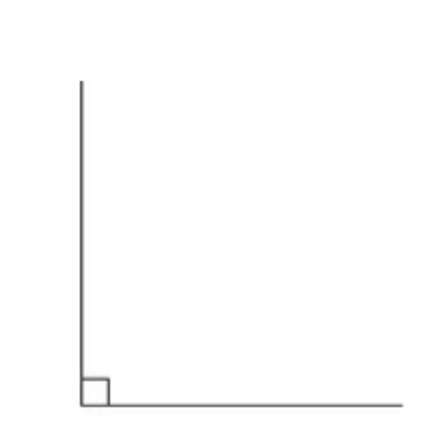
- Right Angles: The two equal angles formed are called right angles. A straight angle contains two right angles. When the door is opened to form a right angle with the wall, it looks like an ‘L’. This is half of a straight angle.
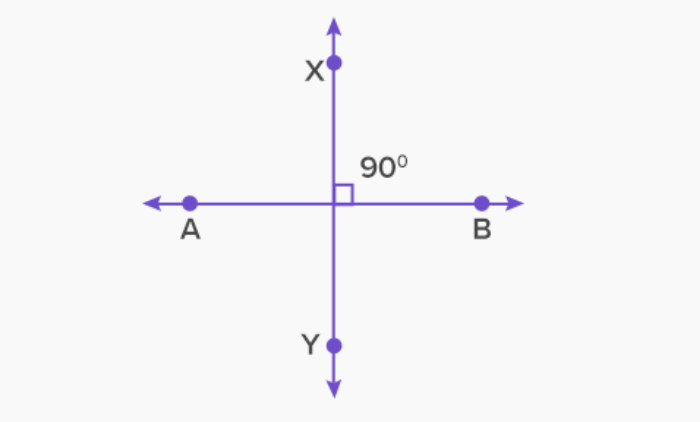
- Perpendicular Lines: If you attach a piece of string vertically from the ceiling to the floor, it will form a right angle with the floor, making the two lines perpendicular.
Classifying Angles
Angles can be classified into three main groups:
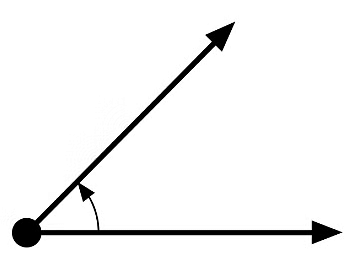
Acute Angles: These angles are less than a right angle. They’re sharp and narrow, like the angle formed when the door is barely open.
Right Angles: These are exactly equal to a right angle. The door forms a perfect 'L' shape with the floor when it’s halfway open.
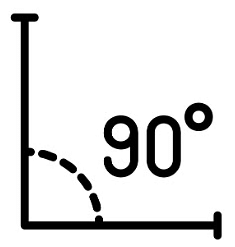
Obtuse Angles: These angles are greater than a right angle but less than a straight angle. They’re formed when the door is open wider but not completely in line with the wall.
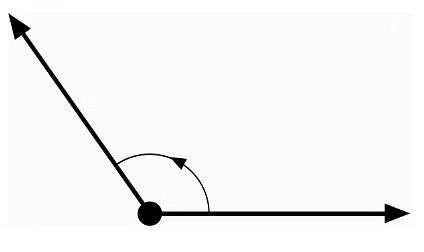 This example of the door helps to understand different types of angles and how they are classified based on how much they open or rotate.
- Straight Angle: An angle of exactly 180°. It looks like a straight line.
 For example, the corners of a piece of paper represent right angles, and the angles made by scissors when slightly open are acute angles.
Measuring Angles
To measure angles precisely, mathematicians divided the circle into 360 equal parts. Each part represents 1 degree, written as 1°. The idea is that the measure of an angle is simply the number of these 1° units that fit inside it.
For example:
- An angle that contains 30 of these units would have a measure of 30°.

Measures of Different Angles
- Full Turn: A full circle contains 360°. So, a full turn is 360°.
- Straight Angle: A straight angle is half of a full turn. Since a full turn is 360°, a straight angle is 180°.
- Right Angle: Two right angles together make a straight angle. Since a straight angle is 180°, a right angle is 90°.

For example, if you look at the hands of a clock, the angle between them at different times can be measured in degrees. At 3 o'clock, the angle between the hour and minute hands is a right angle (90°).
Why 360 Degrees?
But why 360°? The exact reason is a bit of a mystery, but there are several historical reasons:
- Ancient civilizations, like those in India, Persia, Babylon, and Egypt, used a year with 360 days in their calendars.
- The number 360 is practical because it can be divided evenly by many numbers (like 1, 2, 3, 4, 5, 6, 8, 9, 10, and 12), making it easier to split a circle into equal parts.
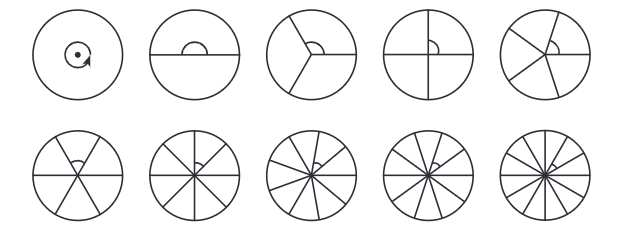 This divisibility is why 360° has been used for so long—it’s just really convenient!
Degree Measures of Angles
Measuring angles is a fundamental concept in geometry, and to do this accurately, we use a tool called a protractor. A protractor is either a full circle divided into 360 equal parts or a half-circle divided into 180 equal parts.
Using a Protractor
- Protractor Structure: A typical protractor has a straight angle at the center, divided into 180 units of 1 degree each. These units help you measure angles precisely.
- Reading the Protractor: Starting from the rightmost point, there are long marks for every 10 degrees and medium-sized marks for every 5 degrees. This makes it easier to count and measure angles.
There are two types:
Unlabeled Protractor: A protractor without numbers, showing only marks. You count the degree units from the markings to measure an angle. This requires you to carefully count each small mark to determine the angle.
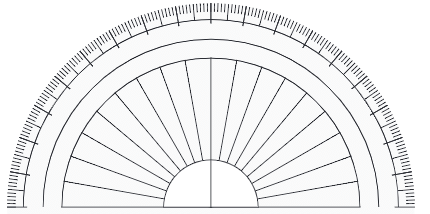
Labeled Protractor: A protractor with numbers marked, making it easier to measure angles. The numbers typically range from 0° to 180° in both directions (clockwise and counterclockwise).
Using a labeled protractor simplifies the process of measuring angles, as you can directly see the angle's degree measure.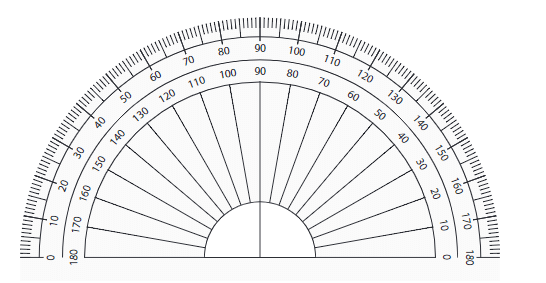
Measuring Angles with a Protractor
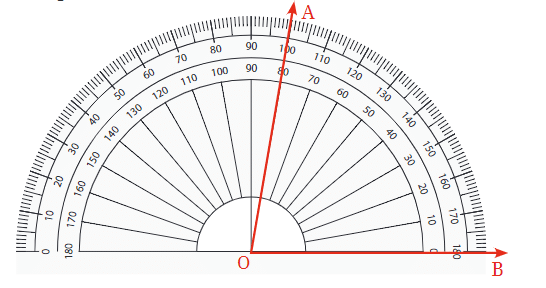
- Place the Protractor: Align the protractor so that its center is on the vertex of the angle.
- Align One Arm: Ensure that one arm of the angle passes through the 0° mark on the protractor.
- Read the Measure: The number on the protractor where the other arm passes through indicates the angle’s measure in degrees.
Creating Your Own Protractor
You can make a simple protractor using paper:
- Draw a Circle: Start by drawing a circle on a sheet of paper and cut it out.

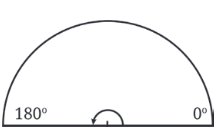
- Create a Semicircle: Fold the circle in half to get a semicircle. Mark the right corner as 0° and the left corner as 180°.
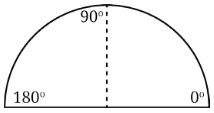
- Create a Quarter Circle: Fold the semicircle again to form a quarter circle. The top of the semicircle now represents 90°.
- Further Divisions: Continue folding to create smaller angles like 45°, 135°, etc. Each new fold bisects the angle, giving you precise measures.

Angle BisectorEvery time you fold the paper, you’re bisecting the angle, which means you’re dividing the angle into two equal parts. The line created by the fold is known as the angle bisector.
Mind the Mistake, Mend the Mistake!
When using a protractor, it’s easy to make errors. Here are some common mistakes and how to fix them:
Incorrect Placement:
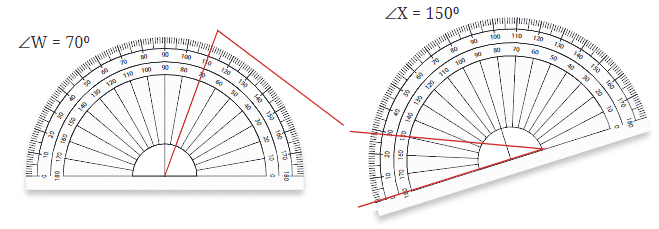
- Mistake: Not placing the protractor's center on the vertex.
- Fix: Ensure the center point of the protractor is exactly on the vertex.
Misalignment:
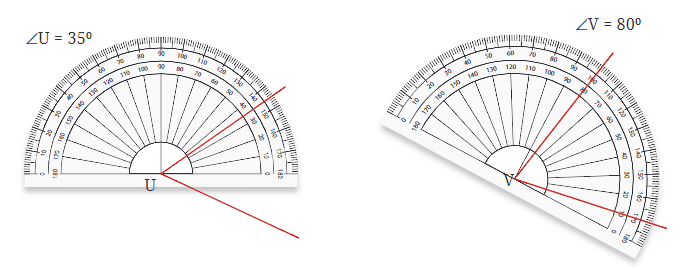
- Mistake: The baseline of the angle isn’t aligned with the 0° line.
- Fix: Align one arm of the angle with the 0° line on the protractor.
Wrong Scale:
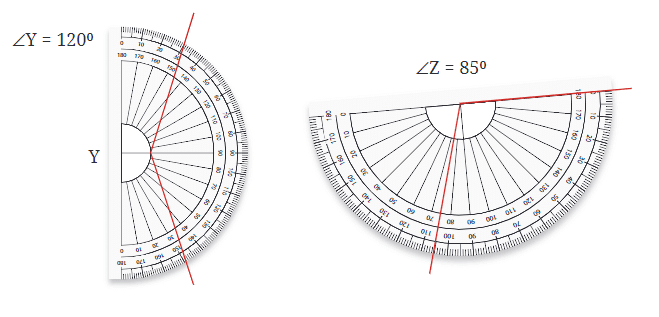
- Mistake: Reading the wrong scale (inner vs. outer).
- Fix: Use the correct scale based on the protractor’s alignment.
Drawing Angles
To measure ∠AOB using a protractor: To draw an angle with a specific degree measure, you can use a protractor.
For example, to draw a 30° angle:
- Draw a straight line, which will be one arm of the angle.

- Place the center of the protractor on one end of the line.
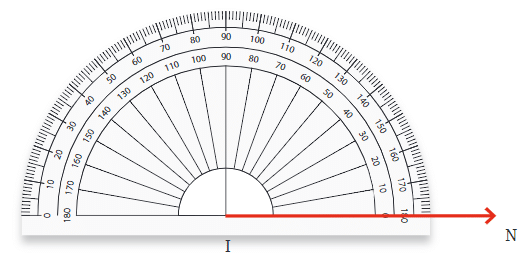
- Align the base of the protractor with the line.
- Find the 30° mark on the protractor and make a small mark on the paper.
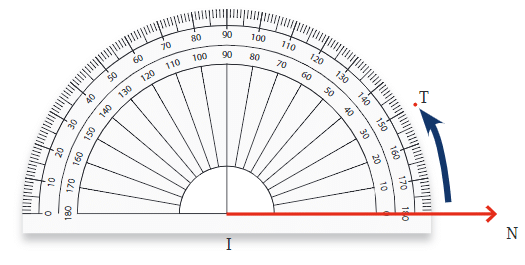
- Remove the protractor and draw a line from the end of the original line to the mark. This line forms the second arm of the angle, creating a 30° angle.
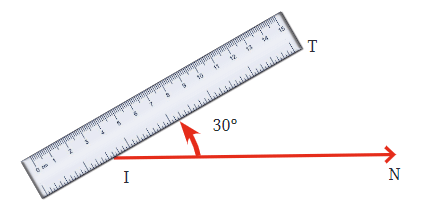
- This process helps you create precise angles that can be used in geometry and other mathematical applications.
Types of Angles and Their Measures
We've explored different types of angles, including straight and right angles. Let’s break down how other angles are measured:
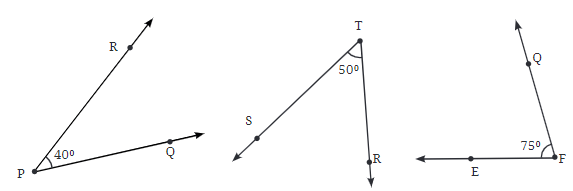
Acute Angle:
- An acute angle is smaller than a right angle, meaning it measures less than 90° but more than 0°.
- Example: An angle of 40° is an acute angle.
Obtuse Angle:
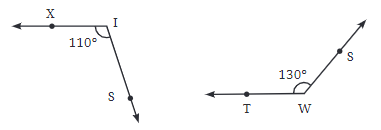
- An obtuse angle is larger than a right angle but smaller than a straight angle, so it measures more than 90° but less than 180°.
- Example: An angle of 130° is an obtuse angle.
Reflex Angle:
- A reflex angle is greater than a straight angle but less than a full circle. This means it measures more than 180° but less than 360°.

- A reflex angle is greater than a straight angle but less than a full circle. This means it measures more than 180° but less than 360°.
These types cover all possible angles based on their degree measures.
Key Points
- A point is a location with no size, represented by a dot, and labeled with a capital letter such as A, B, or C.
- A line segment is the shortest distance between two points, having two endpoints, and is denoted as AB or BA.
- A line extends infinitely in both directions, has no endpoints, and can be represented by two points or a single lowercase letter.
- A ray starts at one point and extends infinitely in one direction, denoted by the starting point and another point on the ray, like Ray AB.
- An angle is formed by two rays sharing a common starting point called the vertex, and is measured by the rotation from one ray to the other.
- Angles are measured in degrees (°), with a full circle being 360°, a straight angle being 180°, and a right angle being 90°.
- A protractor is a tool used to measure angles, with labeled protractors having marked degrees for easy reading, while unlabeled protractors require careful counting of degree units.
- An angle bisector is a line or ray that divides an angle into two equal parts, creating two angles of the same measure.
- Angles are classified into acute (less than 90°), right (exactly 90°), obtuse (greater than 90° but less than 180°), straight (180°), and reflex (greater than 180° but less than 360°).
Let's Practice!
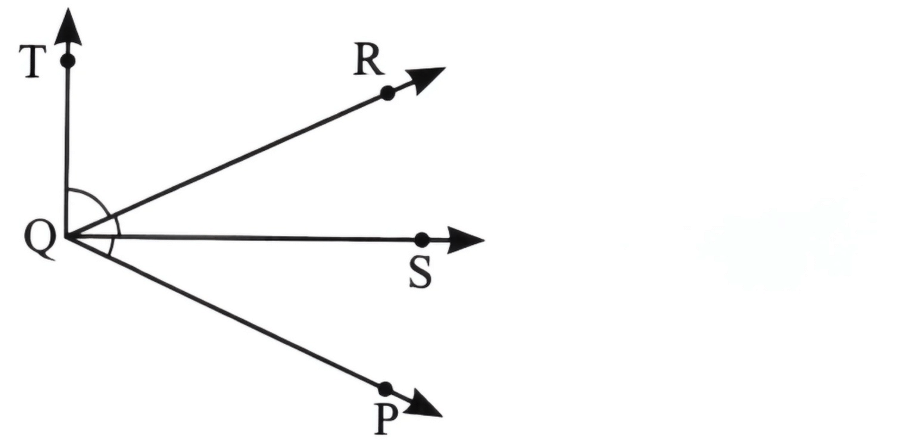
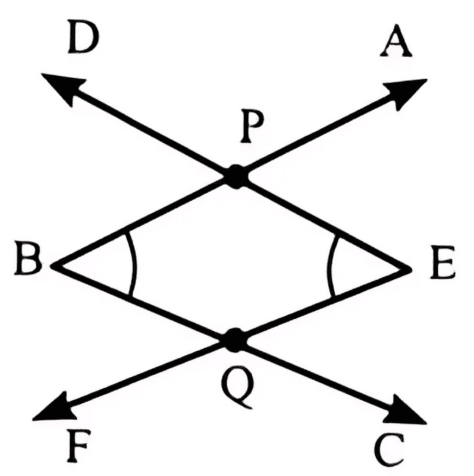
Question 1. Draw rough diagrams of two angles such that they have
(a) One point in common.
(b) Two points in common.
 View Answer
Answer: (a) In the figure below, ∠PQS and ∠RQT have one point Q in common.
 (b) In the figure below, ∠ABC and ∠DEF have two points P and Q in common.
FAQs on Lines and Angles Chapter Notes - Chapter Notes For Class 6
| 1. What is the difference between a line segment and a line? |  |
| 2. How do you measure angles accurately? |  |
| 3. What are special types of angles? |  |
| 4. How can I compare two angles to determine which is larger? |  |
| 5. What is a ray, and how is it different from a line? |  |


