Table Creation in Word | Computer - Class 5 PDF Download
Introduction:-
Dear Students, in this unit, we will learn about the tables in MS-word. First we are going to see “what is MS-word actually”
Microsoft Word or MS-WORD (often called Word) is a graphical word processing program that users can type with. It is made by the computer company Microsoft. The purpose of the MS Word is to allow the users to type and save documents. Similar to other word processors, it has helpful tools to make documents.
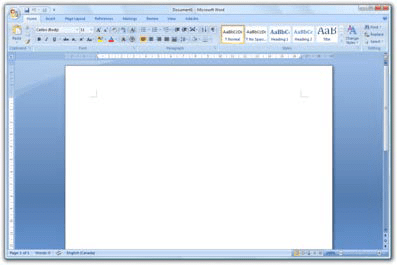 Microsoft Word 2007Students currently there are many version of MS-Word is available in the market like Office 2003, 2007. 2010, 2013 etc. here we are considering MS-word 2007 version.
1.1 Inserting Tables
In Microsoft Office Word 2007, you can insert a table by choosing from a selection of preformatted tables — complete with sample data — or by selecting the number of rows and columns that you want. You can insert a table into a document, or you can insert one table into another table to create a more complex table. There are 3 ways by which you can insert a table in the document and these 3 ways are as following:-
1.1.1 Selecting no of rows and Columns
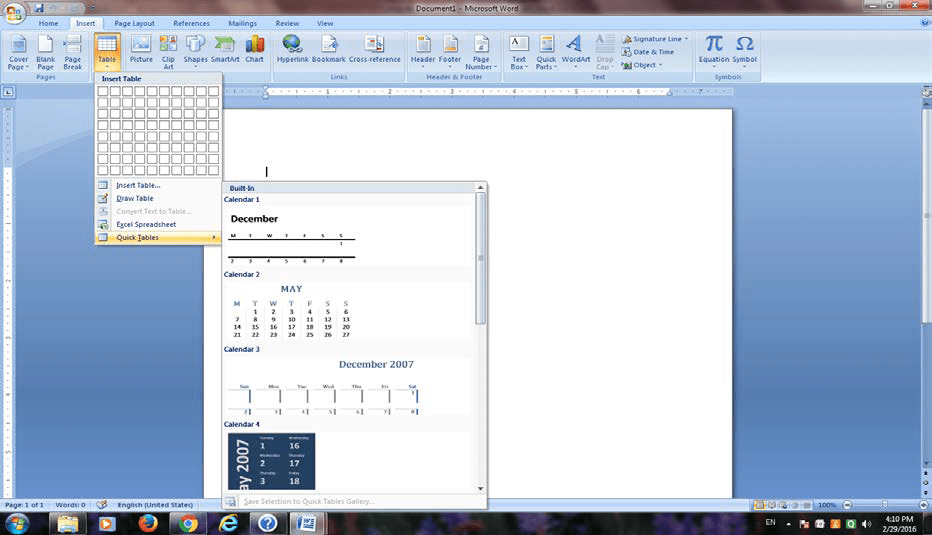
(i) Use table templates
You can use table templates to insert a table that is based on a gallery of preformatted tables. Table templates contain sample data to help you visualize what the table will look like when you add your data.
1. Click where you want to insert a table.
2. On the Insert tab, in the Tables group, click Table, point to Quick Tables, and then click the template that you want.
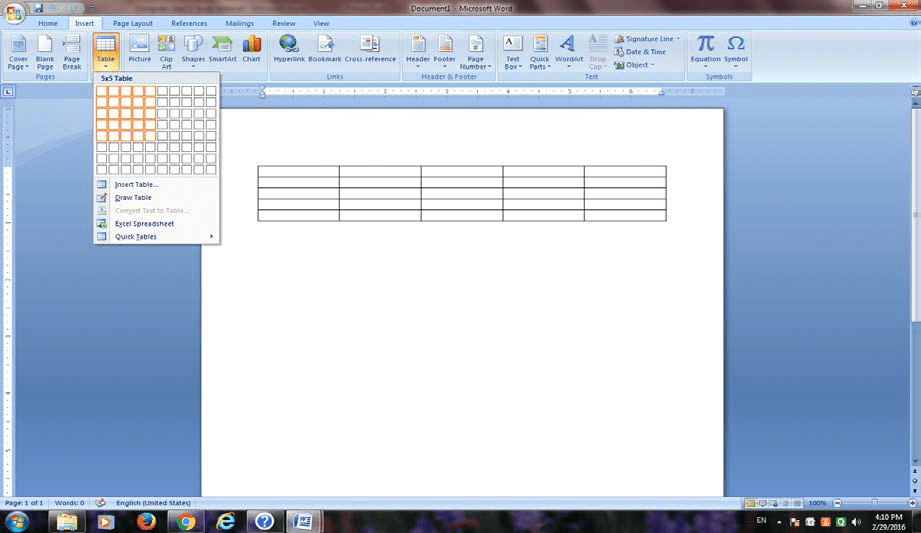
(ii) Use the Table menu
1. Click where you want to insert a table.
2. On the Insert tab, in the Tables group, click Table, and then, under Insert Table, drag to select the number of rows and columns that you want.
(iii) Use the Insert Table command
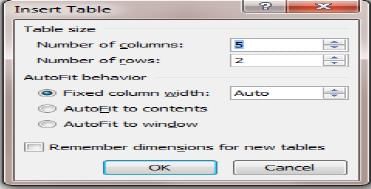
You can use the Insert Table command to choose the table dimensions and format before you insert the table into a document.
1. Click where you want to insert a table.
2. On the Insert tab, in the Tables group, click Table, and then click Insert Table.
3. Under Table size, enter the number of columns and rows.
4. Under AutoFit behavior, choose options to adjust the table size.
1.1.2 Inserting new row and Column:-
After inserting a table if you want to add/insert new row or new column then you can follow the following procedure:-
Add a row above or below
1. Click in a cell above or below where you want to add a row.
2. Under Table Tools, on the Layout tab, do one of the following:
- To add a row above the cell, click Insert Above in the Rows and Columns group.
- To add a row below the cell, click Insert Below in the Rows and Columns group
Add a column to the left or right
1. Click in a cell to the left or right of where you want to add a column.
2. Under Table Tools, on the Layout tab, do one of the following:
- To add a column to the left of the cell, click Insert Left in the Rows and Columns group.
- To add a column to the right of the cell, click Insert Right in the Rows and Columns group.

1.1.3 Merging the cells.
Merge (Combine/Join) cells
You can combine two or more table cells located in the same row or column into a single cell. For example, you can merge several cells horizontally to create a table heading that spans several columns.
1. Select the cells that you want to merge by clicking the left edge of a cell and then dragging across the other cells that you want.
2. Under Table Tools, on the Layout tab, in the Merge group, click Merge Cells.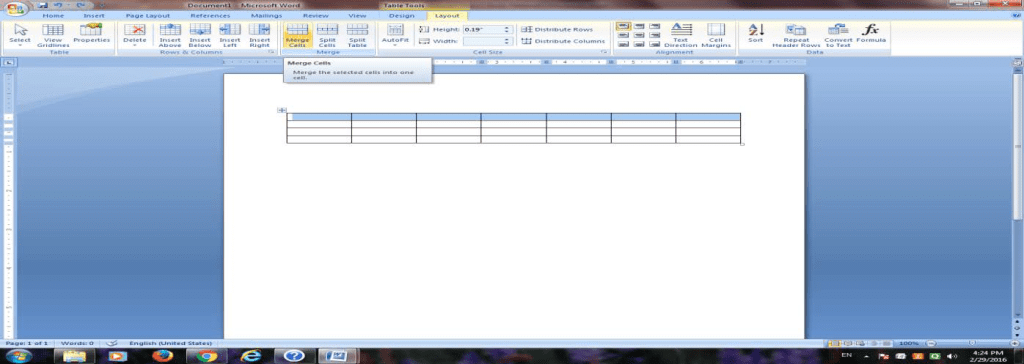
1.1.4 Filling the color in cells.
You can fill any color in a specific cell or group of cell to make it distinct from the other cell in the table by follow the following procedure;-
1. Select the cells that you want to fill with color by clicking the left edge of a cell and then dragging across the other cells that you want.
2. Under Table Tools, on the Design tab, click shading then select any color of your choice.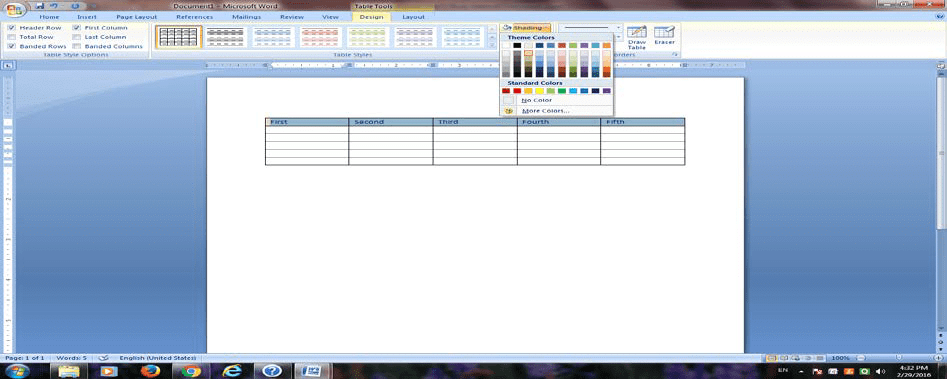
1.1.5 Alignment in the table (vertical and horizontal):-
Aligning text in columns and rows in Word is a matter of choosing how you want the text to line up vertically and how you want it to line up horizontally. Follow these steps to align text in a table:
1. Select the cells, columns, or rows, with text that you want to align (or select your entire table).
2. Go to the (Table Tools) Layout tab.
3. Click an Align button (you may have to click the Alignment button first, depending on the size of your screen).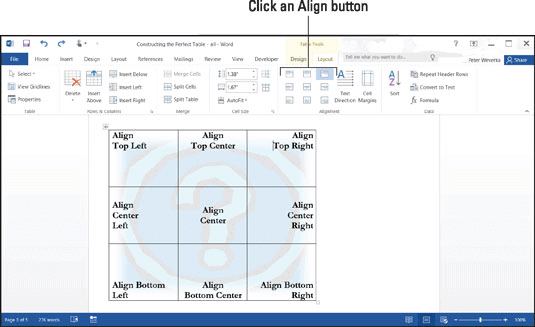
⇒Word offers nine ways to align text
1.1.6 Table borders:-
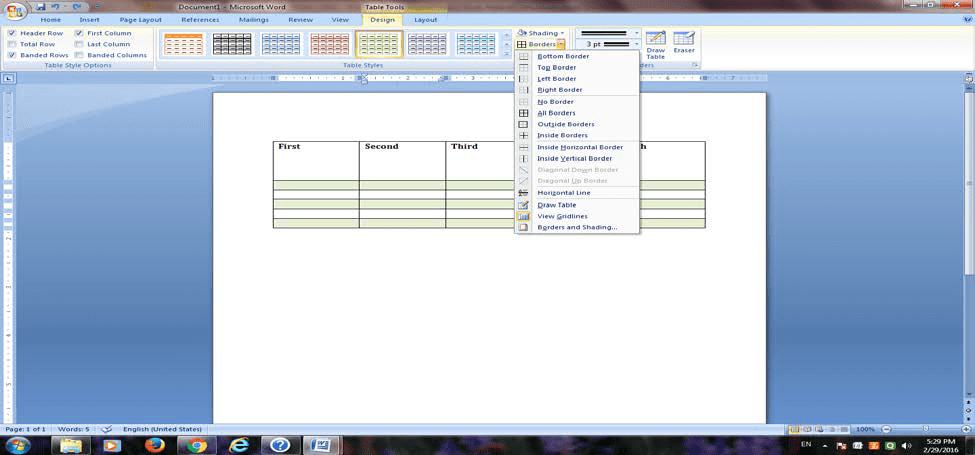
When you add a border to a picture, text, or page, you can make those elements in your document stand out. You can do the same with the tables in your documents. You can add a border to a table by using the Border Styles, you can design your own custom border, or you can apply a pre-designed table style.
Add table borders
1. Under Table Tools, click the Design tab.
2. In the Table Styles group, click Borders, and then do one of the following:
- Click one of the predefined border sets.
- Click Borders and shading, click the Borders tab, and then choose the options that you want.
Remove table borders from the whole table
1. Under Table Tools, click the Design tab.
2. In the Table Styles group, click Borders, and then click No Border.
1.2 Draw Table:-
You can draw a complex table — for example, one that contains cells of different heights or a varying number of columns per row.
1. Click where you want to draw the table.
2. On the Insert tab, in the Tables group, click Table.

Click Draw Table.
The pointer changes to a pencil. 14
4. To define the outer boundaries of the table, draw a rectangle.
5. Draw column and row lines inside the rectangle.
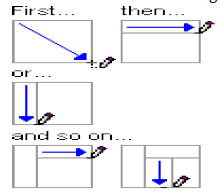
6. To erase a line or block of lines, under Table Tools, on the Design tab, in the Draw Borders group, click Eraser
7. Click the line that you want to erase. When you are finished, click Draw Table to ontinue drawing the table.
8. When you finish drawing the table, click in a cell and start typing or insert a graphic.
|
33 videos|30 docs|32 tests
|
FAQs on Table Creation in Word - Computer - Class 5
| 1. How do I create a table in Microsoft Word? |  |
| 2. Can I customize the appearance of the table in Microsoft Word? |  |
| 3. How can I add or delete rows and columns in a table? |  |
| 4. Is it possible to merge cells in a table in Microsoft Word? |  |
| 5. How can I resize a table in Microsoft Word? |  |


