Creating a Facebook Post | Canva for Beginners - Class 8 PDF Download
| Table of contents |

|
| Overview |

|
| Introduction to Canva |

|
| How to Find a New Photo on Canva |

|
| Publishing the Post |

|
Overview
This lesson will guide you through the process of creating a Facebook post using Canva, a popular graphic design tool. By following these steps, you will learn how to effectively design eye-catching social media images.
- Select a Layout: Start by browsing or searching through Canva's vast library of templates to find a layout that fits your message and style.
- Replace the Photo: You can upload your own photo or choose one from Canva's extensive collection of images to make your post visually appealing.
- Customize the Text: Modify the headings and body text to convey your message clearly and effectively.

By the end of this lesson, you will feel more confident in your ability to create engaging social media images that capture your audience's attention.
Introduction to Canva
- Canva provides a wide range of features for free, but they also offer a paid version called Canva Pro. The free version includes many design tools that are suitable for beginners, making it the best option to start with.
- If you decide to try Canva Pro, be aware that you will be automatically charged a monthly fee once the trial period ends.
Selecting a Template
When choosing a template on Canva, you have the option to either browse through the available templates or use the search bar to narrow down your choices. To use the search bar, simply type in one or more keywords related to your desired template.
Here are some suggestions for keywords you can use:
- Colour: Choose one or more colours that you like.
- Occasion: Look for templates related to specific events, such as sales or birthdays.
- Photo Content: Search for templates that already include photos related to your theme, such as dogs or flowers.
For example, if you are selling cupcakes at a bake sale, you can type "cupcakes" in the search bar to find templates that feature cupcake photos.
Selecting a Template
- Attracting Your Audience: Consider which template will catch the attention of your audience as they scroll through Facebook. For instance, if you want to appeal to kids and families, look for a template that resonates with them.
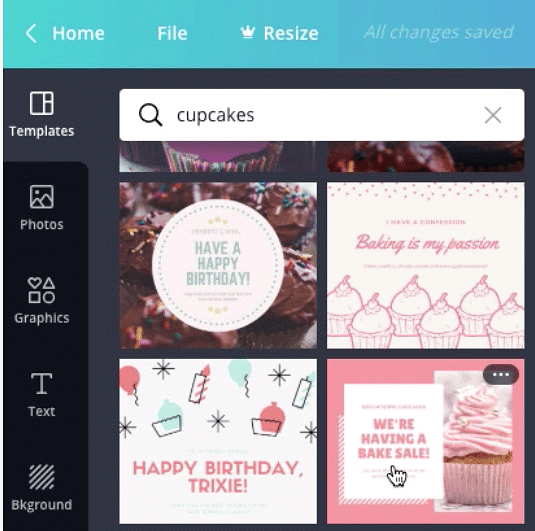
- Starting with a Template: Once you find a suitable template, click on it to get started. Canva's templates are designed to be visually appealing and easy to read, so you may not need to make significant changes.
How to Find a New Photo on Canva
There are two main options:
- Upload Your Own Photo. Click on "Uploads" to upload a file from your computer. Canva will store these photos for future use.
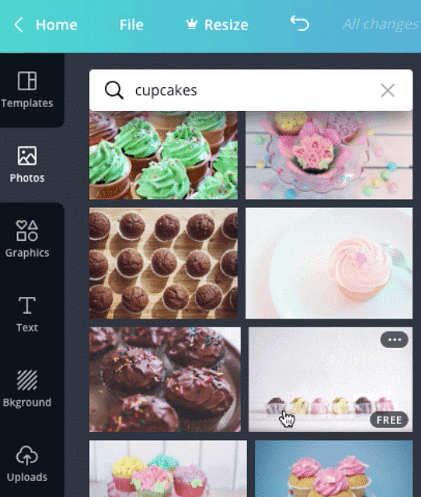
- Select a Canva Stock Image. Click on "Photos" and enter keywords in the search bar to find free and paid images.
This template includes a photo with a Canva watermark, indicating it is a paid image. You can either replace the photo with a free one or purchase the image, usually costing around one pound each. Since we are using the free version of Canva, we will replace it with a free image. To remove the photo, click the trash icon at the top of the page.
Searching for a Free Image
- To find a free image, use the search feature and type a single keyword for better results. For example, you can enter "cupcakes".
- Once you find an image you like, click on it to add it to your template.
Resizing the Photo
- When resizing, the image may get cropped to fit the new dimensions.
- For additional cropping options, click on Crop in the menu bar.

- Adjust the image position as necessary until it appears correctly.
 Once satisfied, click Done to save the adjustments.
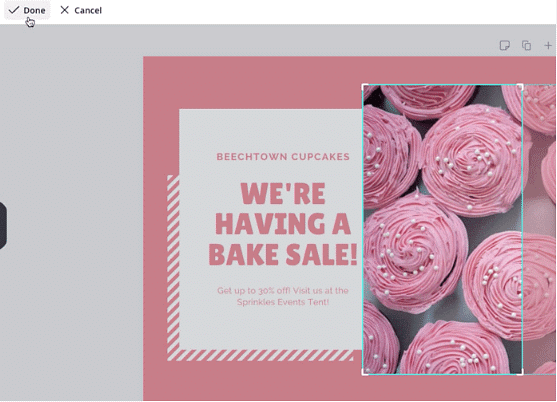
Reordering Elements
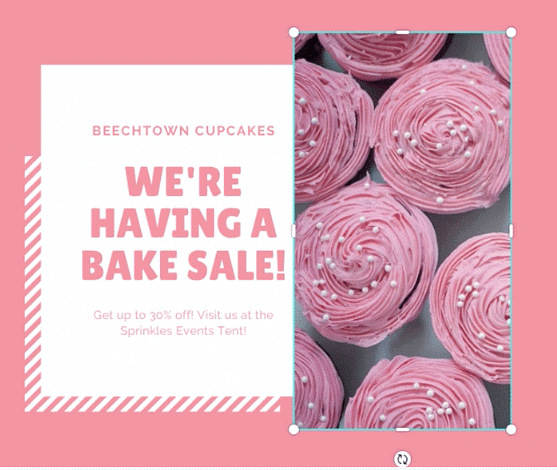
- To fix the issue, go to the menu bar, select the Arrange option, and choose Send Backward.
- This will move the photo behind the white rectangle, resolving the overlap problem.
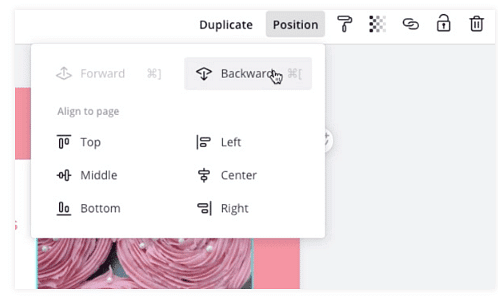

Customizing the Text
- You can adjust the font size to make sure the text fits well. In the menu bar, you can choose from the available font size options in the text editing tools or enter a specific value. For example, let's set it to 45.

- Change the text above and below the title to clearly identify the event organizer and explain the reason for raising funds. If you have more information to add, feel free to include it. For instance, there is some space below this text to inform people about the timing of the bake sale.
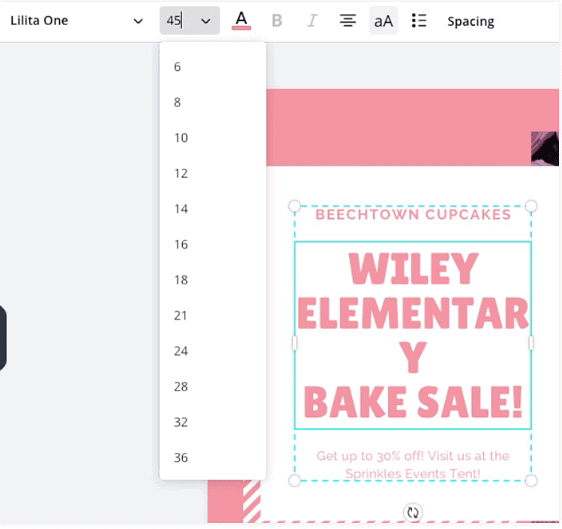
- Since many people view social media posts on their phones, it's better to keep the text short for easier reading.

- Once you finish, take a moment to review the post to ensure everything looks correct. If possible, ask someone else to check it as well.
Publishing the Post
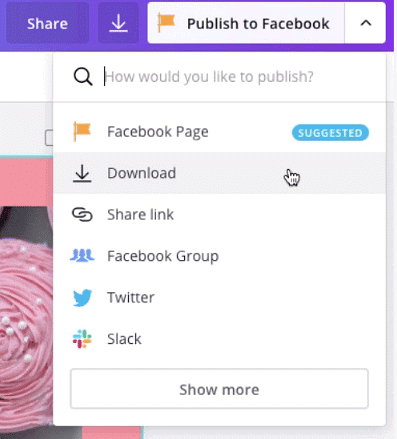
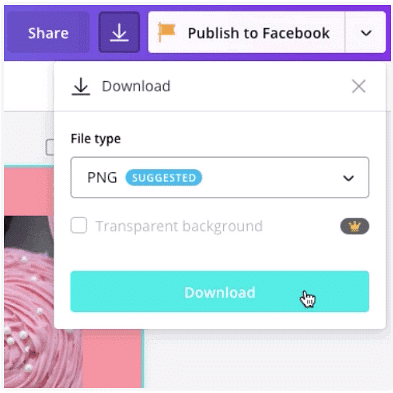
- Select File Type: After your design is ready, choose the file type. The recommended format for social media posts is PNG. Stick to this format for best results.
- Download: Click on Download to save your design.
- Accessing Your Designs: If you want to edit your design later or use it as a template, you can find it by clicking on 'All your designs' on the homepage.
Now that you know how to create a social media image in Canva, you’re ready to start on your own project. We encourage you to check out the homepage and experiment with creating different types of images.
|
4 videos|12 docs|4 tests
|
FAQs on Creating a Facebook Post - Canva for Beginners - Class 8
| 1. What is the importance of exams? |  |
| 2. How should I prepare for exams effectively? |  |
| 3. How can I manage exam stress? |  |
| 4. Are exams the only way to assess a student's knowledge? |  |
| 5. What should I do if I feel unprepared for an exam? |  |


