Playing with Constructions Chapter Notes | Mathematics for Class 6 PDF Download

Introduction
Imagine being able to create perfect shapes just by using a ruler and a compass! In this chapter, you will become a geometry expert as you learn to draw circles, squares, rectangles, and even more fascinating figures. Step by step, you'll discover the secrets behind these constructions and see how simple tools can help you make precise designs. By the end of this chapter, you'll have the skills to draw these shapes on your own with confidence. So, get ready to explore the magic of geometry!
Artwork
Understand how to draw freehand figures and then use geometric tools to replicate these figures more accurately.

Key Concepts
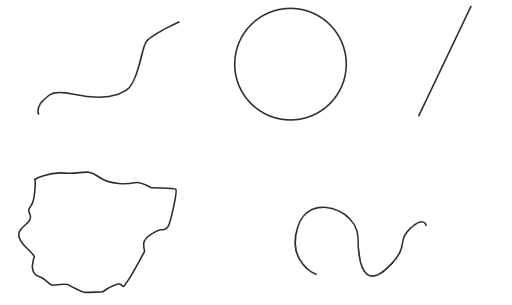
- Curves and Lines:Curves include any shape that can be drawn on paper, such as straight lines, circles, and other figures.
- Using a Compass:A compass is used to draw circles and arcs. By marking a point and adjusting the compass to a specific length, we can draw a circle with that point as the center.
Example
Mark a point on your notebook. 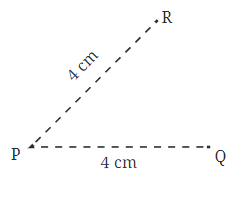
Now, use a compass to mark points that are 4 cm away from P in different directions.
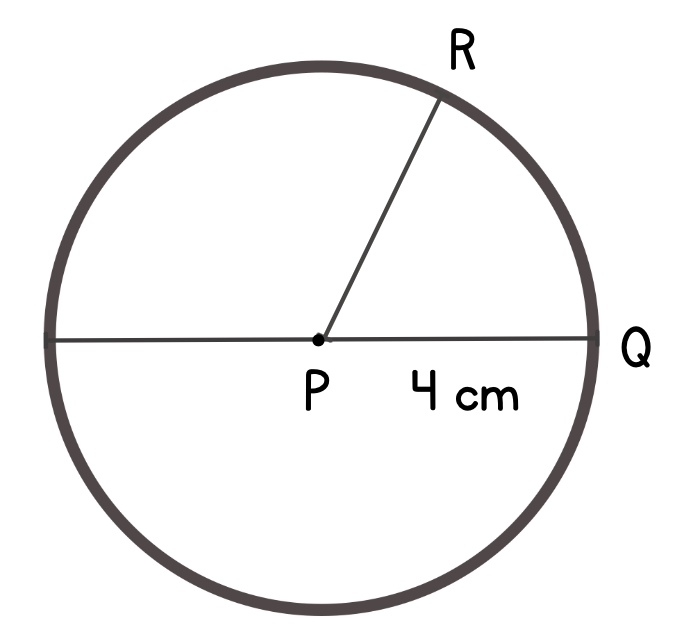
Join these points to form a circle. Here, 'P' is the centre,and the distance (4 cm) is the radius of the circle.
Squares and Rectangles
Understanding Rectangles
- Rectangle ABCD: Let's take a closer look at a rectangle named ABCD.
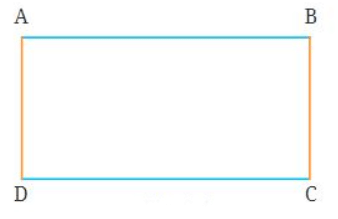
- Corners and Sides: The points A, B, C, and D are the corners of the rectangle. The lines AB, BC, CD, and DA are its sides. The angles at these corners are called ∠A, ∠B, ∠C, and ∠D.
- Opposite Sides: The sides AB and CD are called opposite sides because they are across from each other. Similarly, AD and BC form another pair of opposite sides.
Properties of Rectangles
- Opposite Sides: In a rectangle, opposite sides are equal in length.
- Angles: All angles in a rectangle are 90 degrees.
Naming Rectangles
- The rectangle in the picture is named ABCD, but it can also be called BCDA, CDAB, DABC, ADCB, DCBA, CBAD, and BADC.
Valid Naming
- A rectangle can be named using any combination of the corner labels, but not all combinations are allowed.
- For example, names like ABDC or ACBD are not valid.
- A valid name must list the corners in the order you travel around the rectangle, starting from any corner.
Understanding Squares
Just like in a rectangle, the corners and sides of a square are defined in the same way.
 Properties of a Square: A square has two key properties:
- All sides are equal in length.
- All angles are 90 degrees.
Rotated Squares and Rectangles
When we rotate a square piece of paper, we want to see if it still remains a square.

Let's check the properties:
- Are all the sides still equal? Yes, they are.
- Are all the angles still 90 degrees? Yes, they are.
Rotating a square does not change the lengths of its sides or the measures of its angles. Since the rotated figure still meets the properties of a square, it is still a square.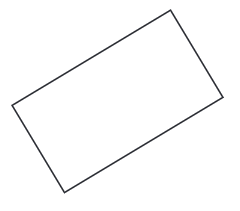
Similarly, when we rotate a rectangle, it remains a rectangle for the same reasons.
Constructing Squares and Rectangles
Squares and rectangles are everywhere around us! In this section, we’ll learn how to draw them accurately using a ruler and a compass. With simple steps, we’ll ensure perfect sides and right angles. Let’s get started!
Let's understand the Construction of Squares and Rectangles with the help of Example
How to Construct a Square with a Side Length of 6 cm?
Follow these steps to construct a square with each side measuring 6 cm:
Step 1:Create a square PQRS with a side length of 6 cm.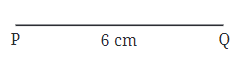
Step 2:At point P, draw a perpendicular line to PQ.
Step 3: Method 1:Using a ruler, mark point S on the perpendicular line such that PS = 6 cm.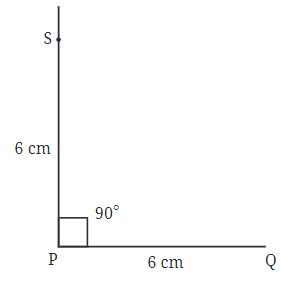
Method 2: You can also use a compass to measure PS.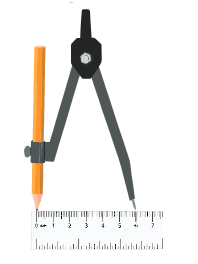
Step 4:Draw a perpendicular line to line segment PQ at point Q.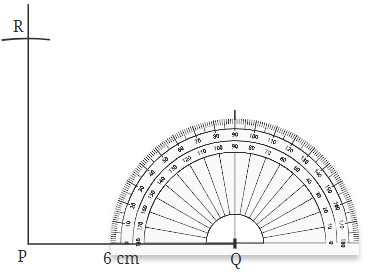
Step 5:If using a compass, the next point can be easily marked with it.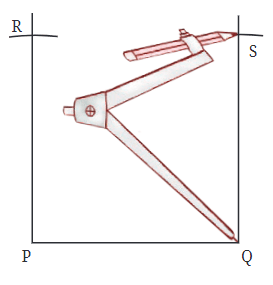
Step 6:Complete the square by ensuring all sides are equal.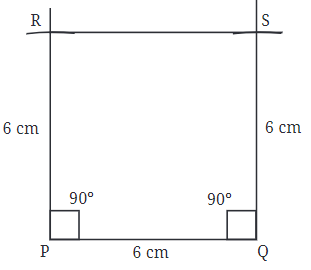
An Exploration in Rectangles
A rectangle is a four-sided shape where opposite sides are equal in length, and all four angles are right angles (90 degrees). Imagine you have a piece of paper in the shape of a rectangle. The longer sides are usually called the length, and the shorter sides are called the width.
Understanding with Examples
Draw a rectangle ABCD where side AB = 7 cm and side BC = 4 cm.
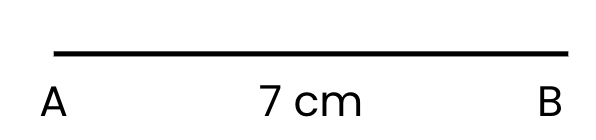
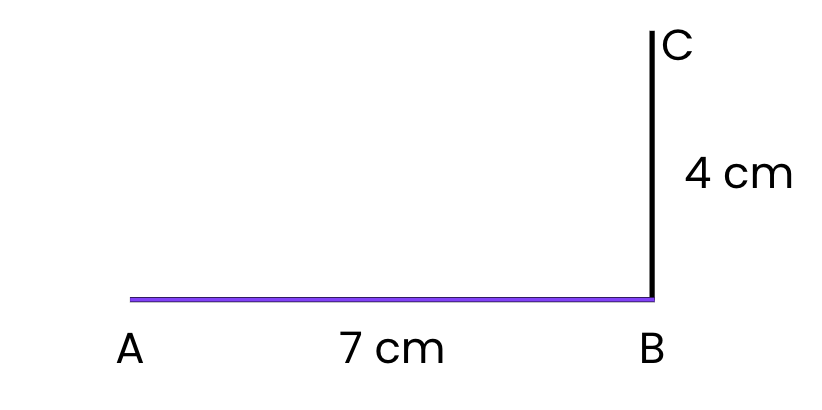
Step 1: Draw Side AB (7 cm):
- Use your ruler to draw a straight horizontal line.
- Mark point A at the start and point B at 7 cm. This is side AB = 7 cm.
Step 2: Draw Side BC (4 cm):
- From point B, use your ruler to draw a vertical line upwards.
- Measure 4 cm and mark point C. This is side BC = 4 cm.
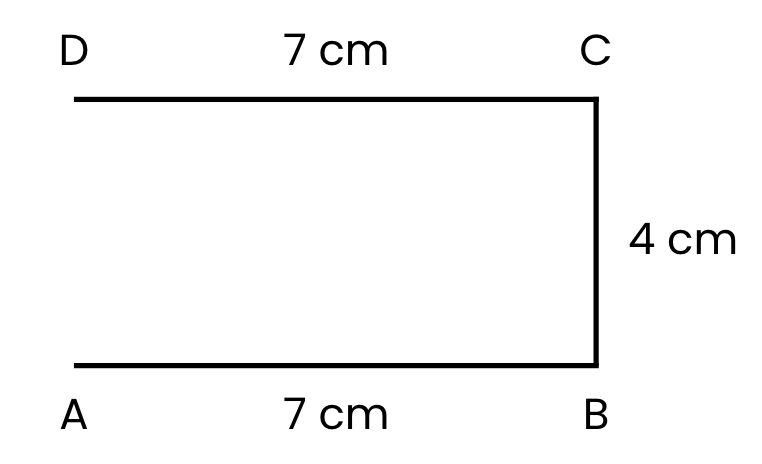
Step 3: Draw Side CD (7 cm):
- From point C, draw a horizontal line parallel to side AB.
- Measure 7 cm and mark point D. This is side CD = 7 cm.
Step 4: Draw Side DA (4 cm):
- Finally, connect point D back to point A with a vertical line.
- Measure 4 cm to ensure it’s the same length as side BC. This is side DA = 4 cm.
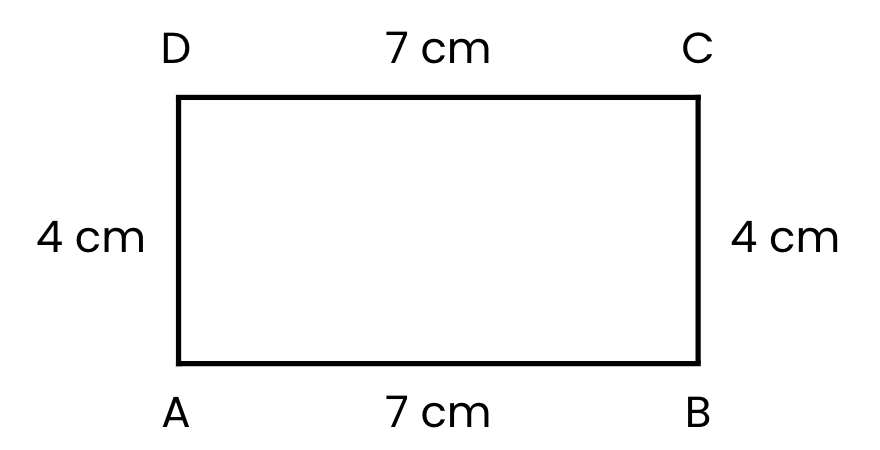
Step 5: Label the Rectangle:
- Write the letters A, B, C, and D at each corner.
- You’ve now drawn a rectangle ABCD with AB = 7 cm and BC = 4 cm!
Activity:
Let’s learn about points X and Y in a rectangle and how to measure the distance between them!
Step 1: Points X and Y
- Imagine your rectangle ABCDis like a playground.
- Side AD is one boundary, and side BC is the opposite boundary.
- Point X is like a little ant that can crawl along side AD (from A to D).
- Point Y is another ant that can crawl along side BC (from B to C).
- Where can X and Y be?
- Point X can be at A, at D, or anywhere in between on side AD.
- Point Y can be at B, at C, or anywhere in between on side BC.
Step 2: Measuring distance XY
- Now, let’s measure the distance between X and Y.
- Use a ruler to draw a straight line connecting X and Y. This line is called XY.
- Measure the length of XY using your ruler.
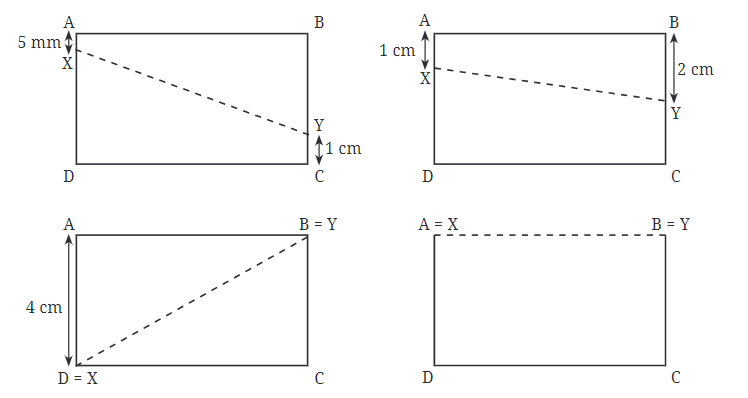
- What happens when you move X and Y?
- If X is at A and Y is at B, the distance XY will be the same as the height of the rectangle (4 cm).
- If X is at D and Y is at C, the distance XY will also be 4 cm.
- If X and Y are somewhere in the middle of AD and BC, the distance XY will still be 4 cm.
Key Observation: The Shortest Distance
- No matter where X and Y are on sides AD and BC, the shortest distance between them will always be 4 cm.
- This is because the shortest path between X and Y is a straight line parallel to sides AB and DC.
Exploring Diagonals of Rectangles and Squares
Diagonals are special lines that connect opposite corners of a shape. In this section, we’ll discover how to draw and measure diagonals in squares and rectangles and understand their unique properties.
Angles and Diagonals
When you draw a diagonal, it splits the corner angles into two smaller angles. For example, if we have a rectangle with corners P and R, the diagonal divides:
- Angle P into two angles
- Angle R into two angles
Do you think c = d and g = h? Try measuring them and check.
What About Squares?
A square is a special rectangle where all four sides are equal. In a square:
- The diagonals are still equal
- The diagonals cut each other exactly in half
- They also make right angles (90°) at the center
Fun Observations
- No matter how big or small the rectangle is, the diagonals are always equal.
- In a square, the diagonals have even more interesting properties.
Challenge for You
Can you draw a rectangle and predict how the angles will be divided before measuring? Let’s see if you’re a diagonal detective.
Understanding with Examples
Example 1: Constructing a Rectangle with Specific Angles
Let’s say we want to build a rectangle where one of the corners is split into angles of 60° and 30°.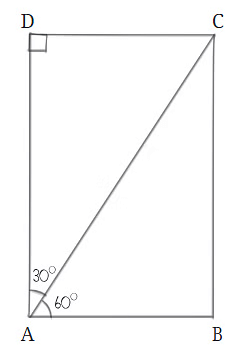
Step 1: We can start by drawing a base line, which we’ll call AB. This line can be any length we choose.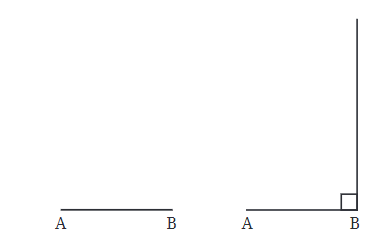
Step 2: Next, we need to find point C. To do this, we draw a line from point B that goes straight up, making a right angle with AB. This helps us find point C, which has to be somewhere on this line.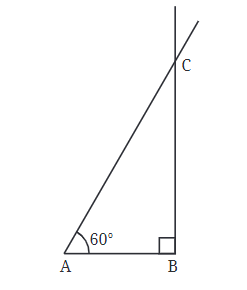
Step 3: Now, we need to create the angles at point A. We know one angle has to be 60°, so we can draw that angle. The other angle will be whatever is left to make a total of 90° because all corners in a rectangle are right angles.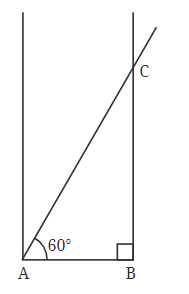
Step 4: Once we have point D, we can finish the rectangle by connecting the dots. We can either draw perpendicular lines from points D and B to find the last corner, or we can use the fact that opposite sides of a rectangle are equal to find the missing point.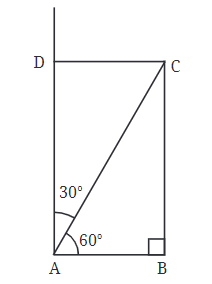
Step 5: Finally, we check to make sure our rectangle looks right. We can adjust if needed, but this is the basic idea of how to construct a rectangle with specific angles!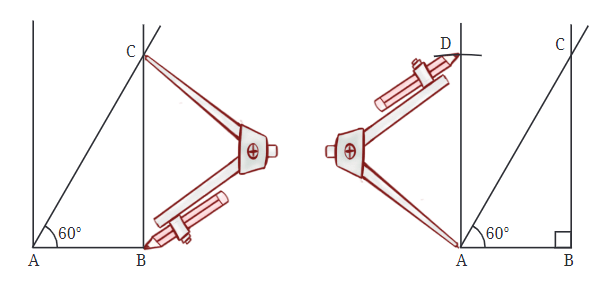
Example 2: Constructing a Rectangle with Given Side and Diagonal
Sometimes, we need to create a rectangle when we know the length of one side and the diagonal. Let’s say one side is 5 cm long and the diagonal is 7 cm long.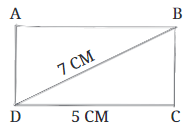
Step 1: We start by drawing the base of the rectangle, called CD, which is 5 cm long.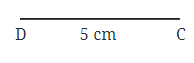
Step 2: Next, we need to draw a line straight up from point C. This line will help us find point B, which needs to be somewhere on this line.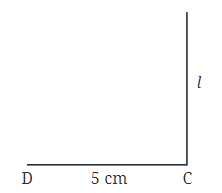
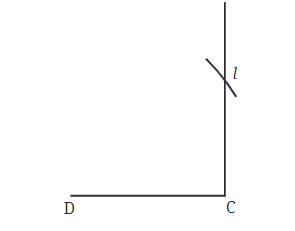
Step 3: Now, we need to find point B. We know that B has to be 7 cm away from point D. Instead of guessing where B is, we can draw a circle with a radius of 7 cm around point D. The point where this circle intersects the line going up from point C will be point B.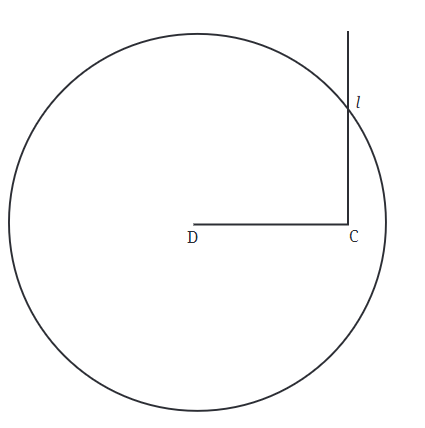
Step 4: Once we have points C, D, and B, we can complete the rectangle by finding the last corner, point A. We do this by drawing lines from points D and B that go straight out to meet each other.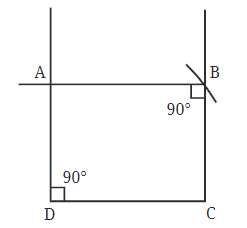
In this example, the perpendicular bisector would be the line that runs right down the middle between points B and C, showing all the points that are the same distance from both.
Points Equidistant from Two Given Points
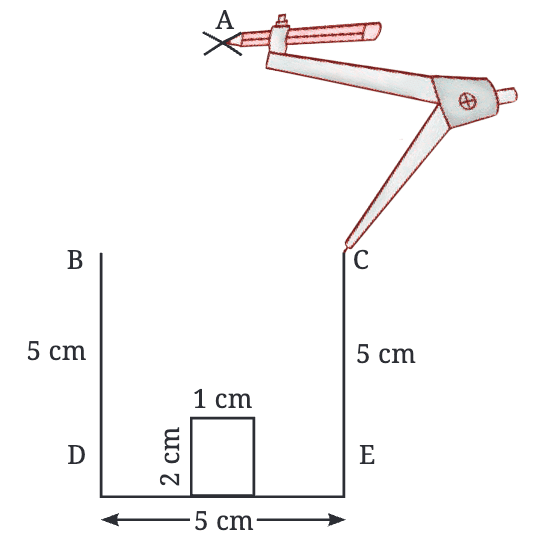
We are going to learn how to construct a house shape step by step using an interesting idea—finding points that are the same distance (equidistant) from two given points.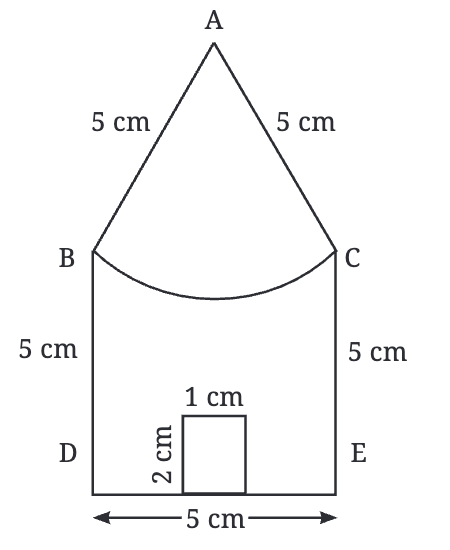
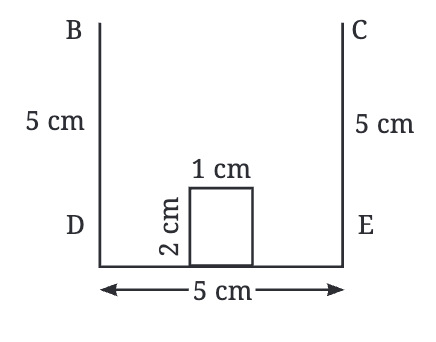
- First, we draw a rectangle with a width of 5 cm and a height of 5 cm.
- Inside this rectangle, we also draw a small door of 1 cm width and 2 cm height.
So now, we have the walls and the door of our house ready. But we still need the roof!
 Step 2: Finding the Peak of the Roof (Point A)
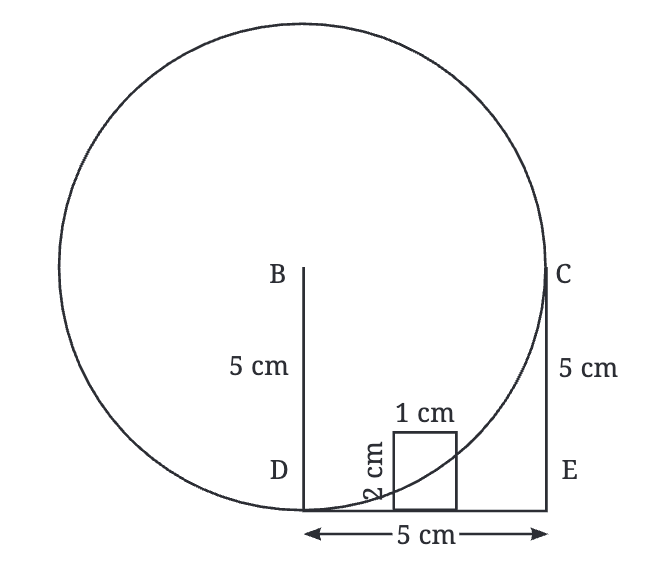
- The top of the roof (point A) should be 5 cm away from both points B and C (the top corners of the rectangle).
- To find this point accurately, we can use a compass instead of guessing with a ruler.
- First, place the compass at point B and draw a circle with a radius of 5 cm.
- This means every point on this circle is exactly 5 cm away from B.
But we need a point that is also 5 cm away from C.
- Now, place the compass at point C and draw another circle of radius 5 cm.
- The two circles intersect at two points.
- The point above the rectangle is the peak of our roof (point A)!
- Draw the perpendicular bisector: Connect the two intersection points with a straight line. This line represents all the points that are equidistant from B and C.
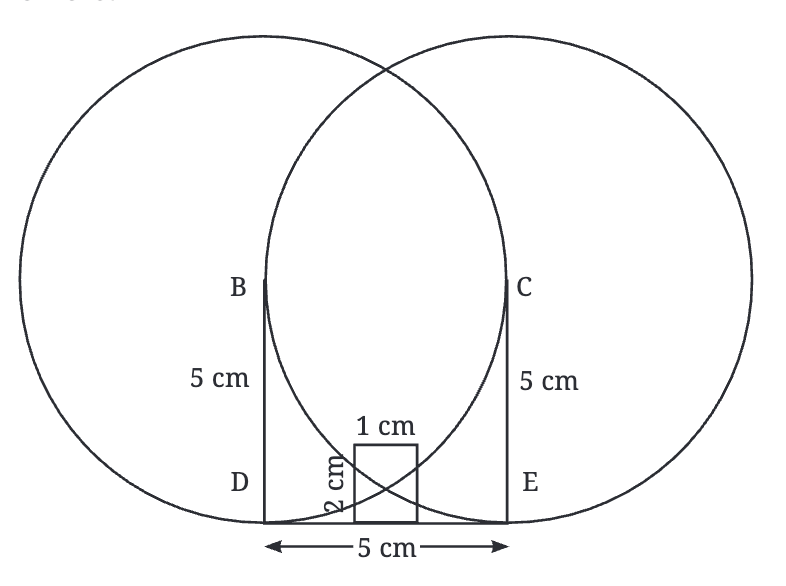
- Alternate method, A point could have been obtained just by drawing arcs of radii 5 cm from points Band C.
- Join A to B and A to C with the help of straight lines.
Take a 5 cm radius in the compass and from A, draw the arc touching B and C as shown in the figure. 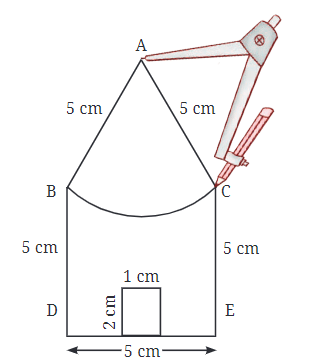
Key Points
- All the points of a circle are at the same distance from its centre. This distance is called the radius of the circle.
- A compass can be used to construct circles and their parts.
- A rough diagram can be useful in planning how to construct a given figure.
- A rectangle can be constructed given the lengths of its sides or that of one of its sides and a diagonal.
|
48 videos|334 docs|23 tests
|
FAQs on Playing with Constructions Chapter Notes - Mathematics for Class 6
| 1. What are the basic properties of squares and rectangles? |  |
| 2. How can we construct squares and rectangles using a compass and straightedge? | |
| 3. What is the significance of exploring the diagonals of squares and rectangles? | |
| 4. How do you find points equidistant from two given points? | |
| 5. What are some key notes to remember when playing with constructions in geometry? | |


Important questions
,Viva Questions
,study material
,Semester Notes
,Playing with Constructions Chapter Notes | Mathematics for Class 6
,Playing with Constructions Chapter Notes | Mathematics for Class 6
,mock tests for examination
,video lectures
,ppt
,Extra Questions
,Previous Year Questions with Solutions
,practice quizzes
,Exam
,Playing with Constructions Chapter Notes | Mathematics for Class 6
,MCQs
,Objective type Questions
,shortcuts and tricks
,Summary
,past year papers
,Sample Paper
,Free
;


Chapter Notes: Playing with Constructions Free PDF Download
Importance of Chapter Notes: Playing with Constructions
Chapter Notes: Playing with Constructions
Chapter Notes: Playing with Constructions Class 6 Questions
Study Chapter Notes: Playing with Constructions on the App
|
© EduRev
|
Education Revolution
|


|


