Free Body Diagram: Definition, Examples, Solved Problems | Physics for JEE Main & Advanced PDF Download
| Table of contents |

|
| Introduction |

|
| The Purpose of a Free Body Diagram |

|
| How to Create a Free Body Diagram |

|
| Free Body Diagram Examples |

|
| Free Body Diagram Solved Problem Example |

|
Introduction
A Free Body Diagram, often referred to as an FBD, serves as a powerful aid for representing the forces acting upon an object. It allows us to visualize and analyze these forces, leading to a better understanding of the underlying physics involved. The primary goal of a Free Body Diagram is to illustrate the relative magnitude and direction of all forces exerted on an object without the clutter of unnecessary details. By simplifying the representation, we can focus solely on the forces and moments acting upon the body.
Key Features of a Free Body Diagram
A Free Body Diagram is a dynamic representation that evolves as we solve the problem at hand. Let's take a closer look at its essential components:
- Simplified Body: To streamline the diagram, the object of interest is often represented as a simplified shape, such as a box. This simplification allows us to focus on the forces applied to the object, rather than its intricate details.
- Coordinate System: Establishing a coordinate system within the Free Body Diagram is crucial. It provides a reference for determining the positive directions, facilitating the analysis of forces along specific axes.
- Forces: Forces acting upon the body are represented as arrows pointing in the direction they act. The length of the arrow signifies the magnitude of the force, allowing us to compare the relative strengths of different forces.
- Moments: In addition to forces, moments (or torques) may come into play. These rotational forces are represented as curved arrows, indicating the direction and magnitude of the moment exerted on the body.
It's important to note that the number of forces present in a Free Body Diagram depends on the specific problem being solved and the assumptions made. In many cases, forces like air resistance and friction are neglected for simplicity.
Exclusions in a Free Body Diagram
- While Free Body Diagrams provide valuable insights into the forces acting upon an object, they do have certain limitations. Here are a few exclusions to keep in mind:
- Bodies Other Than the Free Body Diagram: A Free Body Diagram solely focuses on the object of interest and excludes any external bodies or objects in the vicinity.
- Constraints: Forces exerted by constraints, such as ropes, walls, or supports, are not typically included in the Free Body Diagram. The diagram aims to represent only the forces directly acting on the object.
- Internal Forces: Forces within the object itself, such as tension in a rope or internal stresses, are not depicted in the Free Body Diagram. It focuses solely on external forces.
- Velocity and Acceleration Vectors: While forces may influence the object's motion, velocity, and acceleration vectors are not part of the Free Body Diagram. It is solely concerned with the forces and moments acting on the object.
The Purpose of a Free Body Diagram
Free Body Diagrams serve multiple purposes in the field of mechanics. They enable engineers and physicists to:
- Visualize and understand the forces and moments applied to a body.
- Calculate the resulting reactions and responses of the object.
- Identify the equilibrium or non-equilibrium state of the object.
- Determine the relationship between forces and motion.
Simplify complex problems by isolating and analyzing individual forces acting on the object. With the aid of Free Body Diagrams, professionals and students alike can gain valuable insights into the physical phenomena they are studying or working with.
How to Create a Free Body Diagram
Creating a Free Body Diagram involves a step-by-step process that helps streamline the analysis and understanding of forces acting upon an object. Let's explore the procedure:
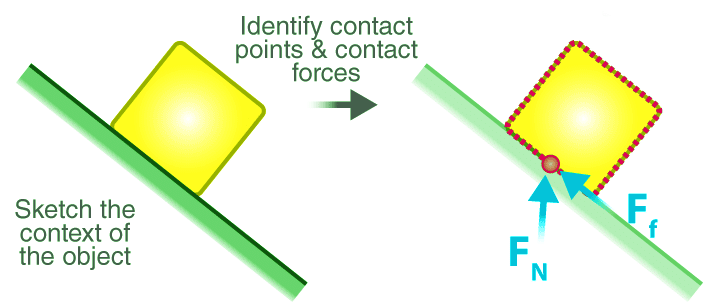
Step 1: Identify the Contact Forces
- To begin, outline the object of interest with dotted lines. Pay attention to any points of contact, and mark them with dots. Each dot signifies a contact force acting on the body. Draw force vectors at these contact points to represent how they push or pull on the object.
Step 2: Represent the Object of Interest
- Next, draw a dot to represent the object you are analyzing. This dot serves as a reference point for visualizing the forces acting on the object.
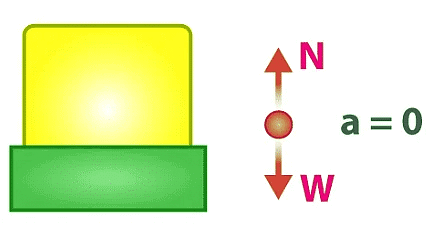
Step 3: Establish a Coordinate System
- Establish a suitable coordinate system within the Free Body Diagram. Clearly label the positive directions along the axes to facilitate the subsequent analysis of forces.
Step 4: Depict Contact Forces
- Draw arrows from the dot to the contact points, representing the contact forces. The length of the arrows should be proportional to the magnitudes of the forces. Label each force accordingly.
Step 5: Incorporate Long-Range Forces
- If applicable, include long-range forces such as weight (gravity), electric charge, or magnetism. Represent these forces as arrows originating from the dot and pointing in the appropriate direction. Label them accordingly.
Step 6: Consider Acceleration (If Present)
- If the system experiences acceleration, draw and label the acceleration vector on the Free Body Diagram. This vector assists in understanding the relationship between forces and motion.
Common Mistakes to Avoid
- While creating a Free Body Diagram, it's essential to be aware of common errors that can lead to inaccurate representations. Here are a few mistakes to avoid:
- Drawing Forces of the Object on Other Objects: A Free Body Diagram should only depict forces acting directly on the object of interest. Avoid mistakenly including forces exerted by the object on other objects in the diagram.
- Incorrect Direction of Forces: Pay close attention to the direction of different forces. Remember these key guidelines:
- Weight always acts downward.
- Friction always acts parallel to the contact surface.
- The normal force is always perpendicular to the contact surface.
- Tension forces only pull and do not push.
- Being mindful of these guidelines will ensure accurate and meaningful Free Body Diagrams.
Free Body Diagram Examples
A Bottle Resting on a Tabletop
- Consider a scenario where a bottle is resting on a tabletop. To create a Free Body Diagram for this situation, we need to identify the forces acting on the bottle. By following the steps outlined earlier, we can visualize and analyze these forces accurately.
Free-Falling Egg from a Tree Nest
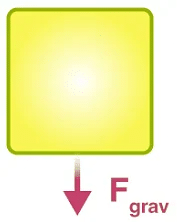
- Imagine an egg falling freely from a nest in a tree, neglecting air resistance. What would the corresponding Free Body Diagram look like? By applying the principles discussed above, we can represent the forces acting on the egg in a clear and concise manner.
Book Moving on a Desk at Constant Velocity
- Suppose a rightward force is applied to a book to move it across a desk at a constant velocity. Neglecting air resistance, we can create a Free Body Diagram to visualize the forces at play in this situation. Following the step-by-step procedure outlined earlier, we can accurately represent the forces involved.

Skydiver Descending at Constant Velocity
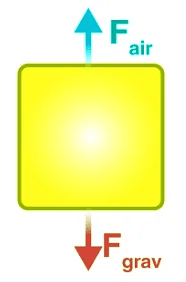
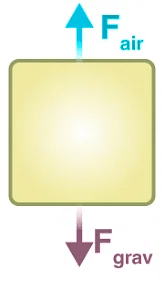
- Consider the scenario of a skydiver descending at a constant velocity, taking air resistance into account. By creating a Free Body Diagram, we can visualize the forces acting on the skydiver and gain insights into the equilibrium state of the system.
Free Body Diagram Solved Problem Example
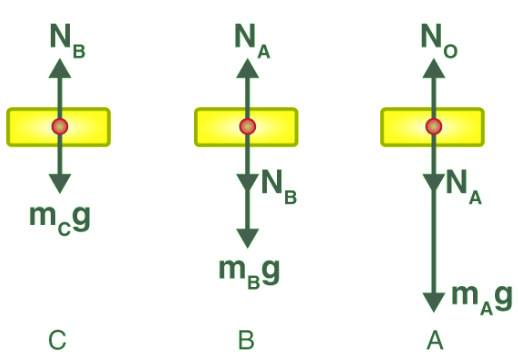
Let's consider an example where we need to draw a free body diagram for three blocks that are stacked on top of each other, as depicted in the figure.

Solution:
The forces acting on the individual elements of the system are shown below:
|
320 videos|1028 docs|210 tests
|


