Class 10 Exam > Class 10 Notes > Art & Craft (Basics) > Craft Ideas: Eggs for Easter
Craft Ideas: Eggs for Easter | Art & Craft (Basics) - Class 10 PDF Download
Material Required
- Eggs
- Pin (You can also use a needle or sharp metal skewer)
- Cocktail stick or wooden skewer
- Bowl
Paint (We've used acrylic paints)
Paintbrush (to apply the paint)
Spounge (to apply the paint)
Directions to be followed
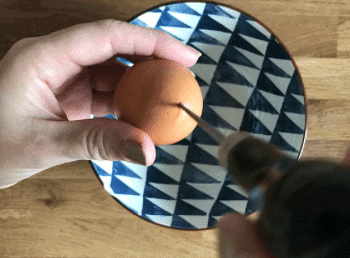
- Take a pin or needle and poke a hole in the top and the bottom of the egg. Start with a pinprick (or we’ve used a thin metal skewer), then gently insert a cocktail stick or skewer into the hole, applying pressure gradually to increase the hole a bit. Be gentle with this bit – if you make it too big you’ll crack the egg, but you need the hole at the bottom of the egg to be big enough for the inside of the egg to pass through. We find a darning needle or thin metal skewer works well for this.

- Holding the egg over a bowl, blow into one of the holes as hard as you can. You’ll start to see the egg contents come out the other end. You won’t be needing the inside of the egg so now’s a good point to set this aside and use it to use for cooking or baking.
- Once all of the egg’s insides are emptied into the bowl, rinse the egg under a tap to wash any excess egg yolk or white away, then leave it to dry.
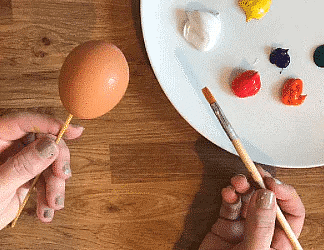
- Now your egg is ready to paint! Insert a cocktail stick or skewer into the bottom hole in the egg to hold it while you paint. We like poster paints or acrylic paints for best results. You do need quite a dense paint as some cheaper watercolour paints won’t give you a strong enough colour when painted on to egg shell. There are loads of other ways to decorate your eggs without painting too, including dying, and we’ve included lots of them in our guide to 40 Easter Egg Decorating Ideas.

- You can apply your paint with a paintbrush or sponge. For a really bright finish, it’s sometimes worth letting the paint dry and applying a second coat. Leave it to dry by popping the skewer into a glass. Acrylic paints dry quite quickly so you should be ready to apply a second coat, or add spots or stripes for decorating, in about 20 minutes.
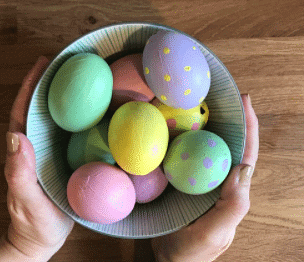
- Keep adding paint until you’re happy with your finished egg!

The document Craft Ideas: Eggs for Easter | Art & Craft (Basics) - Class 10 is a part of the Class 10 Course Art & Craft (Basics).
All you need of Class 10 at this link: Class 10
|
22 videos|15 docs
|
Related Searches


