Class 10 Exam > Class 10 Notes > Art & Craft (Basics) > Craft Ideas: Watercolor Trees
Craft Ideas: Watercolor Trees | Art & Craft (Basics) - Class 10 PDF Download
Material Required
- Watercolor paper (9″ x 12″), at least 90lb (or other thick Sulphite drawing paper)
- Watercolors (pan watercolors are fine)
- Watercolor paintbrush (any round brush will do)
- Water and containers
Directions to be followed
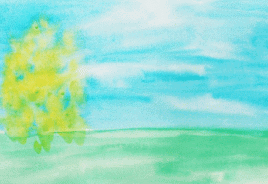
- Wet the watercolor paper on the bottom half of the page (using just plain water).
- Then, add green watercolor paint, a small amount at a time.

- On the top half of the paper, begin adding first water, and then blue watercolor paint. BE PREPARED FOR THE PAINT TO RUN.
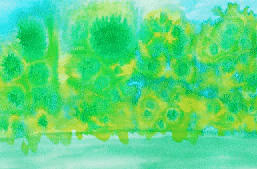
- While the blue paint is STILL WET (this is important!), begin adding dabs of yellow watercolor paint. The yellow paint will blend with the wet blue paint to create shades of green.

- Continue dabbing until you have a row of big, leafy tree shapes.
- Add some darker green dabs of watercolor paint on top of the blended yellow dabs.

- As the paint dries on the paper, the dabs will become more formed and will burst out less.
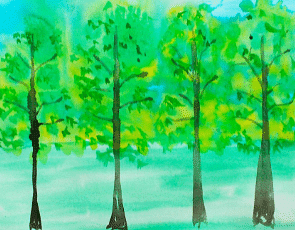
- When you are happy with the shape of the trees, let the paper dry. Then, add some tree trunks and branches using watercolor paint or marker.
- All done!!

The document Craft Ideas: Watercolor Trees | Art & Craft (Basics) - Class 10 is a part of the Class 10 Course Art & Craft (Basics).
All you need of Class 10 at this link: Class 10
|
22 videos|15 docs
|
FAQs on Craft Ideas: Watercolor Trees - Art & Craft (Basics) - Class 10
| 1. How do I create watercolor trees? |  |
Ans. To create watercolor trees, start by sketching the outline of the trees using a pencil. Then, using a brush and watercolor paint, apply light washes of color to represent the foliage of the trees. Gradually build up the layers of paint to create depth and texture. Use different shades of green and brown to add variation to the trees. Finally, add details like branches and leaves using a smaller brush.
| 2. What type of watercolor paper is best for painting trees? |  |
Ans. The best type of watercolor paper for painting trees is one that is heavyweight and has a rough or textured surface. Rough or cold-pressed watercolor paper allows the paint to sit on the surface, creating interesting textures and blending effects. Look for watercolor paper that is specifically labeled as suitable for wet-on-wet techniques, as this will be ideal for painting trees.
| 3. How do I achieve a realistic look when painting watercolor trees? |  |
Ans. To achieve a realistic look when painting watercolor trees, pay attention to the details. Observe real trees and study the way branches and leaves are arranged. Start with a light sketch to plan the composition and layout of the trees. Use a variety of brush strokes to create different textures and shapes. Gradually build up layers of paint, starting with lighter colors and adding darker shades for depth. Don't forget to include small details like individual leaves and branches.
| 4. Can I use masking fluid for painting watercolor trees? |  |
Ans. Yes, you can use masking fluid when painting watercolor trees. Masking fluid is a liquid that can be applied to the paper before painting to preserve areas that you want to remain white or untouched by paint. It can be particularly useful when painting intricate details like branches or thin leaves. Apply the masking fluid with a brush or a fine-tipped applicator and allow it to dry completely before applying the watercolor paint. Once the painting is dry, gently remove the masking fluid with an eraser or your fingertips.
| 5. Are there any specific techniques for painting autumn trees with watercolors? |  |
Ans. Yes, there are specific techniques for painting autumn trees with watercolors. To capture the vibrant colors of autumn foliage, use warm shades of red, orange, and yellow. Start with a light wash of the base color and gradually add layers of darker shades to create depth and dimension. Use wet-on-wet techniques to blend the colors and create soft transitions. You can also add details like fallen leaves or tree trunks with a smaller brush. Experiment with different brush strokes and techniques to create the desired effect of autumn trees.
Related Searches


