Grade 2 Exam > Grade 2 Notes > Drawing (Art & Craft) > Craft Ideas: 3D Paper Pumpkin
Craft Ideas: 3D Paper Pumpkin | Drawing (Art & Craft) - Grade 2 PDF Download
Material Required
- Orange construction paper
- Green pipe cleaner
- Glue stick
- White glue
- Scissors
Directions to be followed
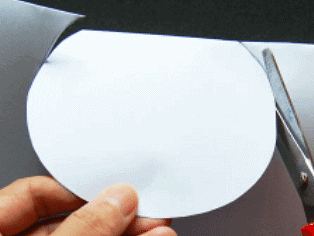
- Print out this pumpkin pattern or make your own by folding any sheet of paper in the middle and drawing an arc along the paper's folded edge.

- While keeping the paper folded, cut out your pumpkin pattern.
*Our printable pumpkin patterns come in 2 sizes—a small and a medium-sized pumpkin. Choose the size that you like and cut out the pattern along its outline. - Trace around the pumpkin pattern on orange construction paper to make a pumpkin shape. Make at least ten pumpkin shapes.
- Cut out all of the pumpkin shapes.
- Fold each pumpkin shape in the middle.
- Without unfolding a pumpkin shape, apply glue on one of its outer faces.

- Glue a second folded pumpkin shape on top of the first one, keeping both pumpkin shapes aligned at the edges.
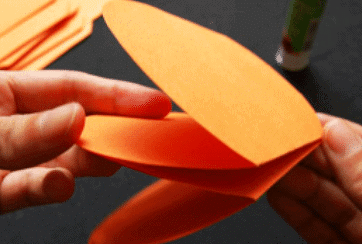
- Press on the pair of pumpkin shapes to glue them together. Right photo shows how the pair would look when opened up.
- Continue gluing the pumpkin shapes one on top of the other, making sure they are aligned along the edges.
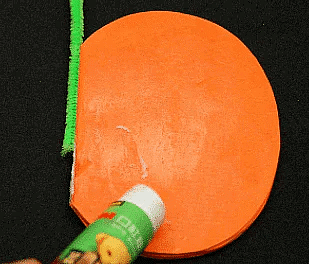
- After you have positioned the last pumpkin shape in place, cut a length of green pipe cleaner to make the pumpkin's stem. Use white glue to attach it along the straight edge of the pumpkin shapes.

- Apply glue on one of the outer faces of the pumpkin shape.
- Bring the two outermost faces together, sandwiching the pipe cleaner in the middle. Press firmly to glue them in place.
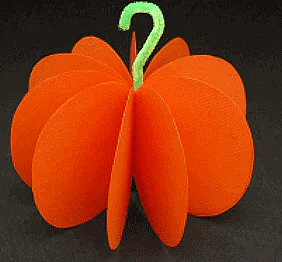
- Carefully open up each of the paper flaps to transform your project into a three-dimensional paper pumpkin. You will discover that once the glue sets, the flaps will be more rigid and your paper pumpkin a lot sturdier.
- Trim the pipe cleaner stem to the desired length. You can bend it into a hooked handle.

- Make these paper pumpkins to decorate your home or classroom for Halloween or autumn. You can put them on tables, hang them or string smaller paper pumpkins together into a Halloween garland.
The document Craft Ideas: 3D Paper Pumpkin | Drawing (Art & Craft) - Grade 2 is a part of the Grade 2 Course Drawing (Art & Craft).
All you need of Grade 2 at this link: Grade 2
|
10 videos|30 docs
|
FAQs on Craft Ideas: 3D Paper Pumpkin - Drawing (Art & Craft) - Grade 2
| 1. How do I make a 3D paper pumpkin? |  |
Ans. To make a 3D paper pumpkin, you will need orange construction paper, scissors, glue, and a template or pattern. Start by cutting out the template pieces from the construction paper. Then, fold and glue the pieces together according to the instructions on the template. Finally, assemble all the parts to create the 3D pumpkin shape.
| 2. Where can I find a template for a 3D paper pumpkin? |  |
Ans. You can find templates for a 3D paper pumpkin online on various crafting websites or platforms. Simply search for "3D paper pumpkin template" on search engines like Google, and you will find a variety of options to choose from. You can then download and print the template to use it for your craft project.
| 3. What are some alternative materials I can use to make a 3D paper pumpkin? |  |
Ans. While construction paper is commonly used for making 3D paper pumpkins, you can also experiment with other materials. Some alternatives include colored cardstock, scrapbook paper, or even recycled materials like old magazines or newspaper. These materials can add different textures and patterns to your pumpkin, making it more unique and creative.
| 4. Can I decorate my 3D paper pumpkin? |  |
Ans. Absolutely! Decorating your 3D paper pumpkin can be a fun and creative part of the crafting process. You can use markers, crayons, or colored pencils to add details and designs to the pumpkin's surface. Additionally, you can glue on small paper or fabric pieces, such as leaves or a stem, to make it look more realistic and personalized.
| 5. Are there any tips for assembling a 3D paper pumpkin? |  |
Ans. Yes, here are a few tips for assembling a 3D paper pumpkin:
- Follow the instructions or template carefully to ensure all the pieces are folded and glued correctly.
- Use a ruler or a bone folder to create sharp and precise folds on the paper for a neater finished product.
- Use a small amount of glue to prevent the paper from becoming too wet and wrinkled.
- Allow the glue to dry completely before moving or handling the 3D paper pumpkin to avoid any accidental damage.
Related Searches


