Grade 2 Exam > Grade 2 Notes > Drawing (Art & Craft) > Craft Ideas: 3D Paper Snowflake
Craft Ideas: 3D Paper Snowflake | Drawing (Art & Craft) - Grade 2 PDF Download
Material Required
- White, blue, or silver paper
- Scissors
- Glue
- Pencil
- Thread or thin string
Directions to be followed
- Prepare 6 squares of equal size using blue, white, or silver plain or patterned paper. Follow this size guide for deciding how big you want your snowflake to be:
- 3" squares = 7.5" snowflake
- 3.5" squares = 9" snowflake
- 4.25" squares = 11" snowflake
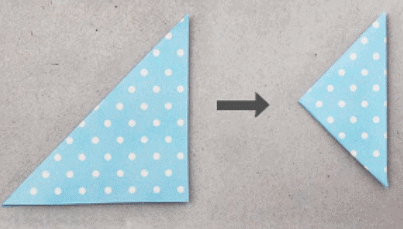
- Take one of the six squares. Fold it diagonally in half to come up with a triangle.

- Fold the resulting triangle in half to come up with a smaller triangle.
- Make 3 equally spaced vertical slits on one short side of the folded triangle. Stop cutting before reaching the opposite short side. It's easy to make the slits equally spaced even without measuring with a ruler by doing the middle slit first.
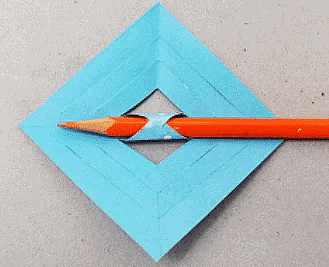
- Carefully unfold the paper. The square will have three pairs of concentric slits.

- Rotate the square so that it forms a diamond shape. Glue the innermost pair of flaps together by the tips. You can use a pencil to bring the pair of flaps together if your square is small. Press the tips for a few seconds to glue the paper in place.
- Flip the square over so that the paper's opposite side is facing you.
- Glue the second pair of flaps together by the tips. Press for a few seconds to glue in place.
- Turn the paper over again. Glue the third pair of flaps by the tips.
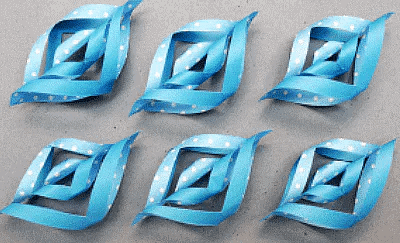
- Turn the paper over for the last time. Glue the outermost pair of flaps by the tips. You have just finished making one of the snowflake's arms.

- Transform each of the five remaining squares into snowflake arms following Steps 2 to 10.
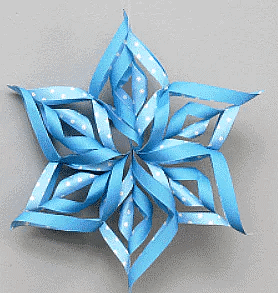
- Start assembling the snowflake by gluing two snowflake arms together. Glue them at the bottom and at the middle where the two arms touch, as indicated by the arrows in the photo. Press on these two points for a few seconds to glue in place.
- Continue adding the rest of the snowflake arms one at a time. Just like the first two, glue them at the bottom and at the middle.
- After you've positioned the last snowflake arm, glue its middle point with that of the first snowflake.

- Attach a length of thread or thin string at the top of one snowflake arm. Hang from the ceiling, on window sills, or on a Christmas tree.
The document Craft Ideas: 3D Paper Snowflake | Drawing (Art & Craft) - Grade 2 is a part of the Grade 2 Course Drawing (Art & Craft).
All you need of Grade 2 at this link: Grade 2
|
10 videos|30 docs
|
FAQs on Craft Ideas: 3D Paper Snowflake - Drawing (Art & Craft) - Grade 2
| 1. How do I make a 3D paper snowflake? |  |
Ans. To make a 3D paper snowflake, follow these steps:
1. Start with six square pieces of paper.
2. Fold each square in half diagonally to form a triangle.
3. Fold the triangle in half again to create a smaller triangle.
4. Cut small shapes along the folded edges of the triangle, being careful not to cut all the way through.
5. Unfold the triangle to reveal a unique snowflake pattern.
6. Repeat the process for the remaining squares.
7. Once all six snowflakes are cut out, glue them together at the center points to create a 3D effect.
| 2. What materials do I need to make a 3D paper snowflake? |  |
Ans. To make a 3D paper snowflake, you will need the following materials:
1. Six square pieces of paper (any color or pattern)
2. Scissors
3. Glue or tape
| 3. Can I use different sizes of paper to make a 3D paper snowflake? |  |
Ans. Yes, you can experiment with different sizes of paper to create various sizes of 3D paper snowflakes. Just make sure that all the squares you use are the same size to maintain symmetry in the final snowflake.
| 4. Are there any alternatives to using paper for making 3D snowflakes? |  |
Ans. Yes, there are alternatives to using paper for making 3D snowflakes. Some other materials you can use include:
1. Plastic sheets or transparency film
2. Foam sheets
3. Felt fabric
4. Tissue paper
5. Cardstock paper
| 5. Can I decorate my 3D paper snowflake after it is assembled? |  |
Ans. Yes, you can decorate your 3D paper snowflake after it is assembled. You can add glitter, sequins, or beads to enhance its appearance. Additionally, you can attach a string or ribbon to hang your snowflake as a decoration.
Related Searches


